Adding Labels in Layout Mode
Labels in Layout Mode allow you to annotate individual elements of the layout, making it easier to navigate and manage your project. Below is a guide on how to add and customize labels effectively.
Adding a Label
-
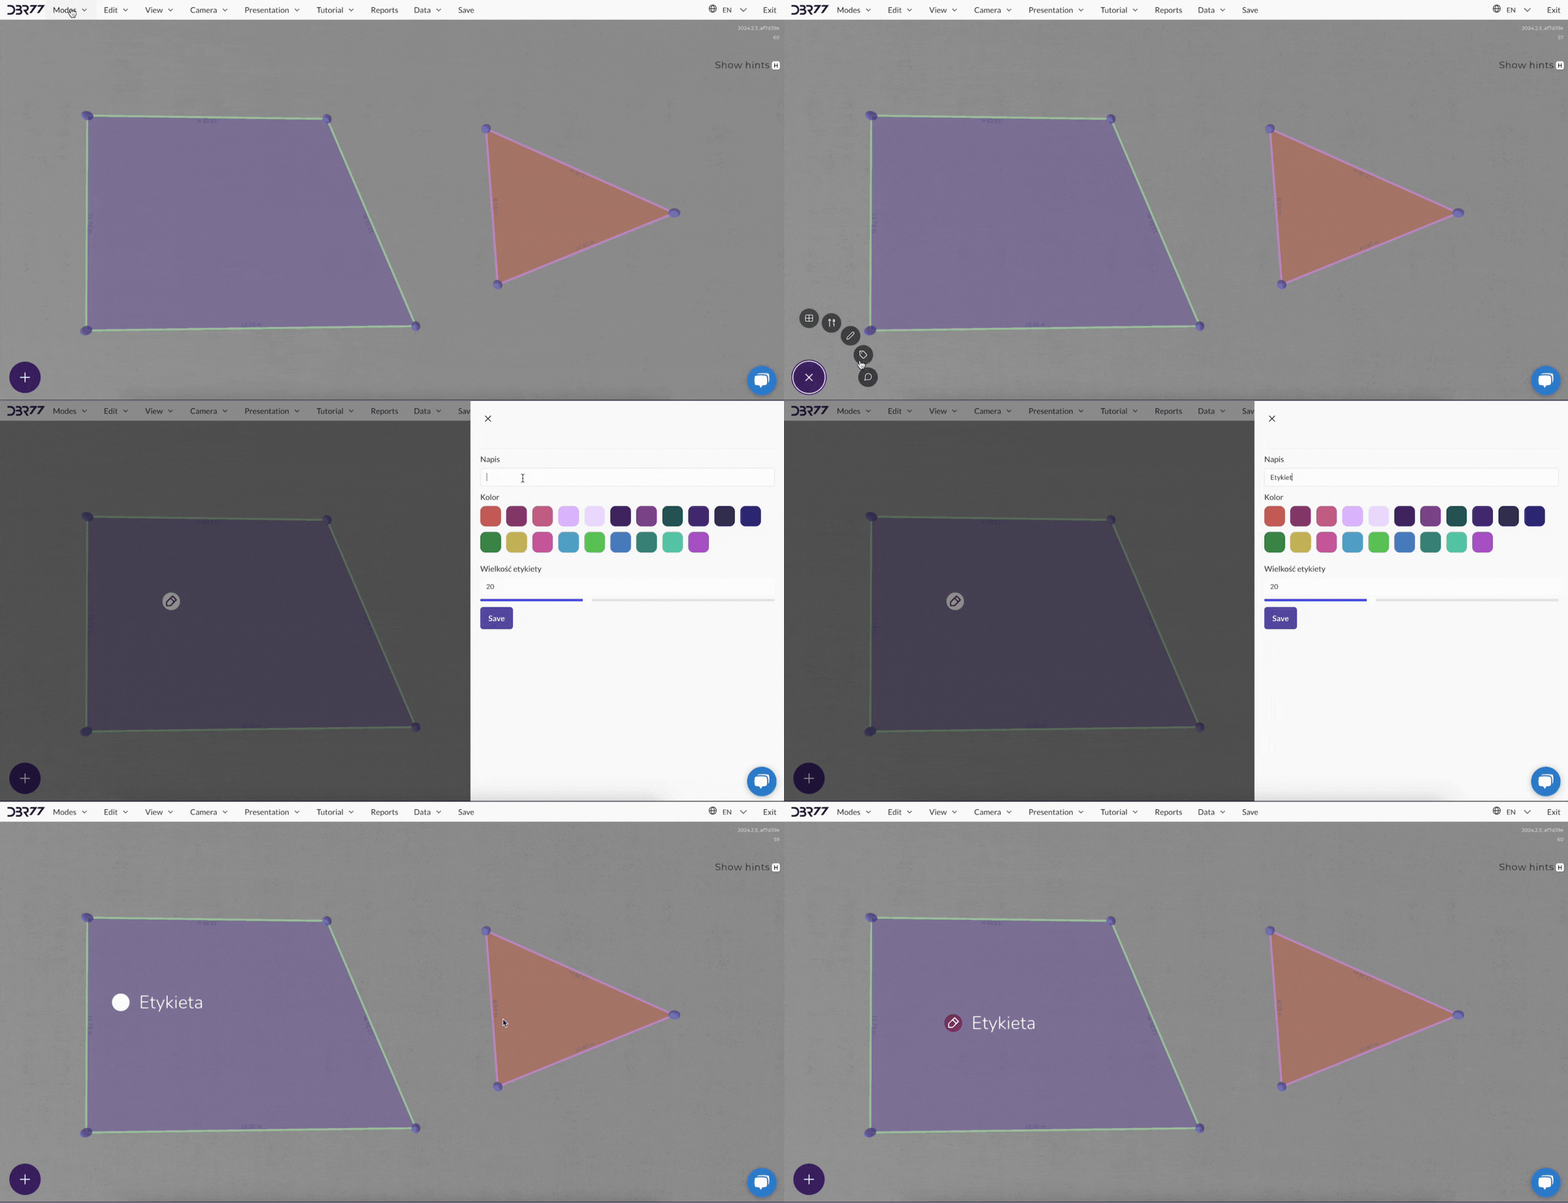
Activate Layout Mode: Ensure that Layout Mode is selected in the main menu.
-
Select the Label Tool:
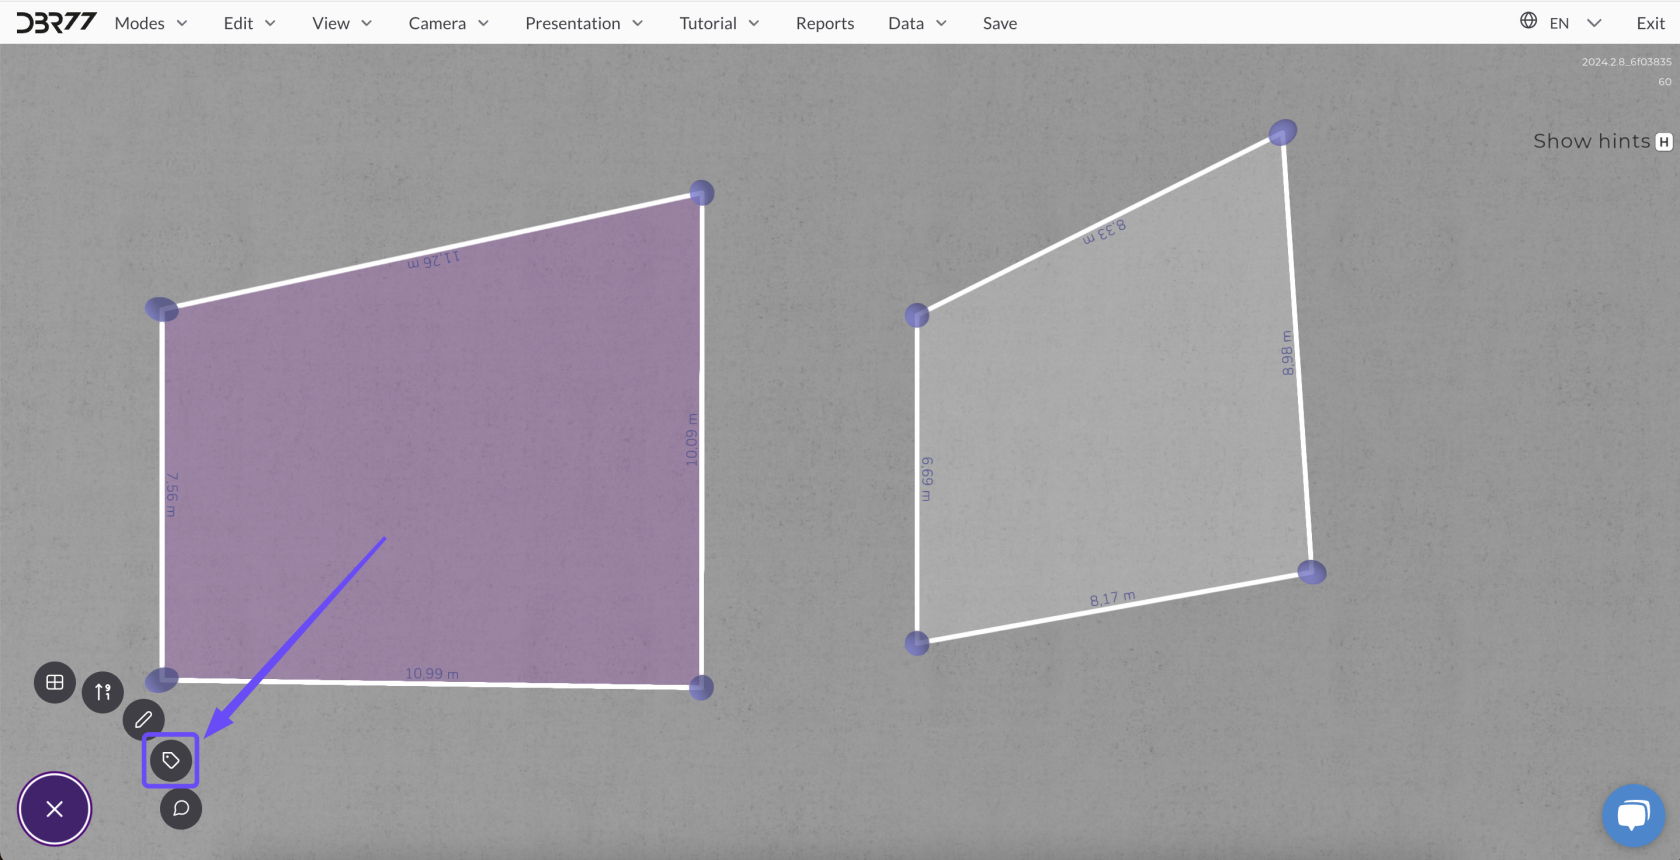
- Click the plus symbol (+) and choose the Label icon.
- Place the Label:
-
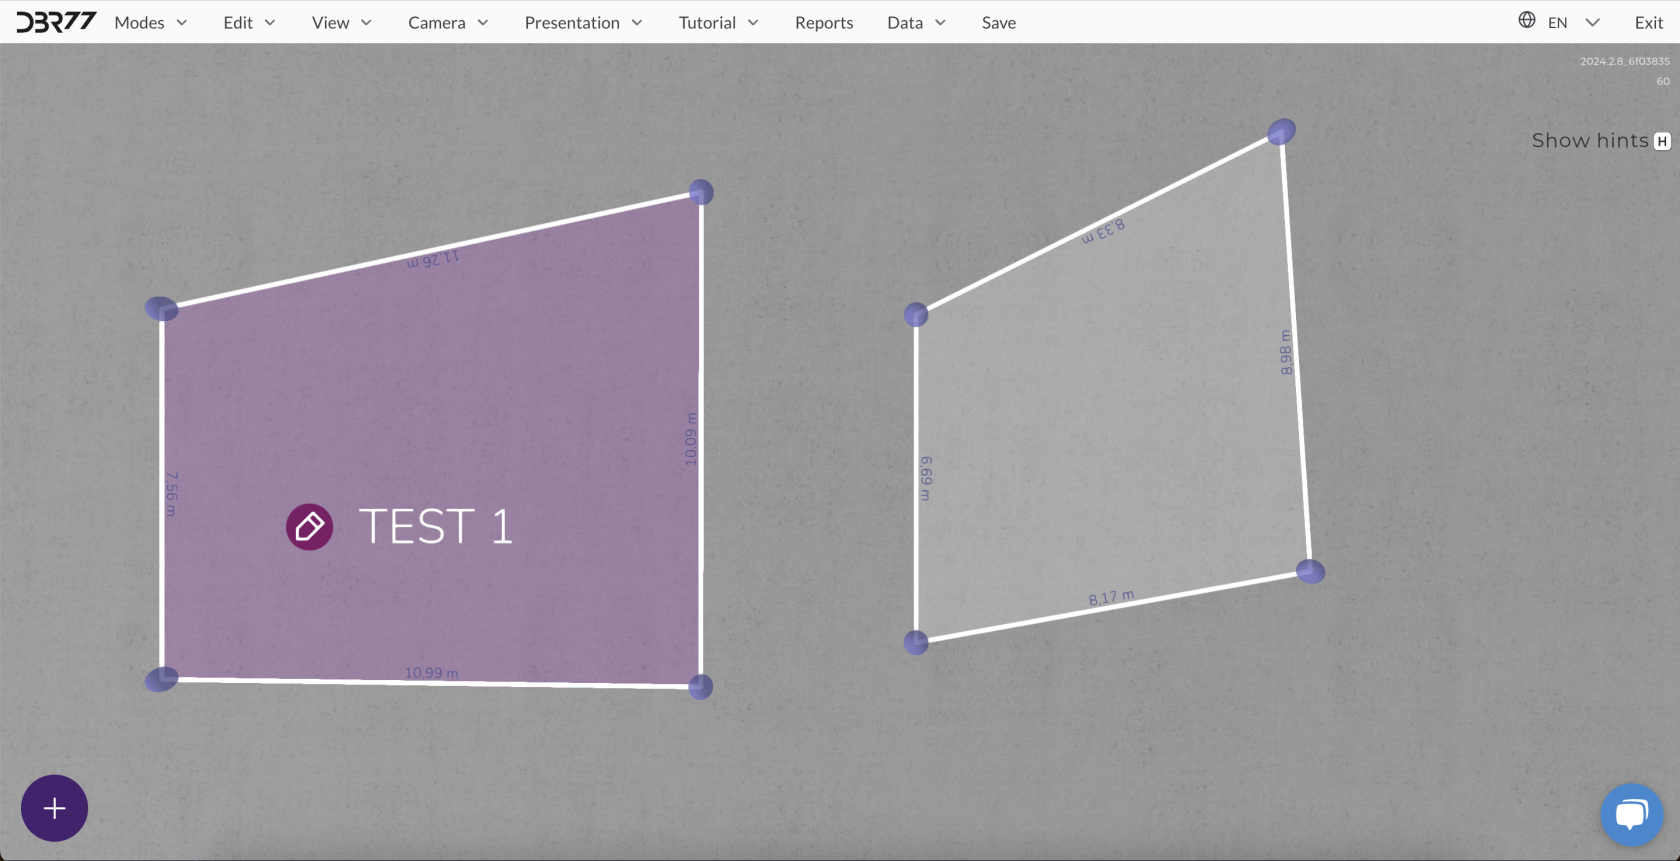
- Click on the desired location in the layout where the label should appear.
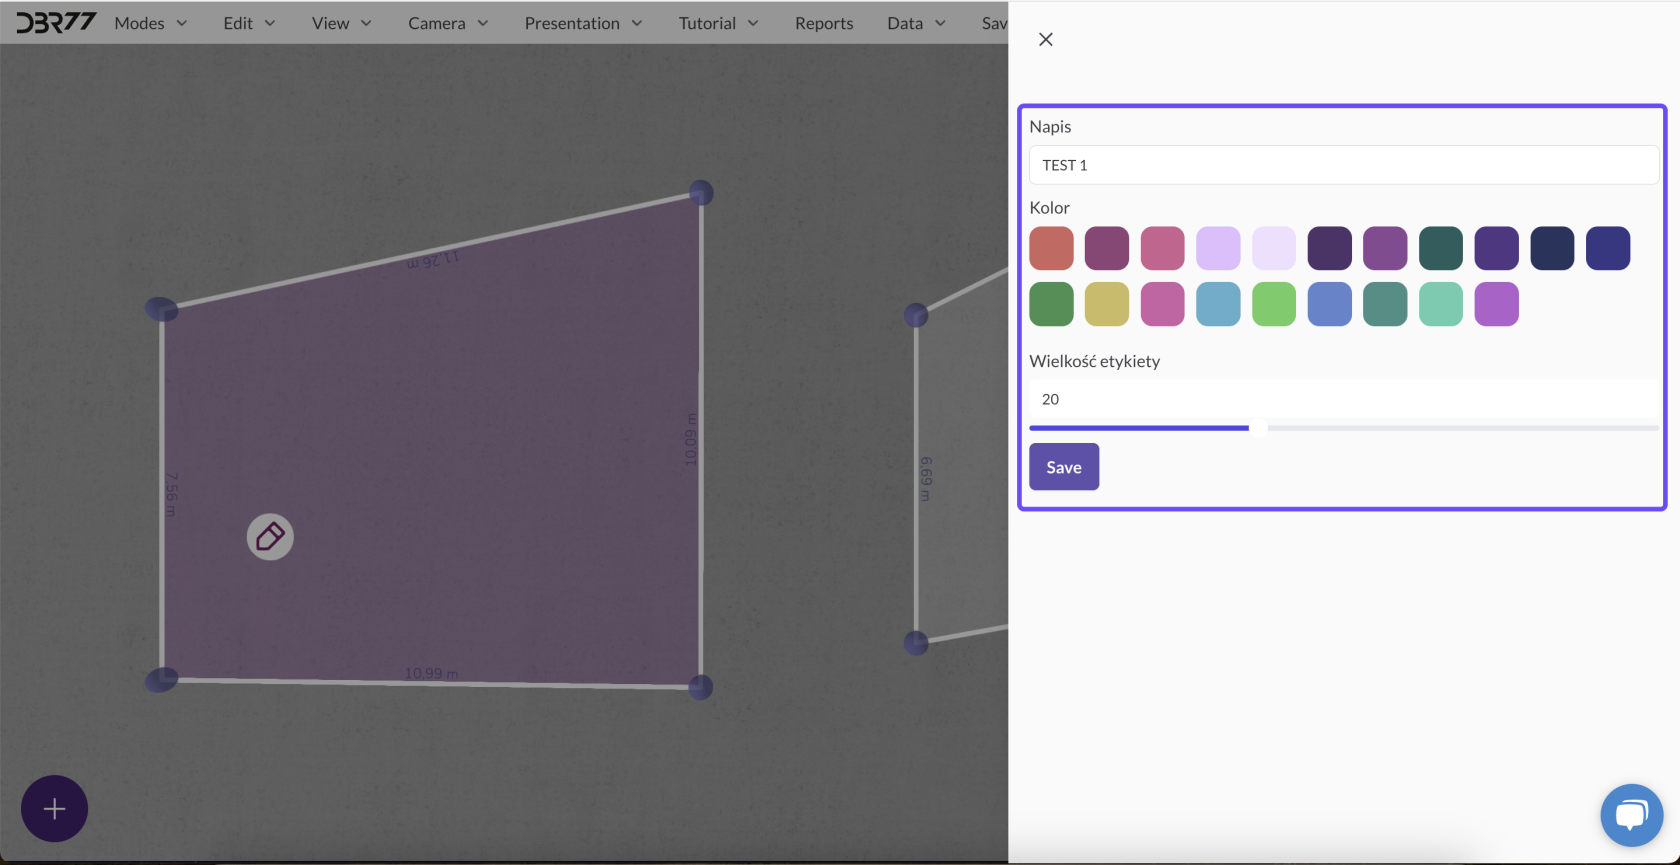
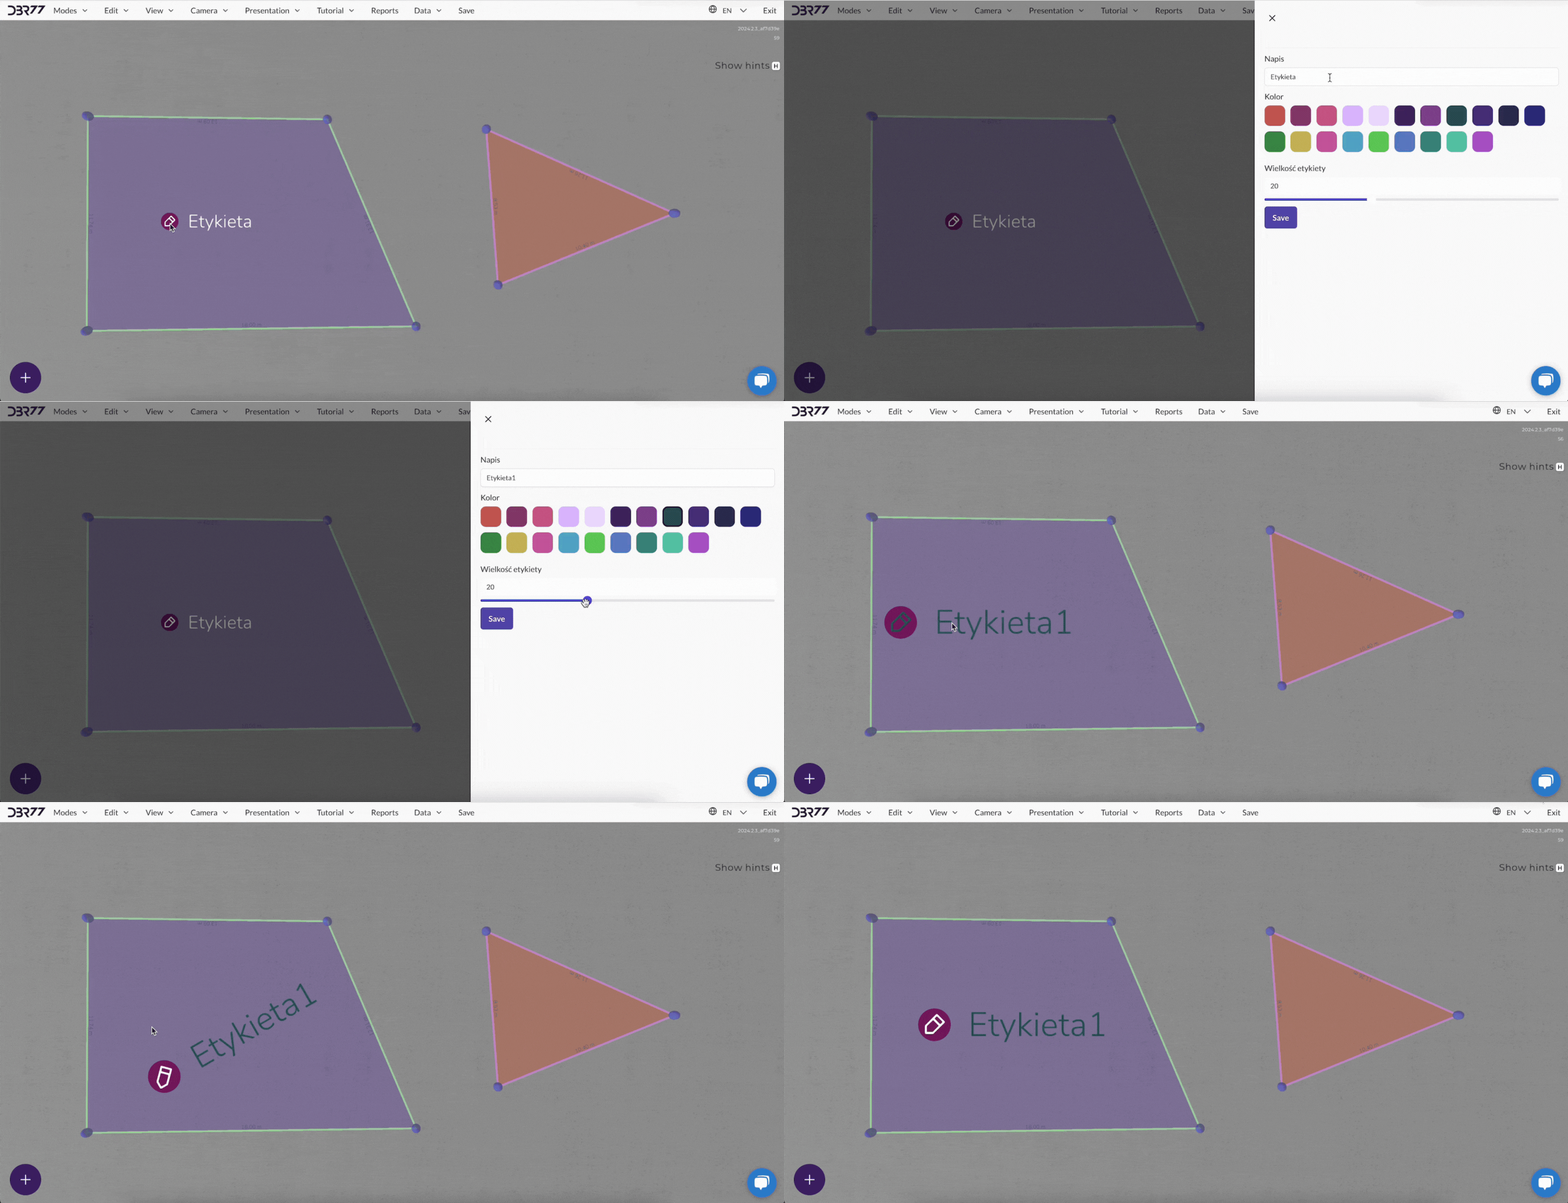
- Enter the text to describe the element.
Customizing Labels
Adjusting Size
- Select the label and resize it to enhance visibility or match the scale of your project.
Changing Color
- Choose a label and adjust its color using the available palette to better fit the layout design.
Rotating Labels
- Rotate the label to align it with other layout elements:
- Click and hold the left mouse button on the label.
- Use the Q and E keys to rotate it.
Summary
Adding labels to your layout is a simple and effective way to mark and describe project elements. With options to customize size, color, and alignment, labels can be tailored to your specific needs, streamlining your workflow and improving clarity.

No Comments