# User
#### Go to the User List.
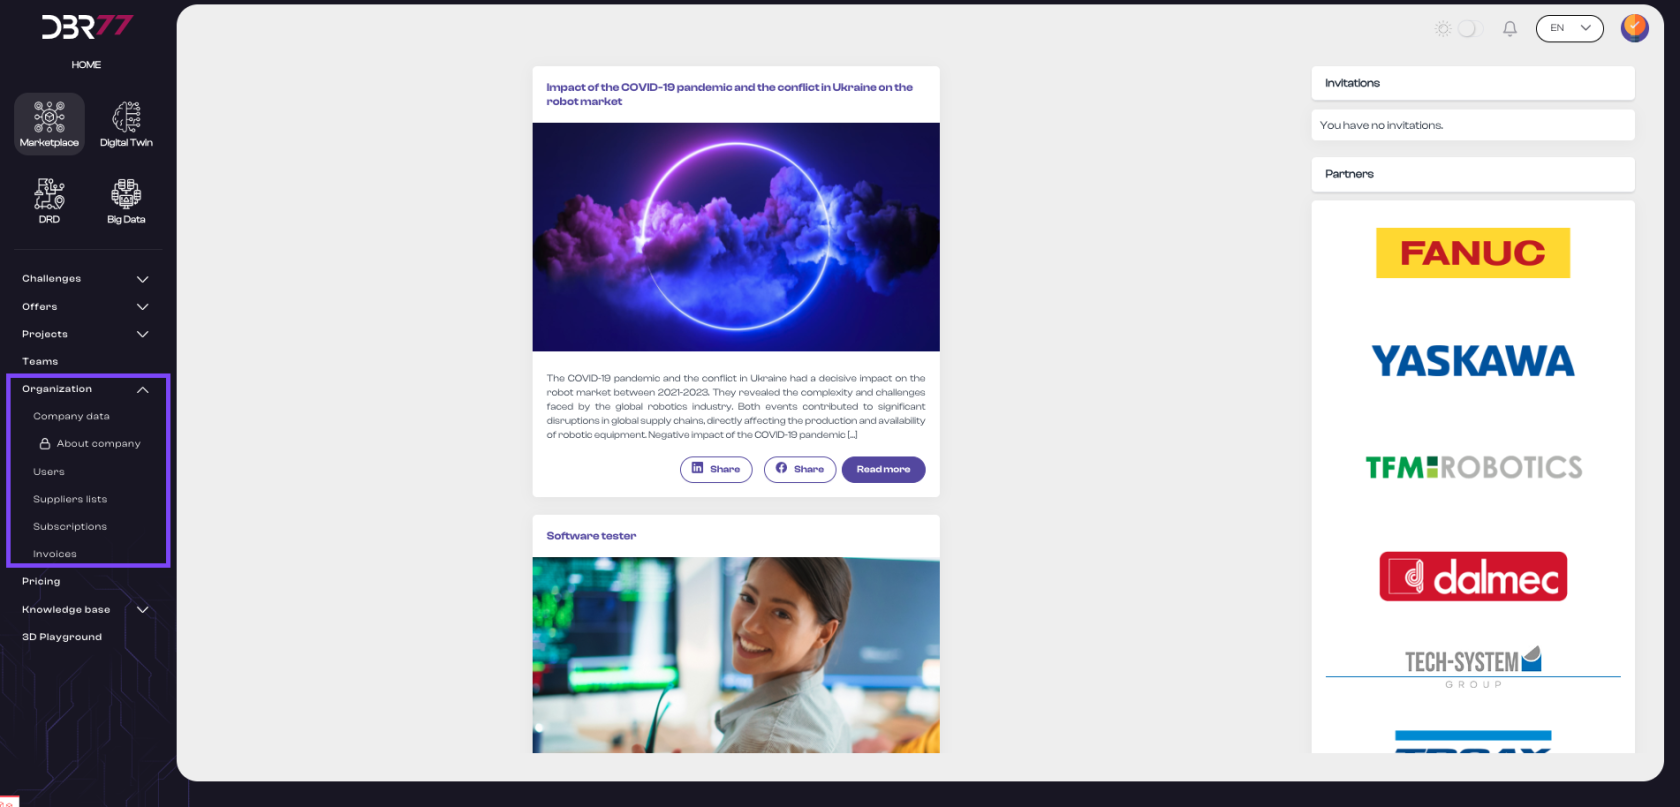
- In the navigation menu, select the "Organization" section and then click on "Users."
[](https://learn.dbr77.com/uploads/images/gallery/2024-07/NfFb8acdnLTqkqO9-zrzut-ekranu-2024-07-1-o-14-58-24.png)
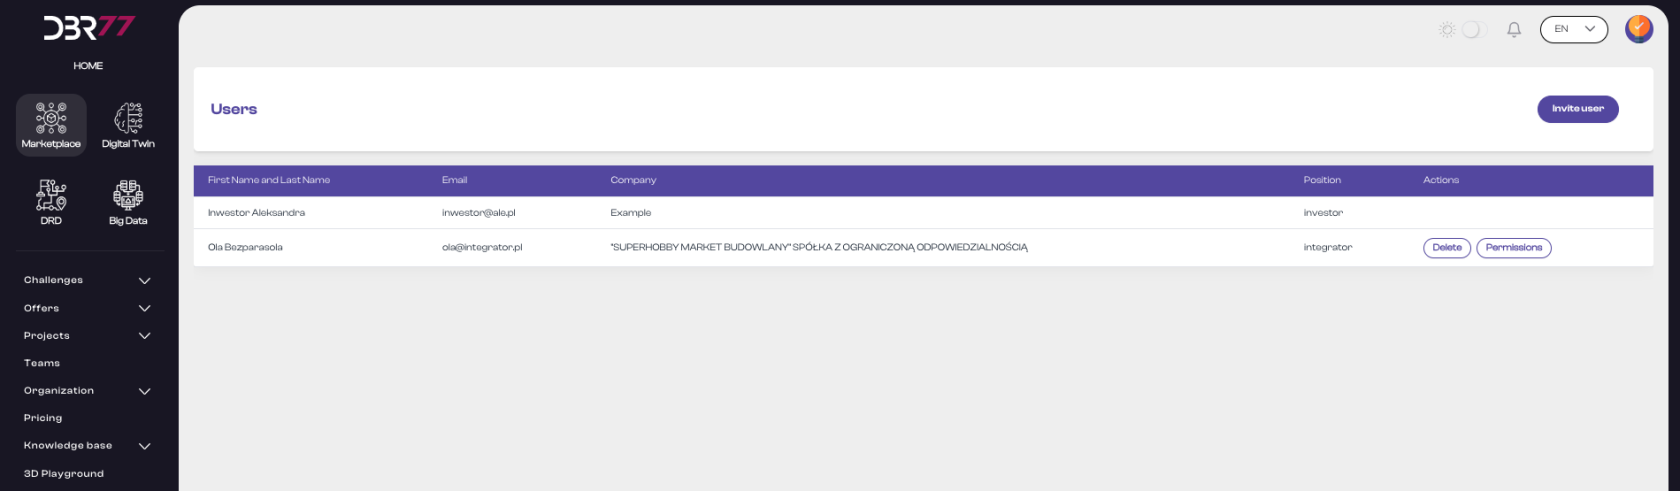
The user list view on the DBR77 platform is a central tool for managing organization members. It allows administrators to efficiently manage user data, control their permissions, and ensure that each organization member has appropriate access to the platform's resources.
[](https://learn.dbr77.com/uploads/images/gallery/2024-06/dSksc2MPwmRbcl7e-zrzut-ekranu-2024-06-28-o-16-50-18.png)
#### Elements of the User List View:
List Header:
- Column "First and Last Name": Displays the full name of each user registered in the organization.
- Column "Email Address": Shows the email address under which the user is registered on the platform.
- Column "Company": Displays the name of the company the user represents.
- Column "Account Type": Indicates the user's account type, such as "Investor," "Integrator," or "Supplier."
- Column "Actions": Allows two types of actions for each individual user:
- Delete: Enables the removal of the user from the organization.
- Permissions: Provides access to the user’s permissions.
[](https://learn.dbr77.com/uploads/images/gallery/2024-06/sHXChl4V2haT1cNr-zrzut-ekranu-2024-06-28-o-17-00-36.png)
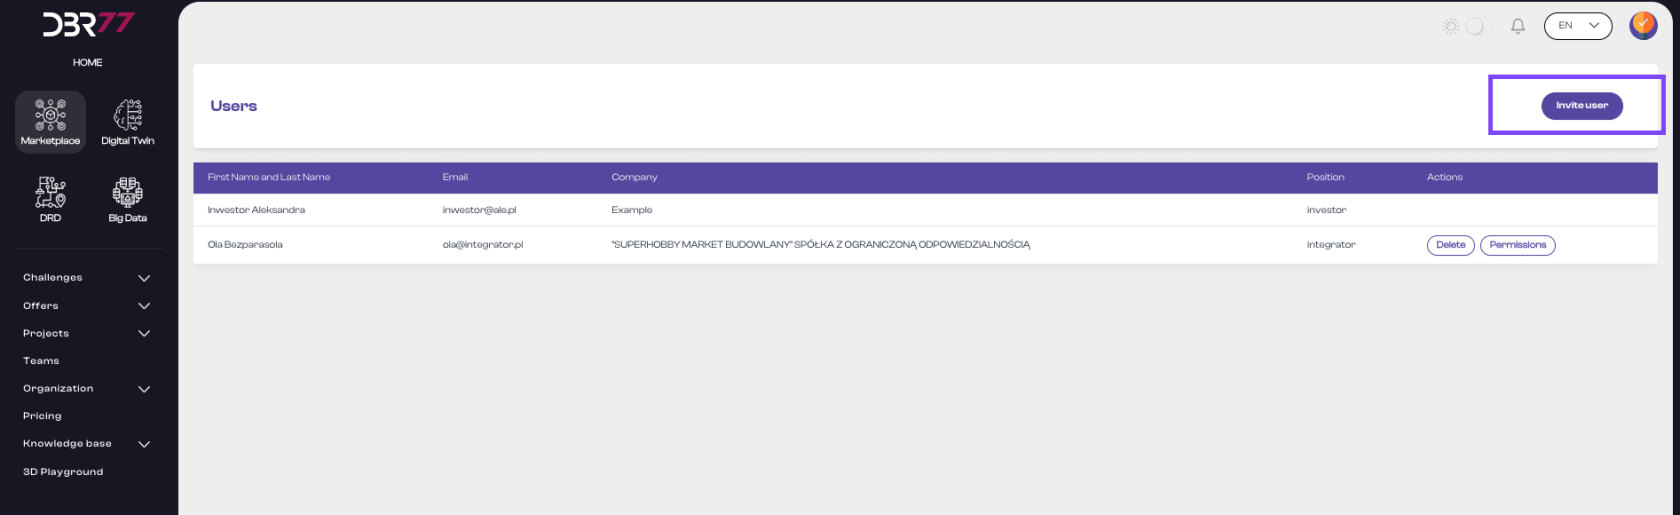
#### User Management Options in the List View:
- Delete Button: Allows removal of a user from the organization.
- Permissions Button: Provides access to the user’s permissions for further adjustment.
#### Adding a New User:
- Click the "Add User" button.
- A form will appear to enter the new user's email address.
[](https://learn.dbr77.com/uploads/images/gallery/2024-06/UGKqvEsV7MPZ9i0J-zrzut-ekranu-2024-06-28-o-17-06-21.png)
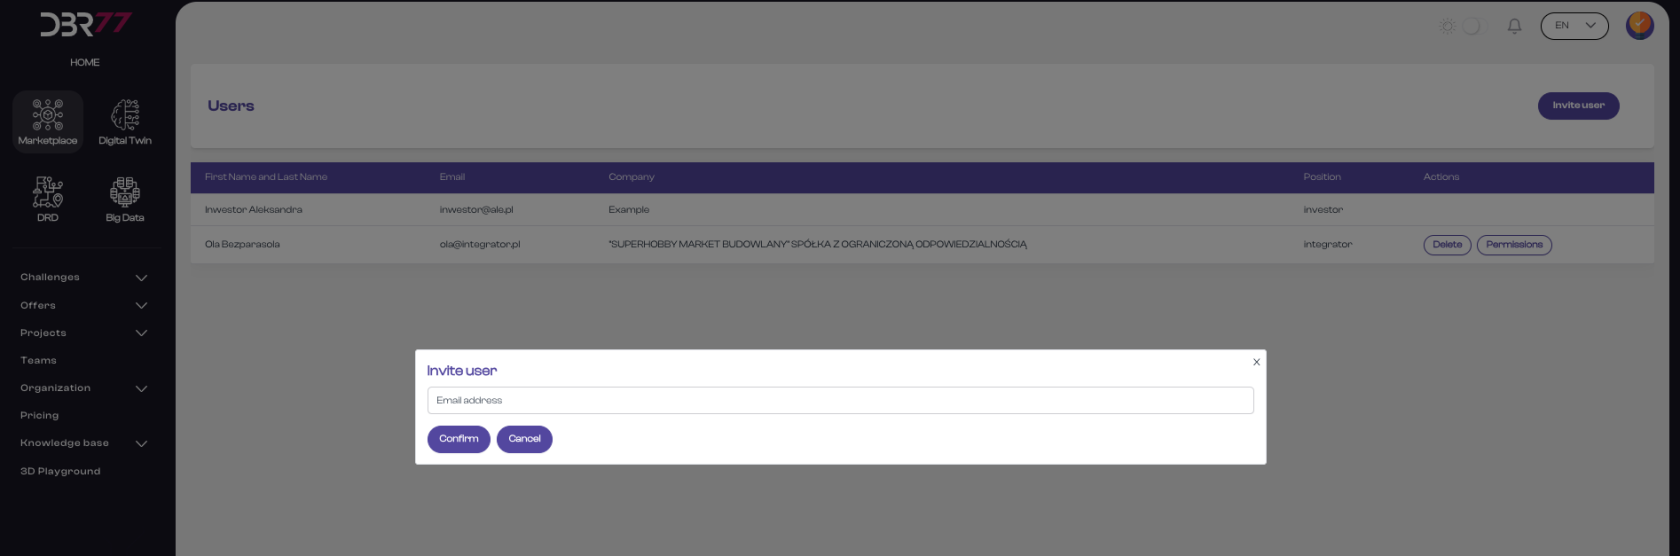
#### Enter Email Address:
- Enter the new user’s email address in the corresponding field.
- Ensure the user is already registered on the DBR77 platform.
#### [](https://learn.dbr77.com/uploads/images/gallery/2024-06/TyS5Y316nKC4jyro-zrzut-ekranu-2024-06-28-o-17-07-36.png)
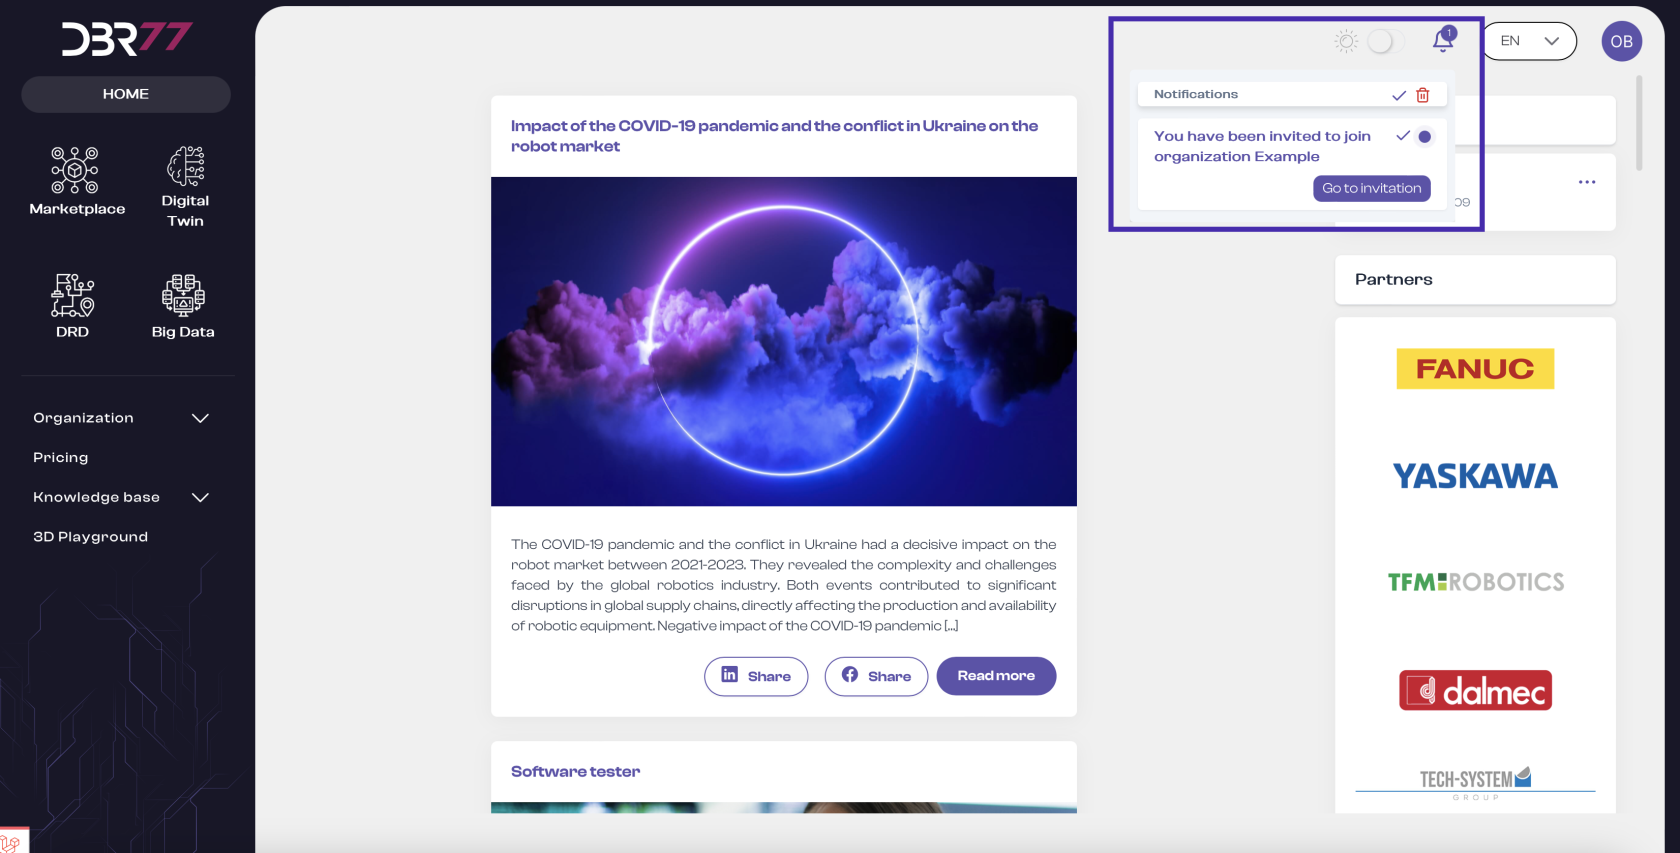
#### Send Invitation:
- Click the "Confirm" button.
- The new user will receive a notification with an invitation to join the organization. This invitation will also be displayed in the top right corner of the dashboard.
[](https://learn.dbr77.com/uploads/images/gallery/2024-07/wiUNqxQLpyoMtz9P-zrzut-ekranu-2024-07-1-o-13-10-09.png)
[](https://learn.dbr77.com/uploads/images/gallery/2024-07/BxcI9tCqIVFzbuKa-zrzut-ekranu-2024-07-1-o-13-11-34.png)
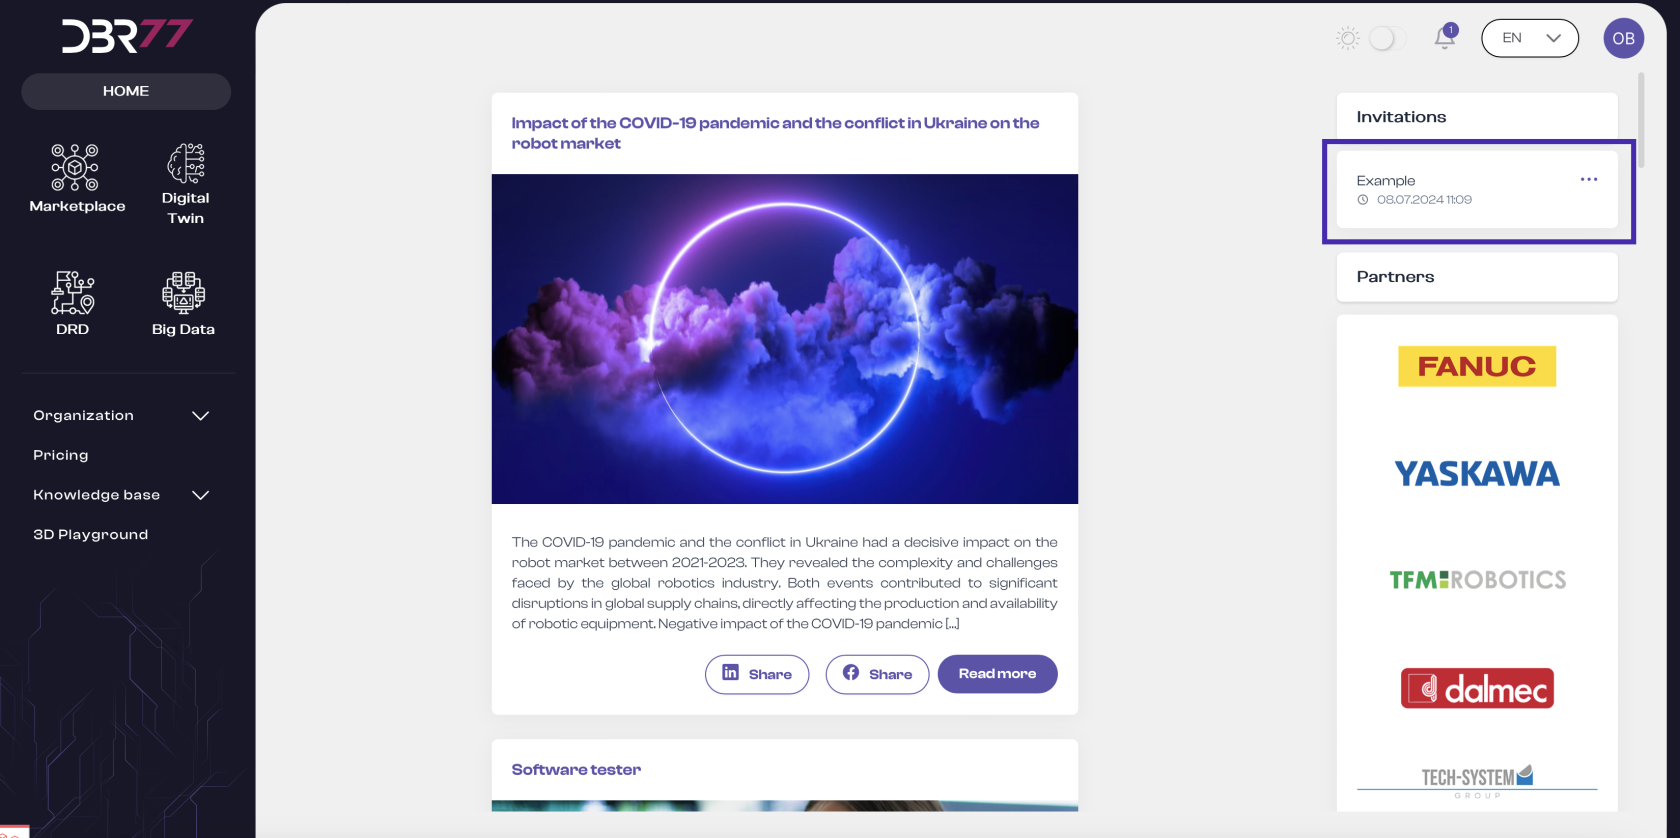
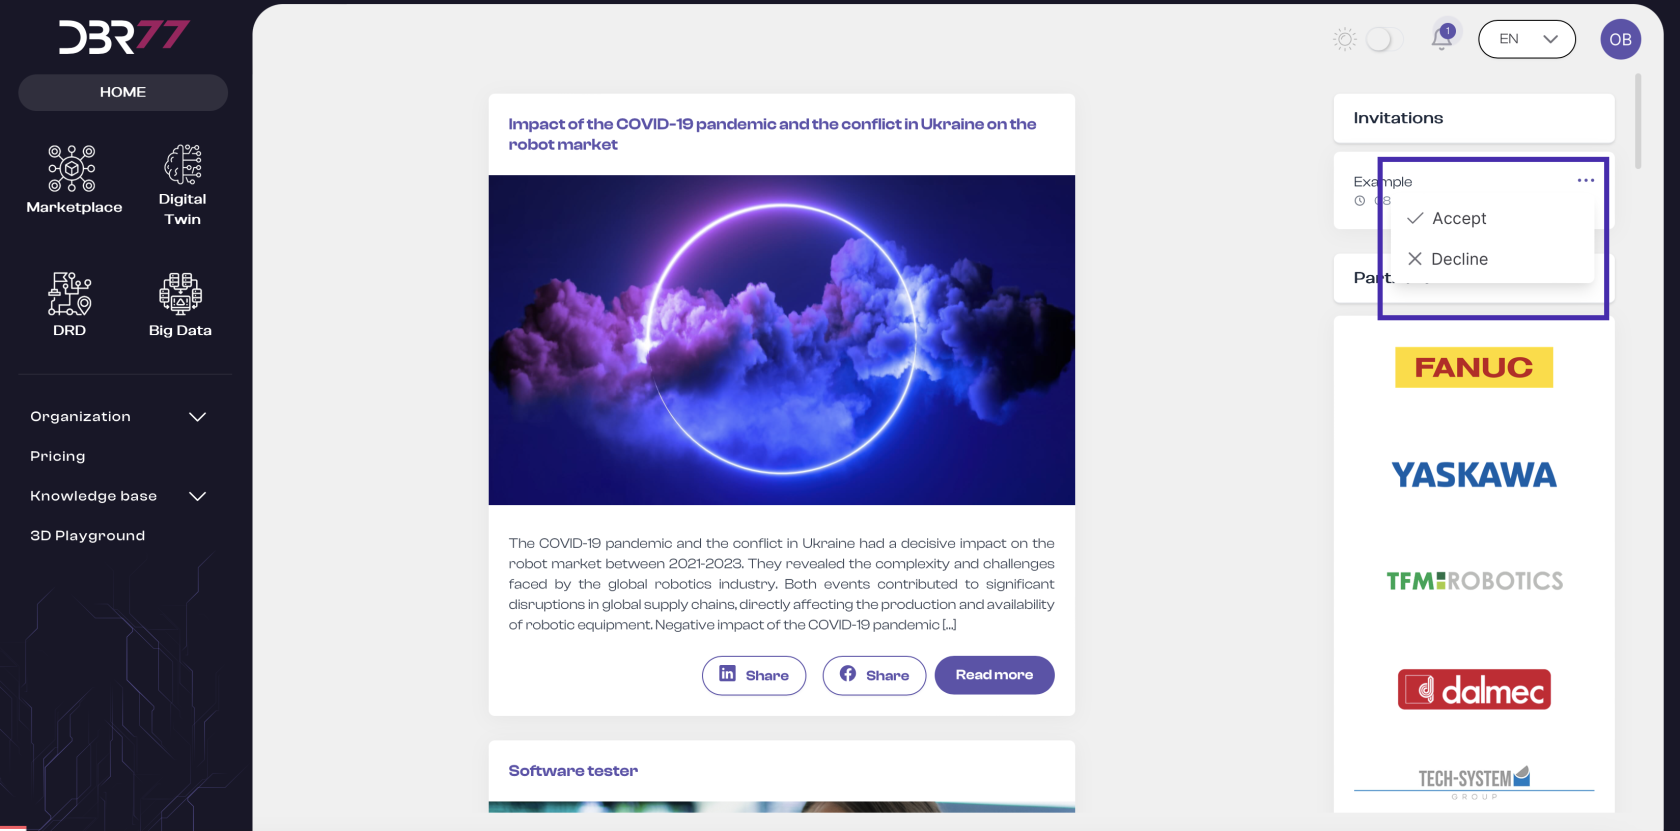
#### Accept Invitation:
- The new user must accept the invitation to the organization within 7 calendar days.
- Once the invitation is accepted, the user will be added to the organization.
[](https://learn.dbr77.com/uploads/images/gallery/2024-07/HGCAe19oyB0ye7lL-zrzut-ekranu-2024-07-1-o-13-16-50.png)
#### Important Information
- Platform Registration: The new user must already be registered on the DBR77 platform to receive and accept an invitation.
Notification: After accepting the invitation, the new user receives confirmation of joining the organization. If there are issues with acceptance, the user should contact the organization administrator.
- This process ensures that adding new users to the organization is secure and effective, maintaining data integrity and authorization for new members on the DBR77 platform.
#### Assigning Permissions
- The permissions assignment view on the DBR77 platform enables administrators to manage access levels for organization members. Below is the process for assigning permissions:
#### User Selection:
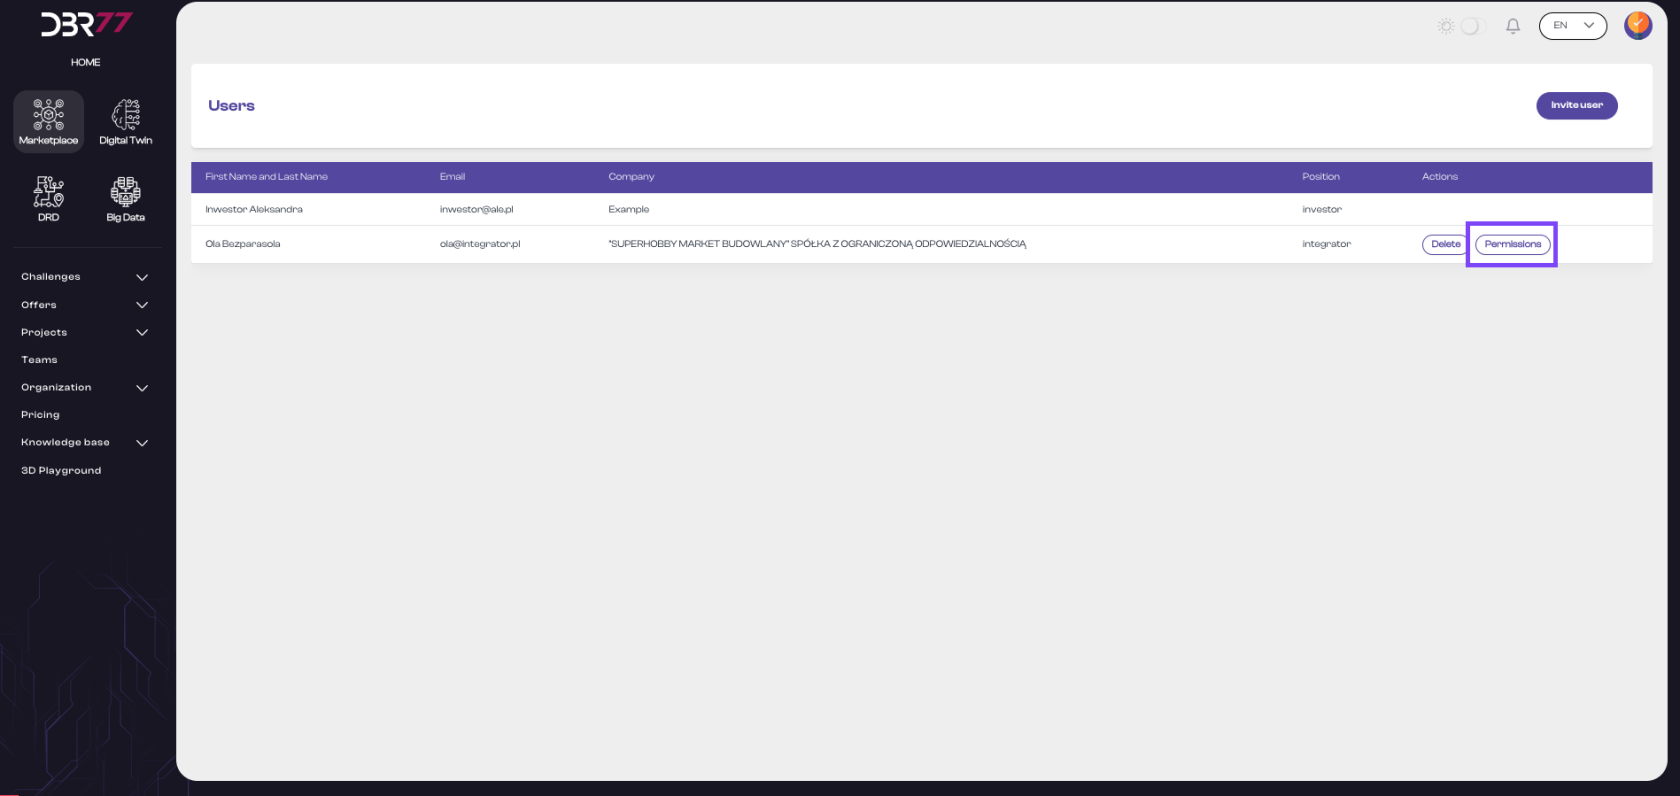
- Locate the user to whom you wish to assign permissions by browsing the user list.
- Click the "Permissions" button next to the selected user.
[](https://learn.dbr77.com/uploads/images/gallery/2024-07/6KUcNjzZ0RDZFNE7-zrzut-ekranu-2024-07-1-o-13-26-36.png)
- A new window will display a list of permissions for the selected user.
#### [](https://learn.dbr77.com/uploads/images/gallery/2024-06/11lwSfsVace4V3wx-zrzut-ekranu-2024-06-28-o-17-08-23.png)
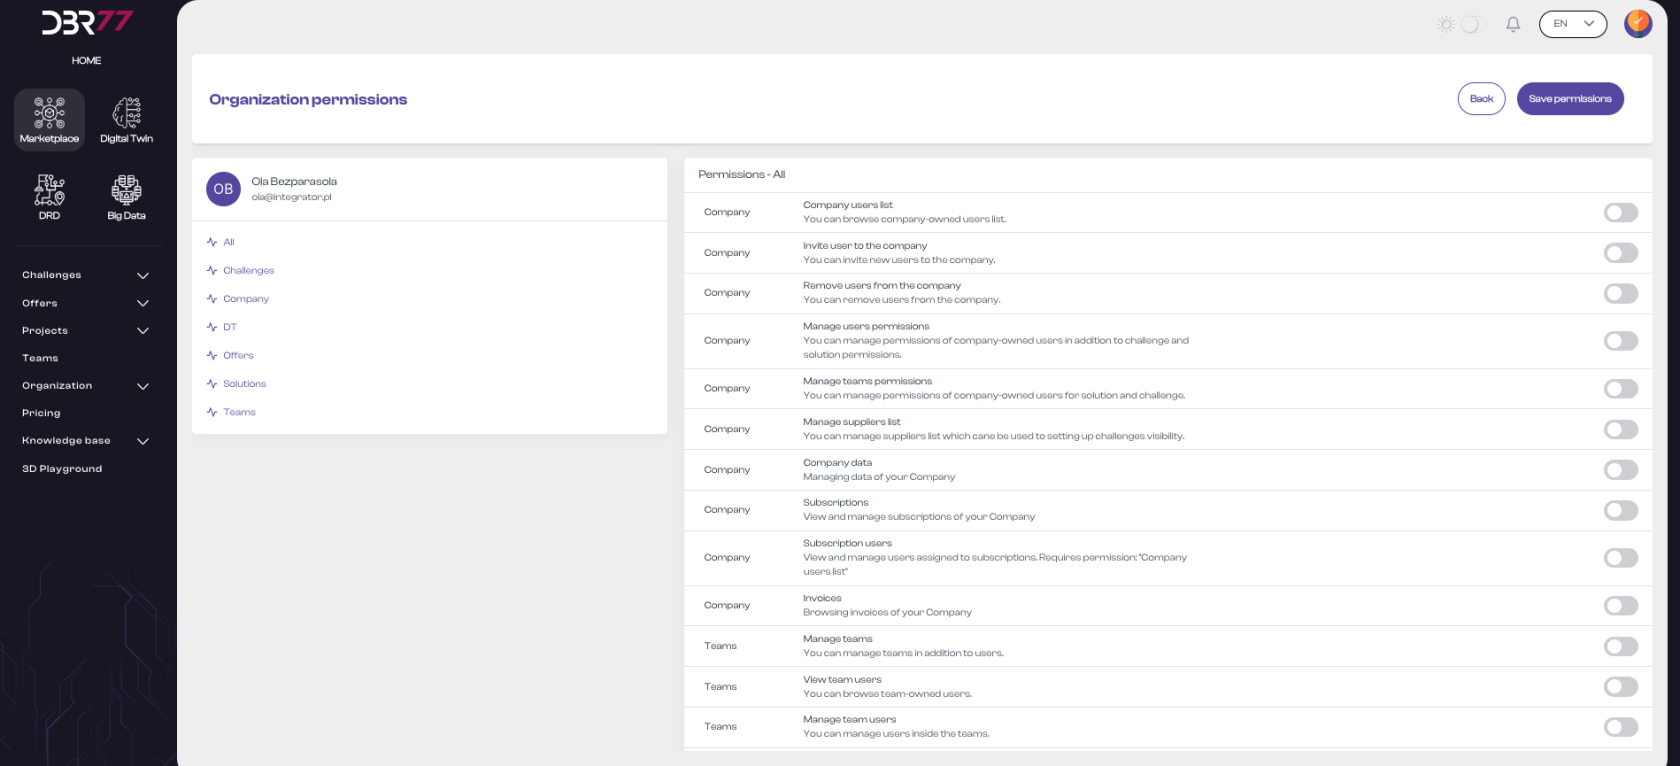
#### Elements of the Permissions View:
- Header: At the top of the screen is the title "Permissions in the Organization," indicating the current platform section.
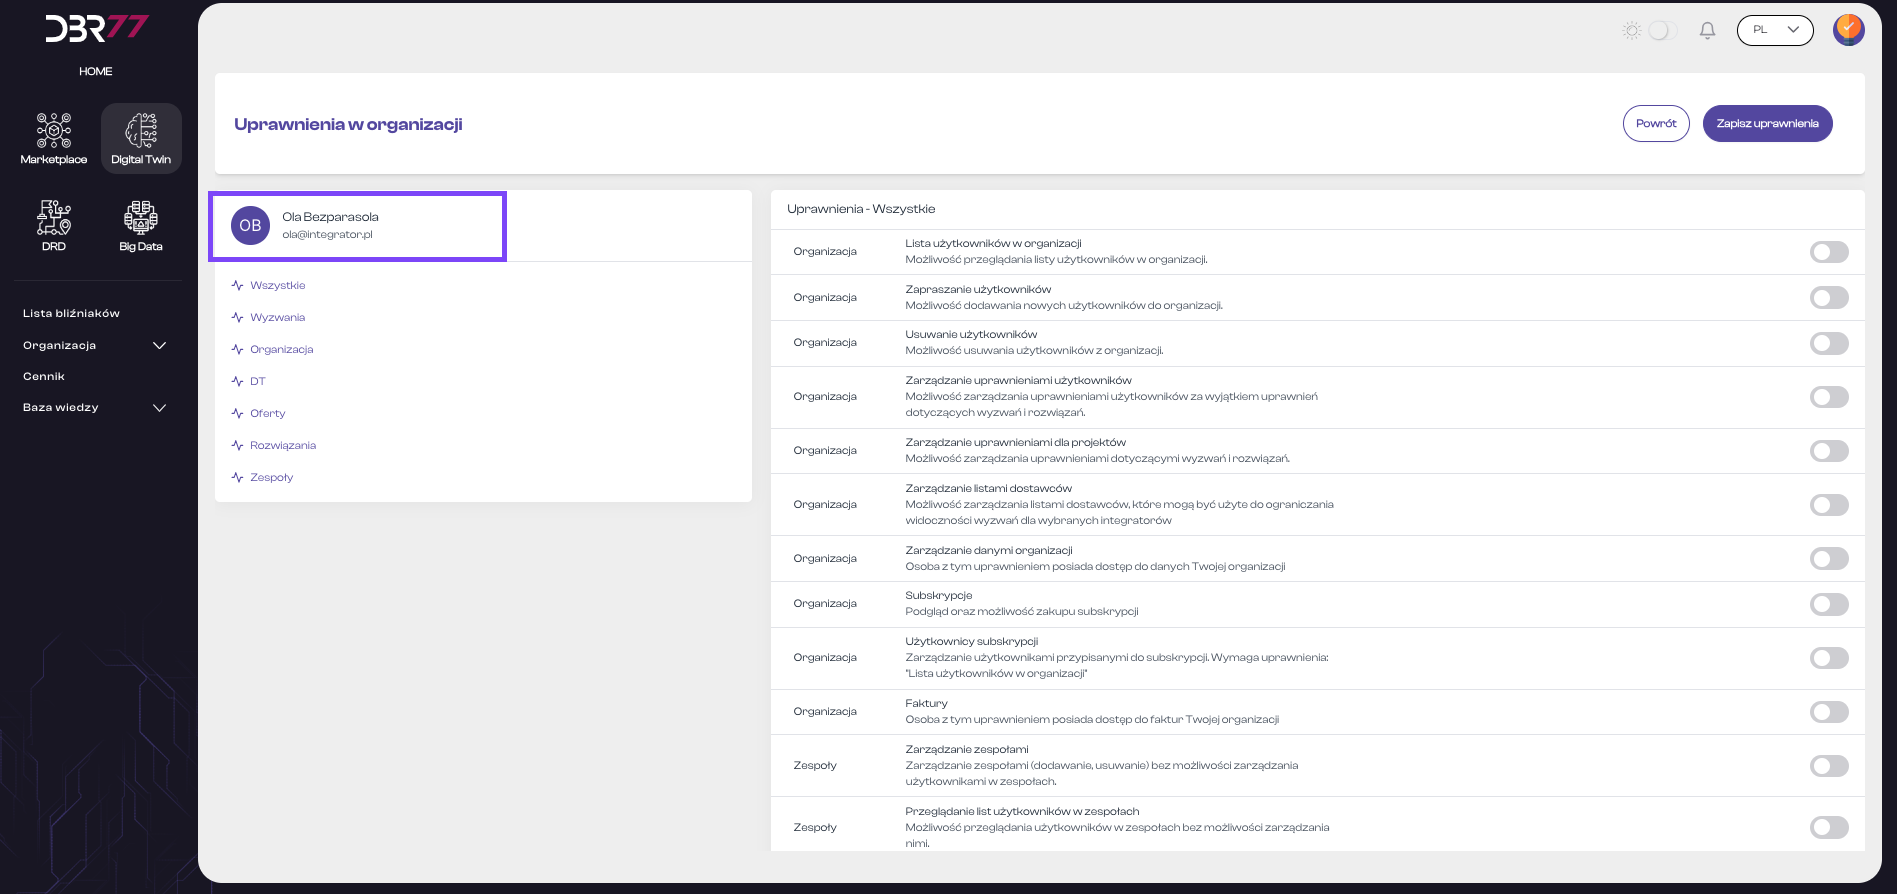
#### User Information:
- User avatar (initials or photo).
- User’s first and last name.
- User’s email address.
[](https://learn.dbr77.com/uploads/images/gallery/2024-07/ZYppId4lxWzEXyBn-zrzut-ekranu-2024-07-1-o-14-19-47.png)
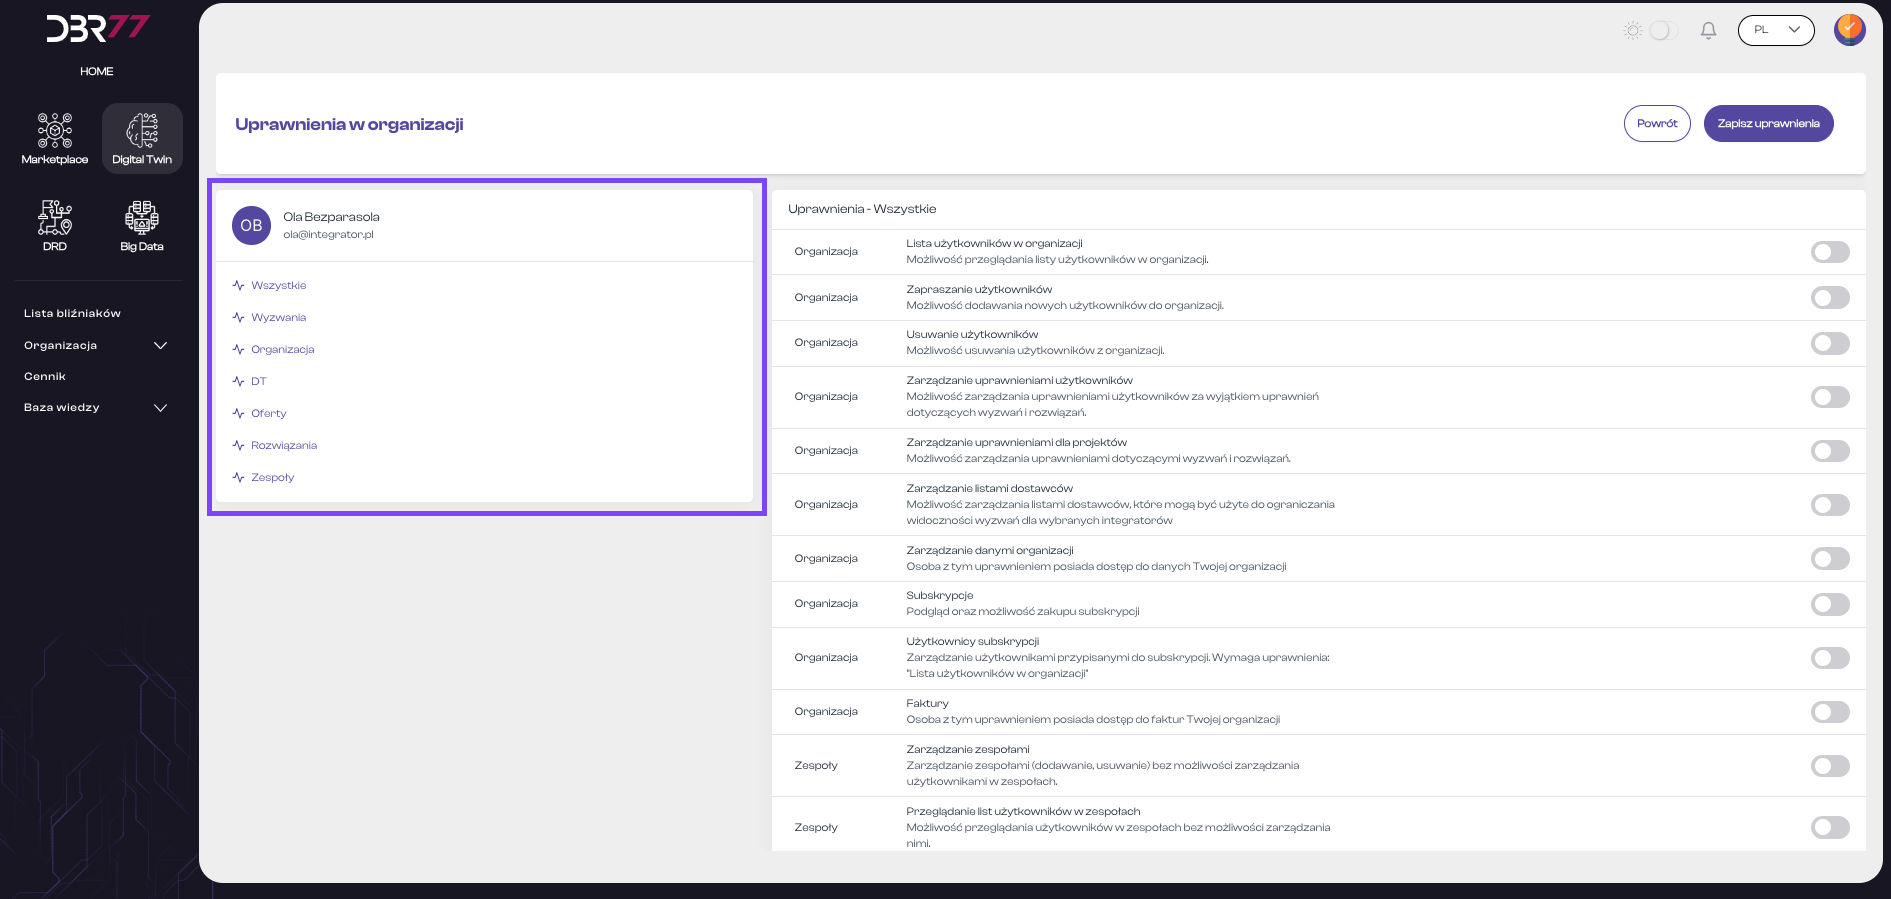
Below this information is a list of permission categories, such as:
- All
- Challenges
- Organization
- DT (Digital Twin)
- Offers
- Solutions
- Teams
[](https://learn.dbr77.com/uploads/images/gallery/2024-07/cIkYc2ZCvfOBpRpy-zrzut-ekranu-2024-07-1-o-14-20-20.png)
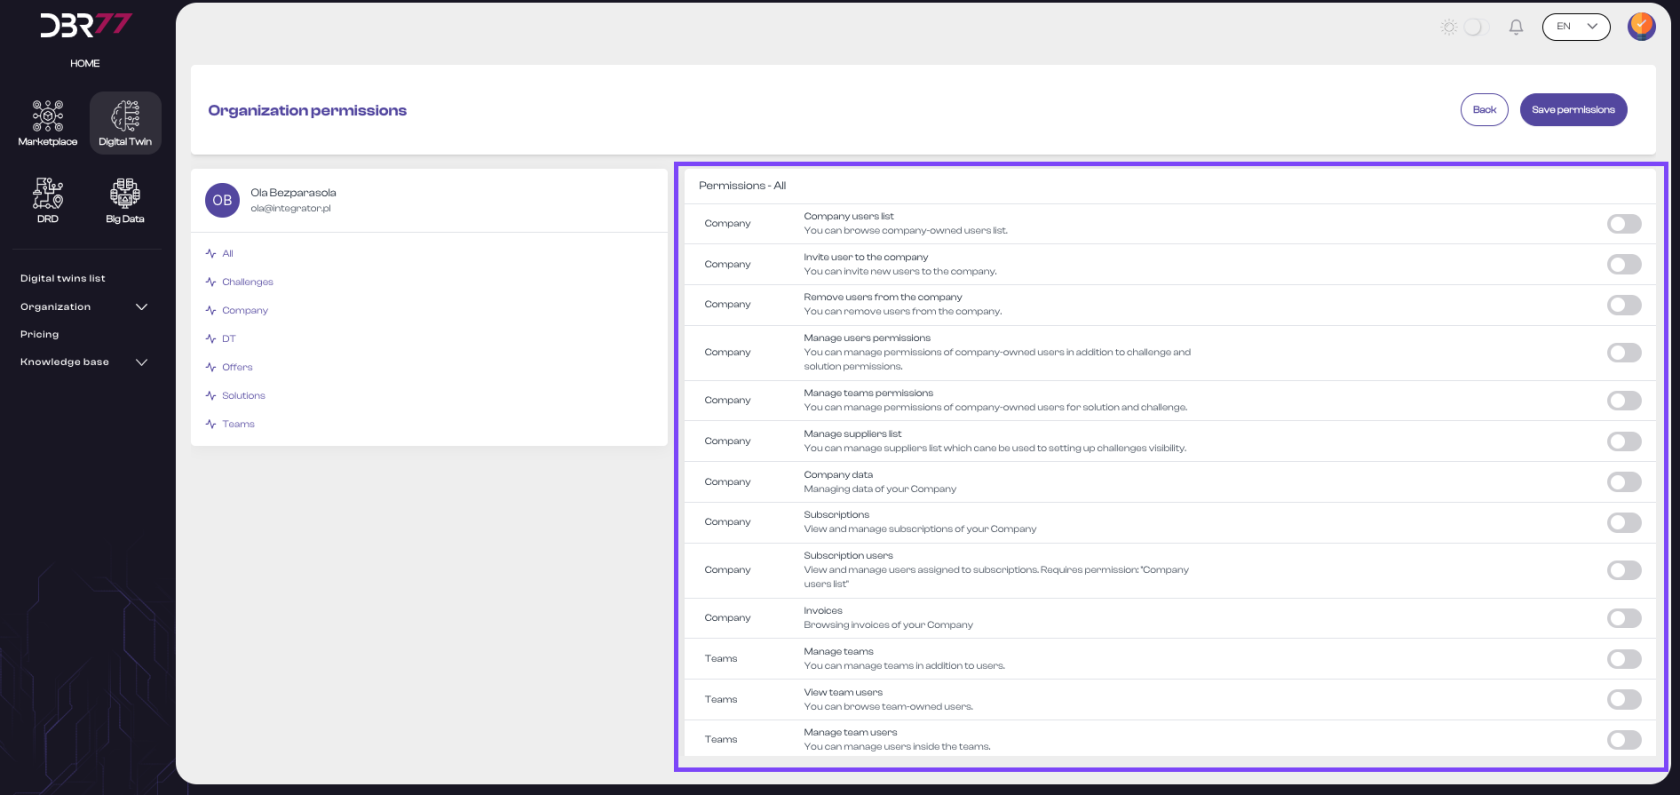
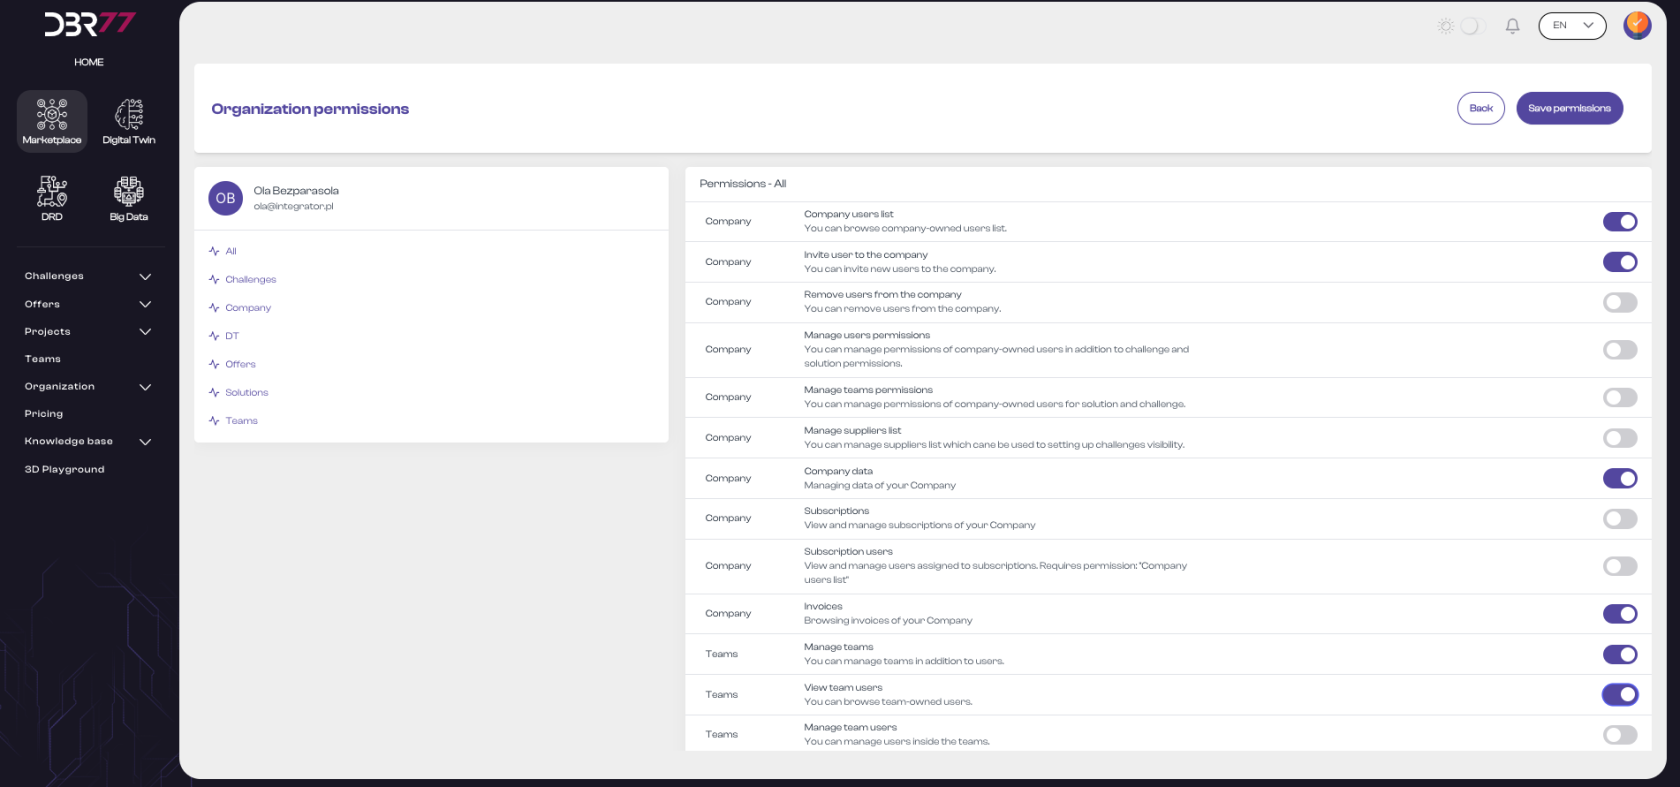
#### Permissions List:
[](https://learn.dbr77.com/uploads/images/gallery/2024-07/uQqChysqFxe5gkj3-zrzut-ekranu-2024-07-1-o-14-21-09.png)
#### Detailed Permissions List:
On the right side of the screen, there is a detailed list of permissions divided into categories. Each category contains specific rights that can be granted or removed for a user. Example permissions include:
- View Organization User List: Ability to view the user list in the organization.
- Invite Users: Ability to add new users to the organization.
- Remove Users: Ability to remove users from the organization.
- Manage User Permissions: Ability to manage user permissions, excluding permissions for Challenges and Solutions.
- Manage Project Permissions: Ability to manage permissions related to Challenges and Solutions.
- Manage Supplier Lists: Ability to manage supplier lists to limit the visibility of challenges for selected integrators.
- Manage Organization Data: Access to the organization’s data.
- Subscriptions: View and manage subscriptions, including subscription purchases.
- Subscription Users: Manage users assigned to subscriptions.
- Invoices: Access the organization’s invoices.
- Manage Teams: Manage teams (add and remove), without managing users within teams.
- View Team User Lists: Ability to view users in teams without managing them.
- Manage Users in Teams: Ability to add or remove users in teams.
#### Permission Toggles:
Next to each permission, there is a toggle switch that can be activated or deactivated to grant or revoke the corresponding permission for the user.
[](https://learn.dbr77.com/uploads/images/gallery/2024-06/EV8yXJc8NaXH463o-zrzut-ekranu-2024-06-28-o-17-10-41.png)
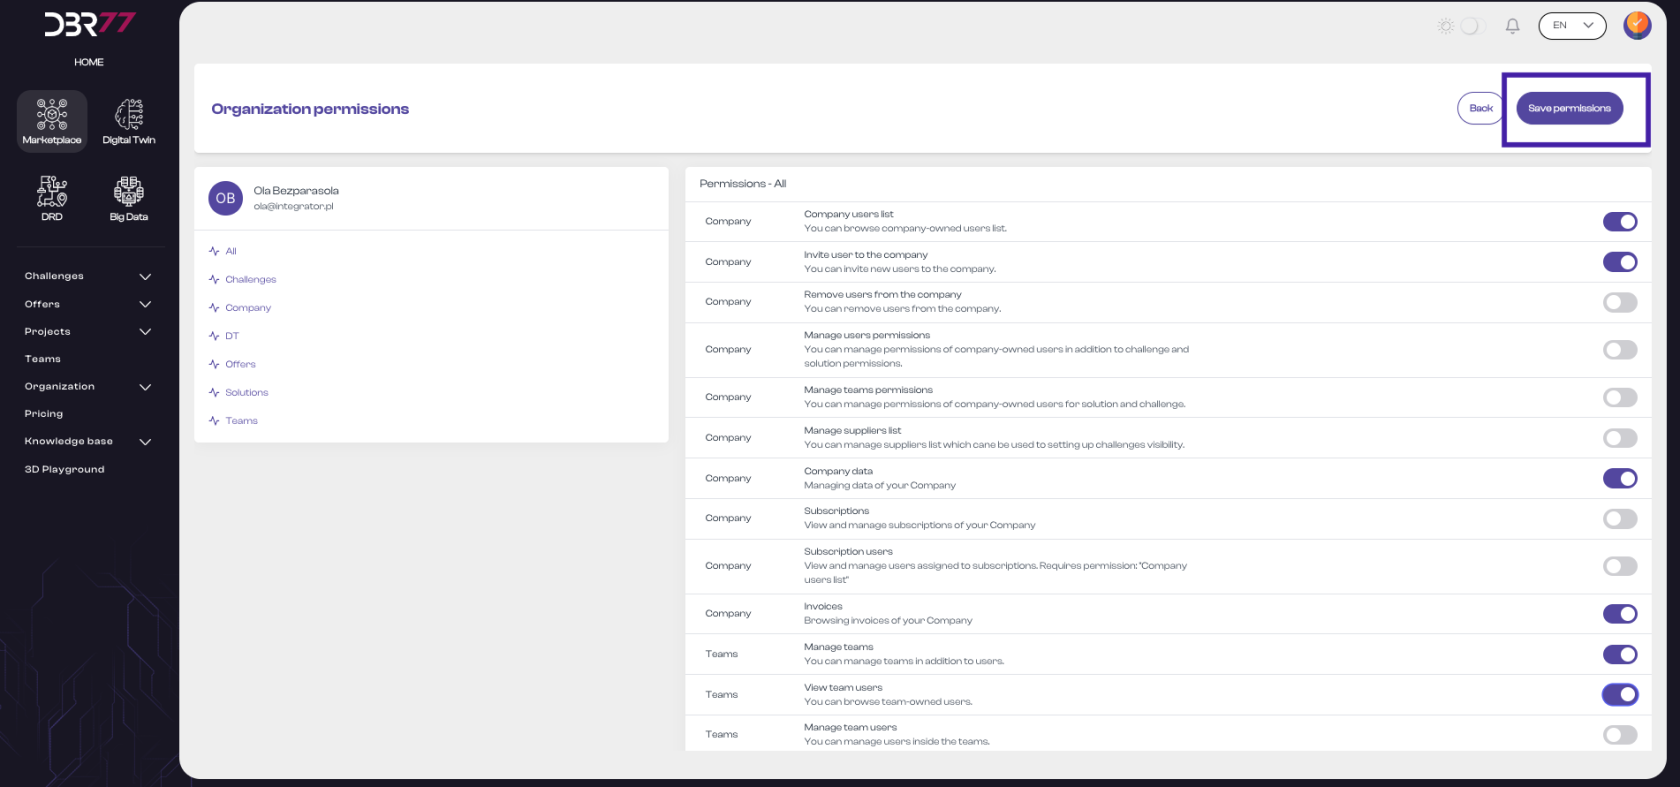
#### Action Buttons:
In the top right corner of the screen, there are two action buttons:
- Back: Returns to the previous view.
- Save Permissions: Saves the changes made to the user’s permissions.
[](https://learn.dbr77.com/uploads/images/gallery/2024-06/CqwlYBPJ6ZNOOhfQ-zrzut-ekranu-2024-06-28-o-17-10-41.png)
The permissions view mode on the DBR77 platform is user-friendly, allowing administrators to efficiently manage user access rights within the organization. With detailed options and a clear interface, administrators can easily assign appropriate permissions so each user has access to the relevant platform functions and resources.
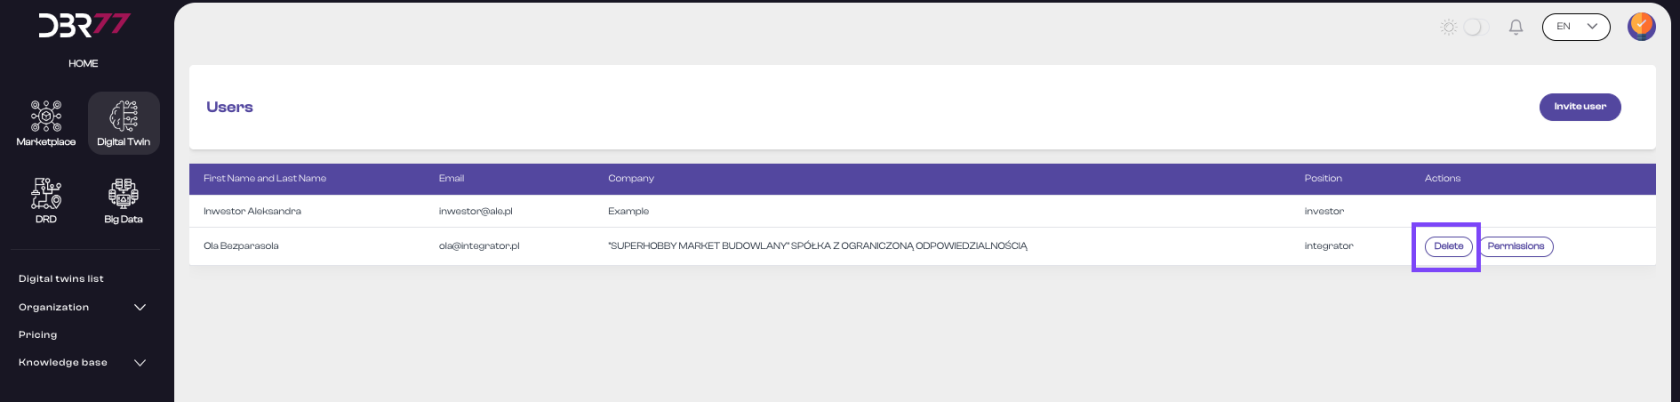
#### Removing a User
Steps to Remove a User:
- Locate the user you wish to remove in the list, then click the management icon next to their details.
**[](https://learn.dbr77.com/uploads/images/gallery/2024-07/CrKbSeDyJmwO2nXc-zrzut-ekranu-2024-07-1-o-14-54-40.png)**
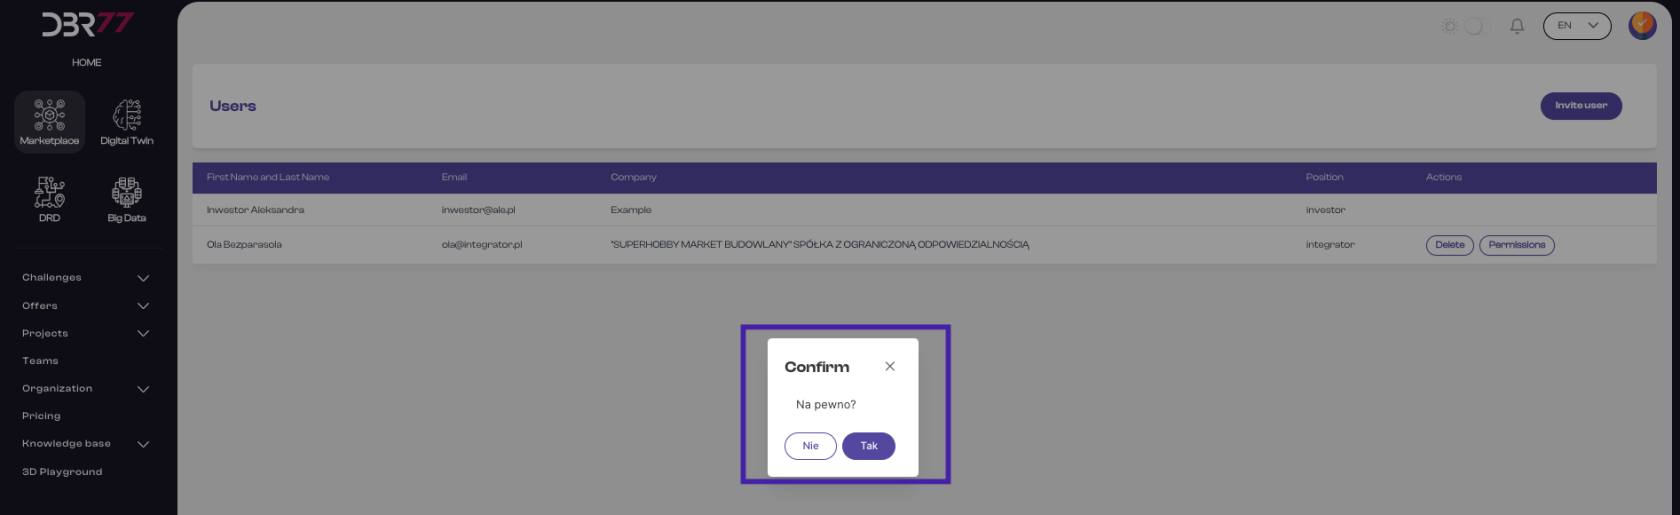
- In the confirmation dialog that appears, click the "Confirm" button to remove the user from the organization.
[](https://learn.dbr77.com/uploads/images/gallery/2024-06/nl5cVer99bvQaCPO-zrzut-ekranu-2024-06-28-o-17-13-24.png)
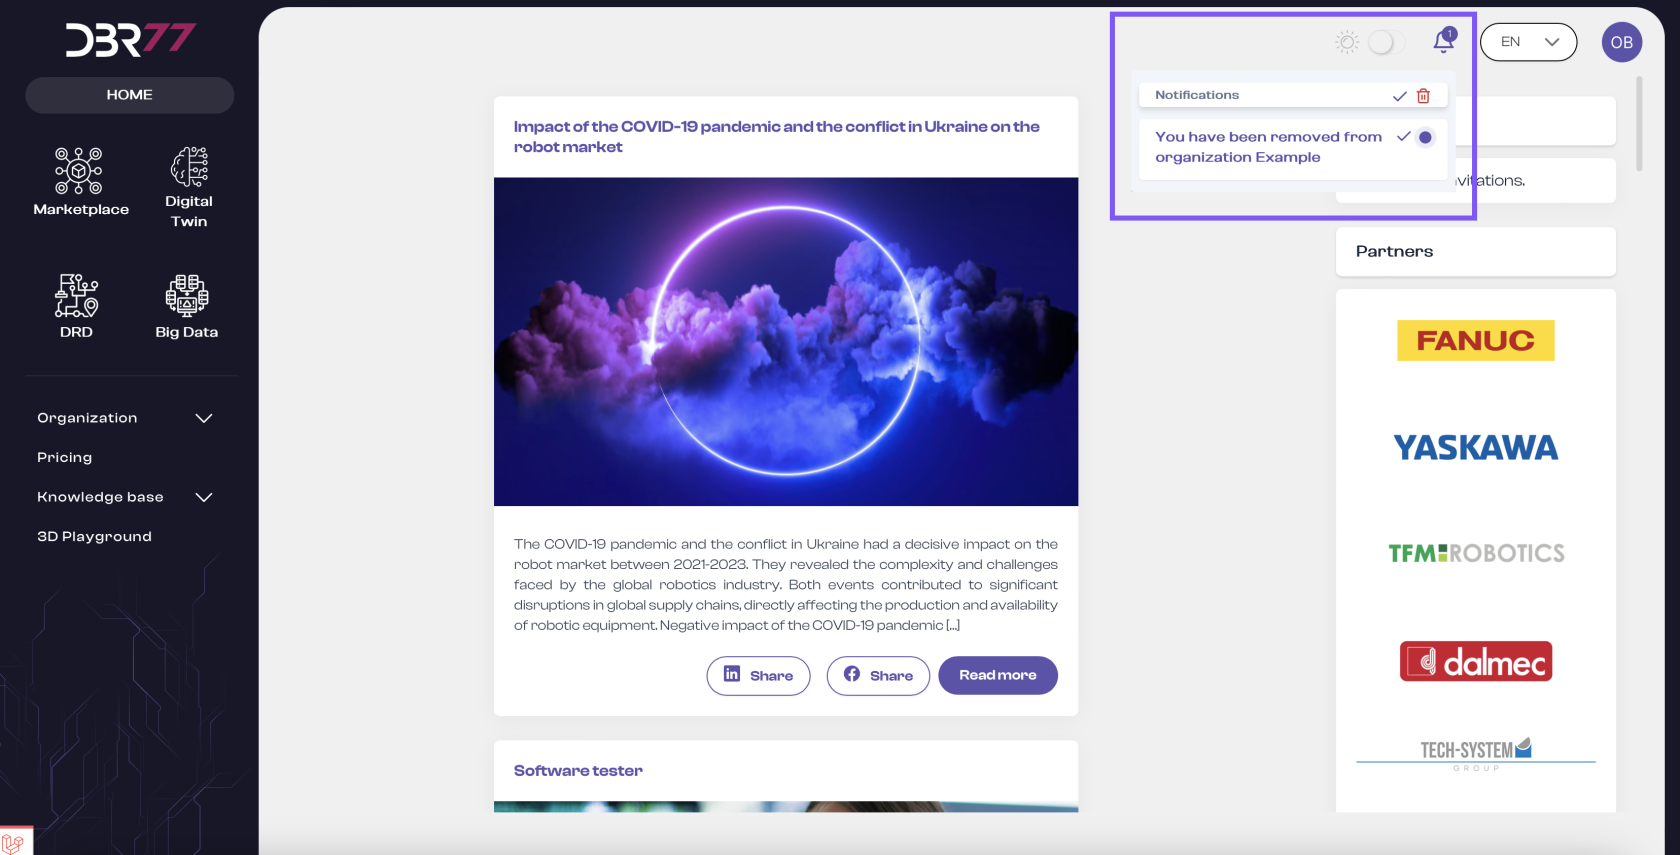
- Once the operation is completed, both the removed user and the system administrator will receive a notification about the change.
[](https://learn.dbr77.com/uploads/images/gallery/2024-07/0vhdb9lZvUifAxSC-zrzut-ekranu-2024-07-1-o-15-09-52.png)