Getting Started - ENG
Wszystko co musisz wiedzieć by zacząć korzystać z Platformy DBR77.com
- Intro
- Registration
- Login
- Home
- Notifications
- Setting the Language Version
- Switching Between Organizations
- Profil
- Invitations
- Products
- Menu
- News
- Profile
- Settings
- Organisation
Intro
Introduction - DBR77 Platform
The DBR77 platform is a key tool for the industry, supporting the digitalization, automation, and robotization of manufacturing companies. Our mission is to help companies unlock their full potential through innovative technological solutions. We believe that digital transformation via the DBR77 platform is the path – from efficient data collection, analysis, and optimization to the full automation of production processes.
Implementing this path requires a well-thought-out plan, suitable methods and tools, and collaboration with trusted partners accessible through our platform. Thanks to the DBR77 platform, companies can achieve the following:
- Increase operational efficiency and reduce costs
- Improve product and process quality
- Boost innovation and competitiveness in the market
Our customers' success stories show that using our platform brings tangible benefits and helps achieve strategic business goals. After registration, the DBR77 platform offers four main tools:
The Development Roadmap
is the core tool of the DBR77.com platform. It guides factories through the digital transformation process, providing a strategic plan that identifies critical phases and milestones to ensure a smooth transition to advanced production practices.
Our Big Data Module
leverages the potential of large datasets to gain practical insights and improve efficiency. This module helps companies optimize their operations by analyzing patterns and trends, significantly enhancing decision-making processes.
DBR77's Digital Twin Technology
is a virtual replica of physical production processes, enabling simulation, analysis, and optimization. This innovative approach reduces downtime and increases resource utilization by identifying potential issues early and testing solutions in a virtual environment.
The Marketplace on DBR77
is a dynamic platform for the exchange of digital solutions, tools, and services tailored to the needs of the manufacturing industry. It connects manufacturers with suppliers and experts, facilitating the adoption of new technologies that enhance productivity and innovation.
We place a strong emphasis on the security and protection of our users' data by providing advanced security measures and adhering to the latest standards. In addition, we offer technical support and training so our users can fully leverage the platform's potential.
Looking to the future, we are committed to continuous updates and further development of our platform to provide even more advanced, market-oriented solutions.
Join us at DBR77.com and discover how we can transform the future of industry together.
Registration
Standard Registration
Standard Registration Guide for the DBR77 Platform
Open the Registration Page:
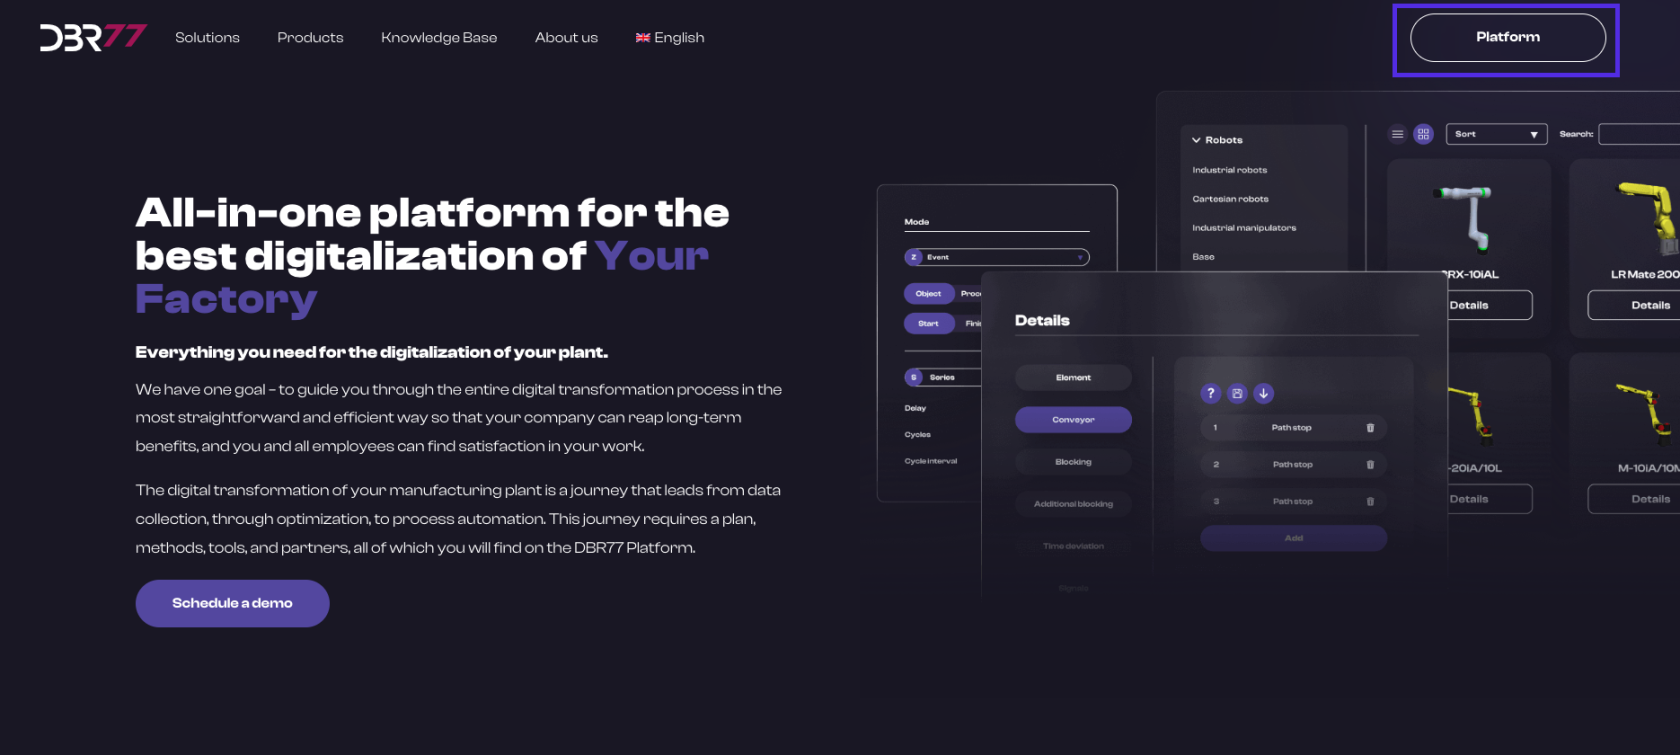
- Go to the homepage at DBR77.com.
- Click on the “Platform” button in the upper right corner.
- You will be redirected to the login page.
- Click on the “Register” button..

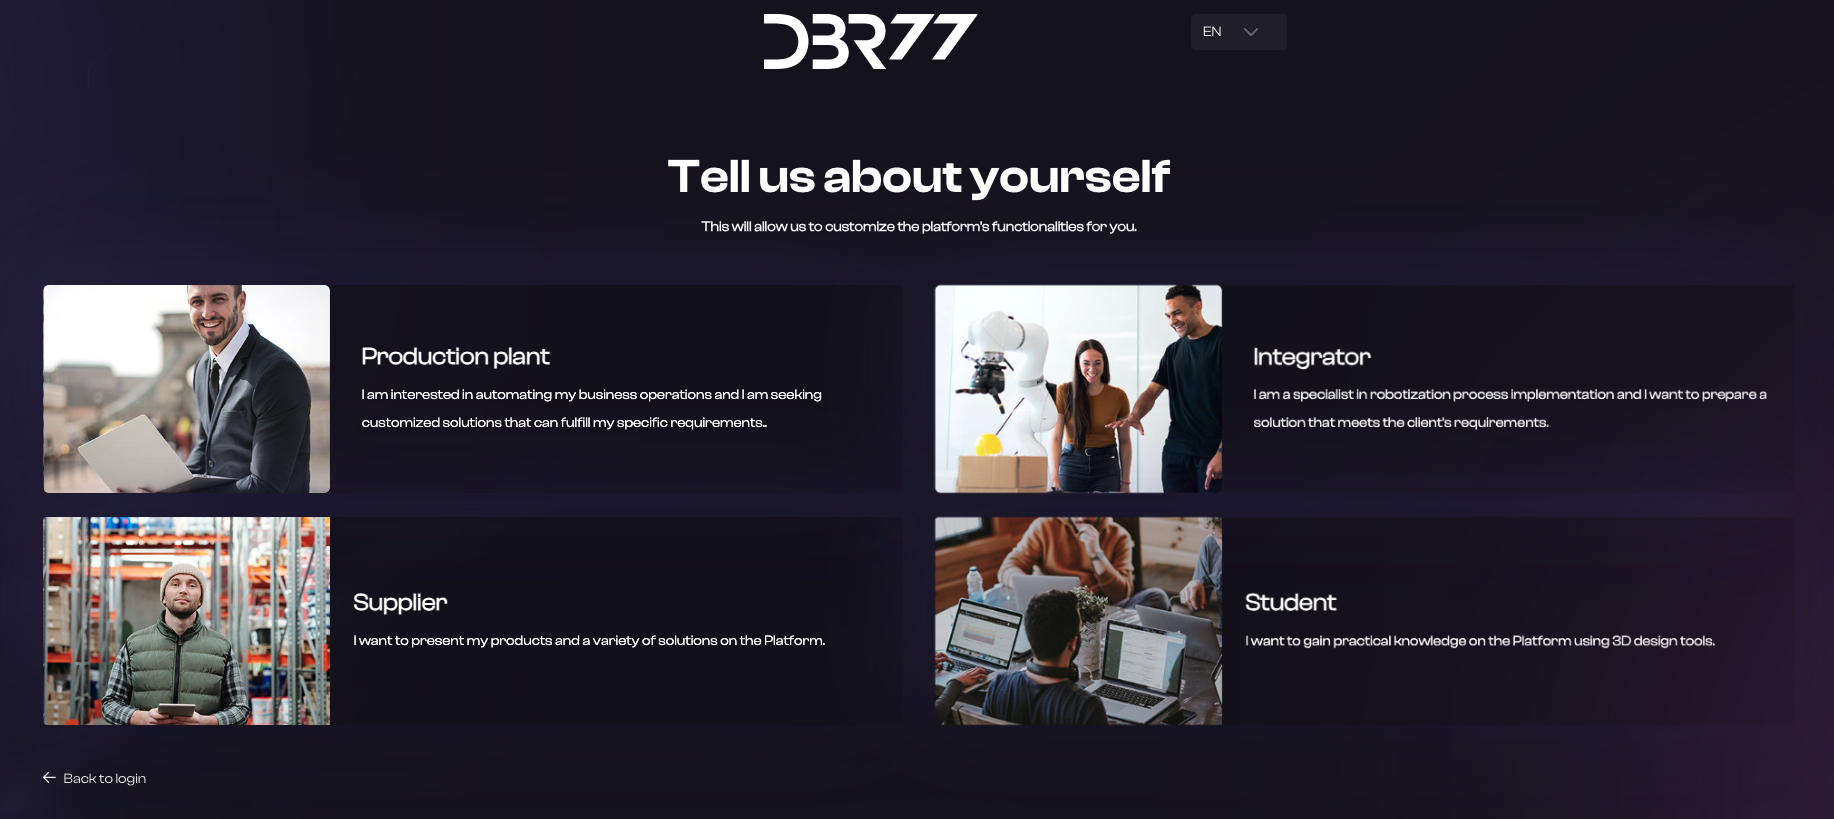
Select Account Type:
On the registration page, select the account type that matches your role and needs:
- Production Company – For employees representing a production company looking for tailored technological solutions.
- Integrator – For employees of integration companies specializing in robotics and automation implementation.
- Technology Provider – For employees representing technology suppliers aiming to showcase products to potential customers.
- Student – For students who wish to gain practical experience using the platform’s 3D design tools
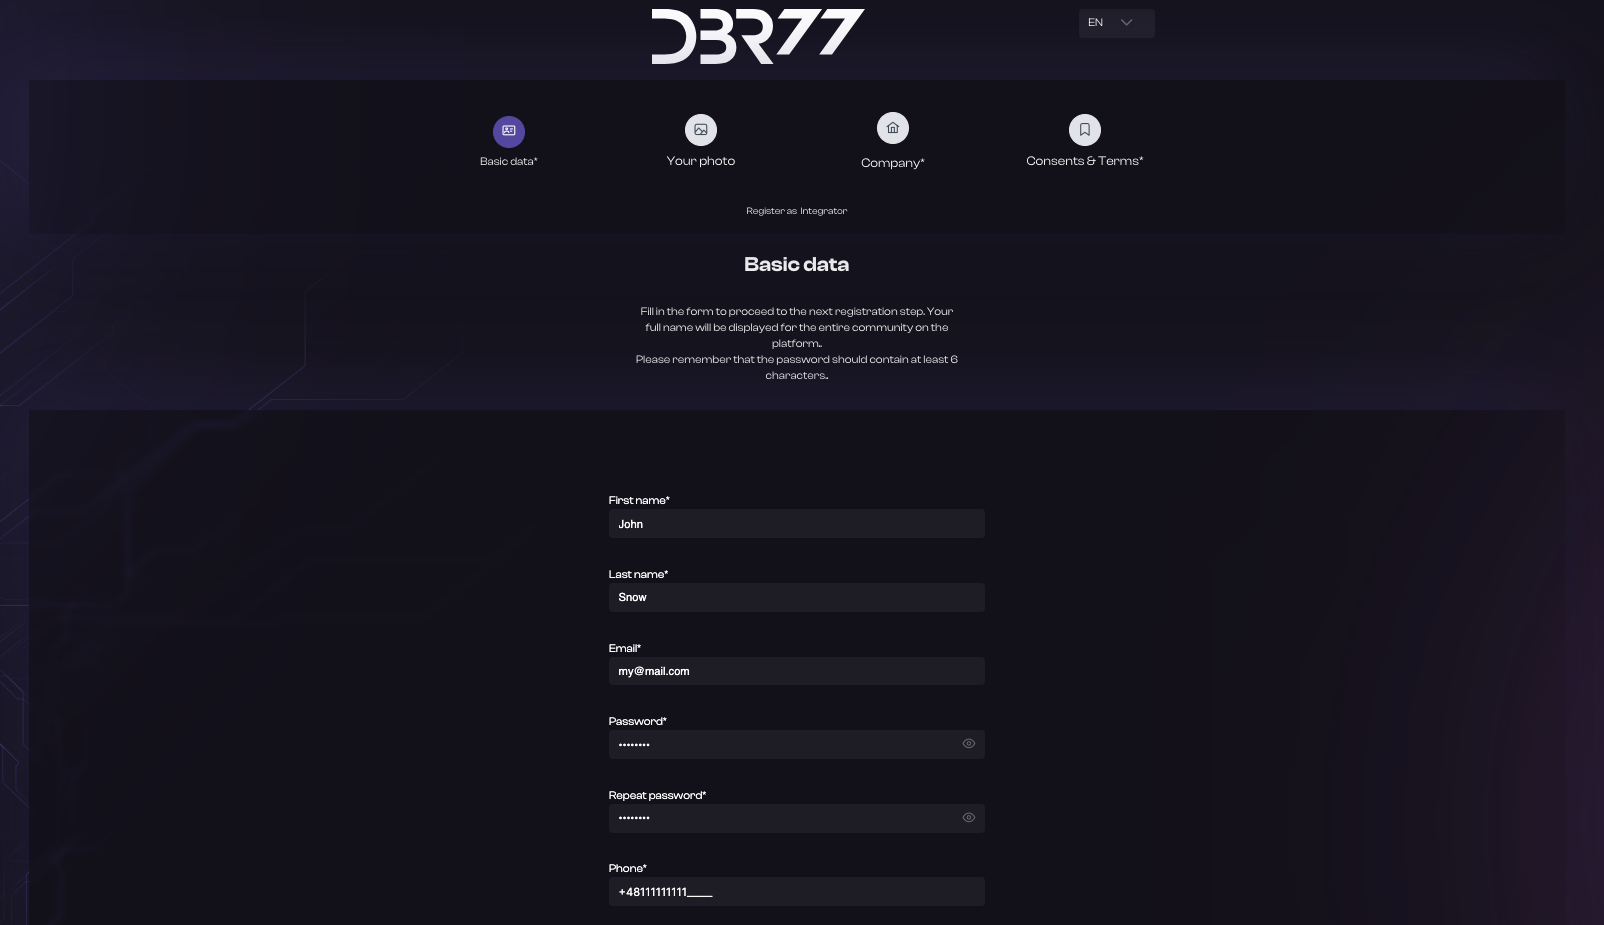
Enter Personal Information:
- Fill in your first and last name.
- Enter your email address, which will serve as your login.
- Create a password that meets specific requirements (e.g., at least 6 characters).
- Provide your phone number with the country code.
- After entering your details, click “Next.”
Add an Avatar (optional):
- Upload an avatar by clicking “Change Photo.”
- Click “Next” to continue.

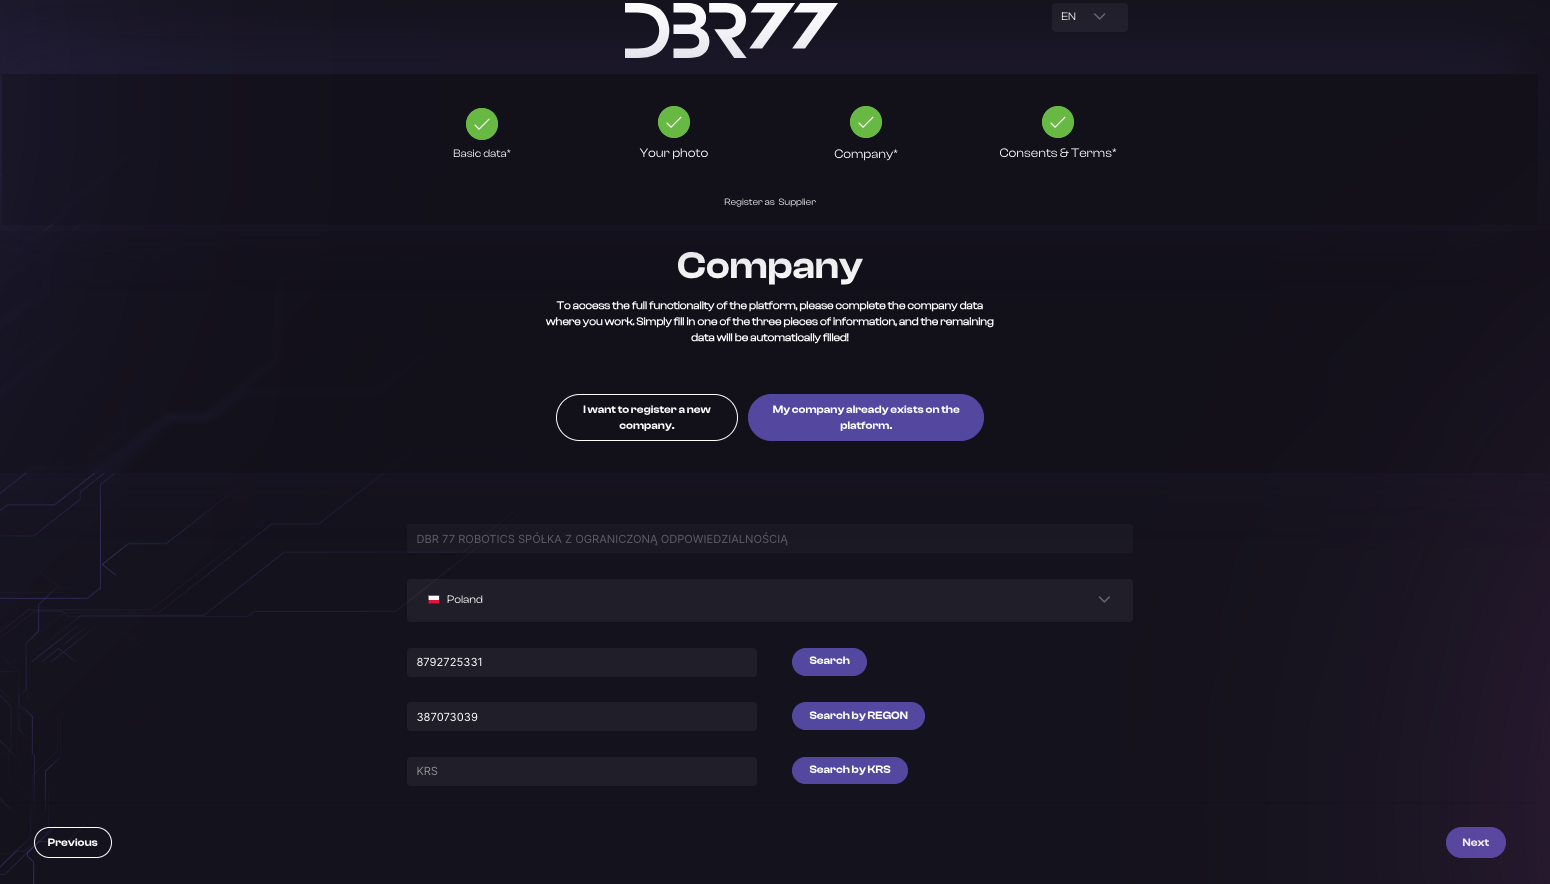
Enter Company Information:
Entering company information is necessary to fully access the DBR77 platform's tools, especially for formal proposal submissions.
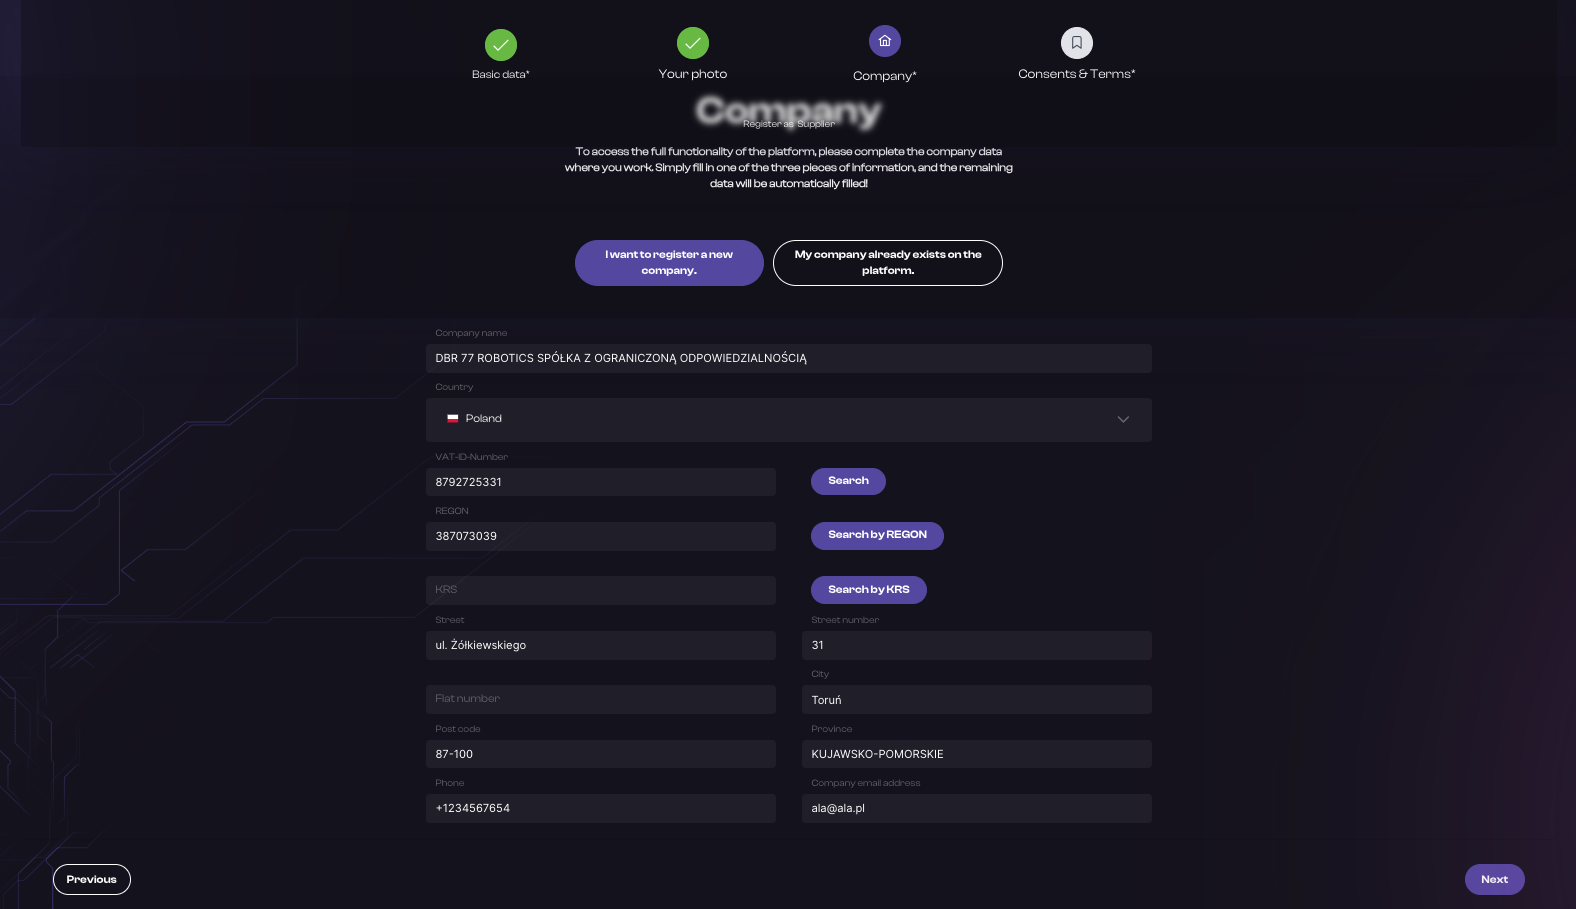
If your company is not yet registered on the platform:
- Enter your company’s tax ID (e.g., VAT ID).
- The remaining details will auto-populate from the platform’s database. Verify and confirm accuracy.
- If auto-fill is unavailable, manually enter:
- Company name
- Address (street, city, postal code, country)
- Company phone number
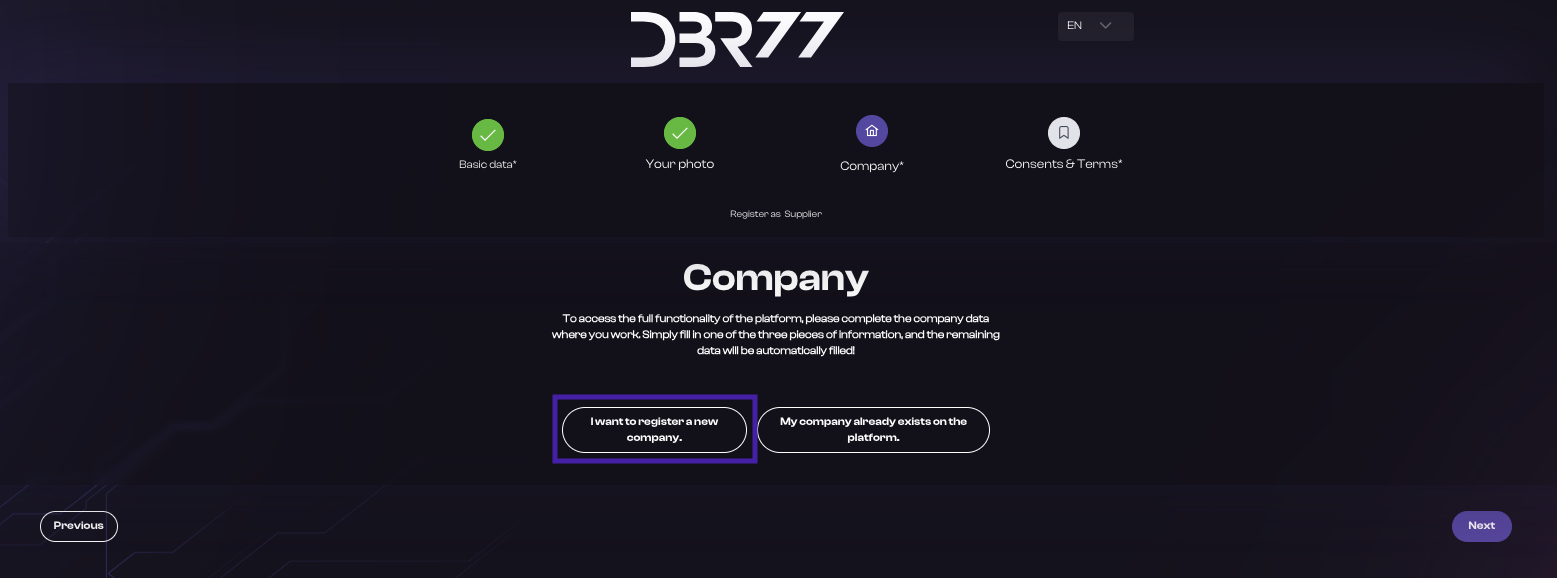
If your company is already registered:
- Search using the company’s tax ID (e.g., VAT ID).
- Verify and confirm the auto-filled information.
Important Information:
Organization Assignment:
- Selecting an existing company assigns you to both your own organization and the one you designated in the form.
- Full access to the other organization’s tools requires approval from an admin account holder who can grant you the necessary permissions.
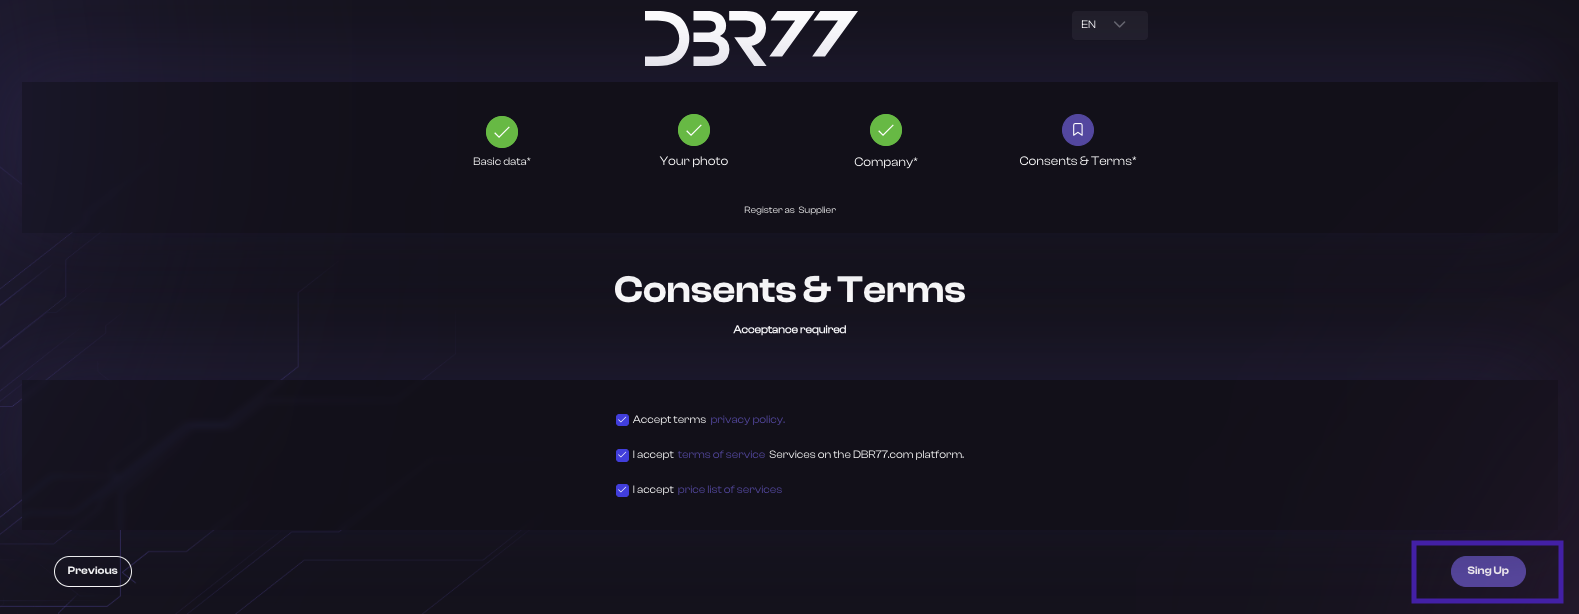
Accept Terms of Use and Privacy Policy:
- Carefully read the platform's Terms of Use and Privacy Policy.
- Check the box to confirm your acceptance.
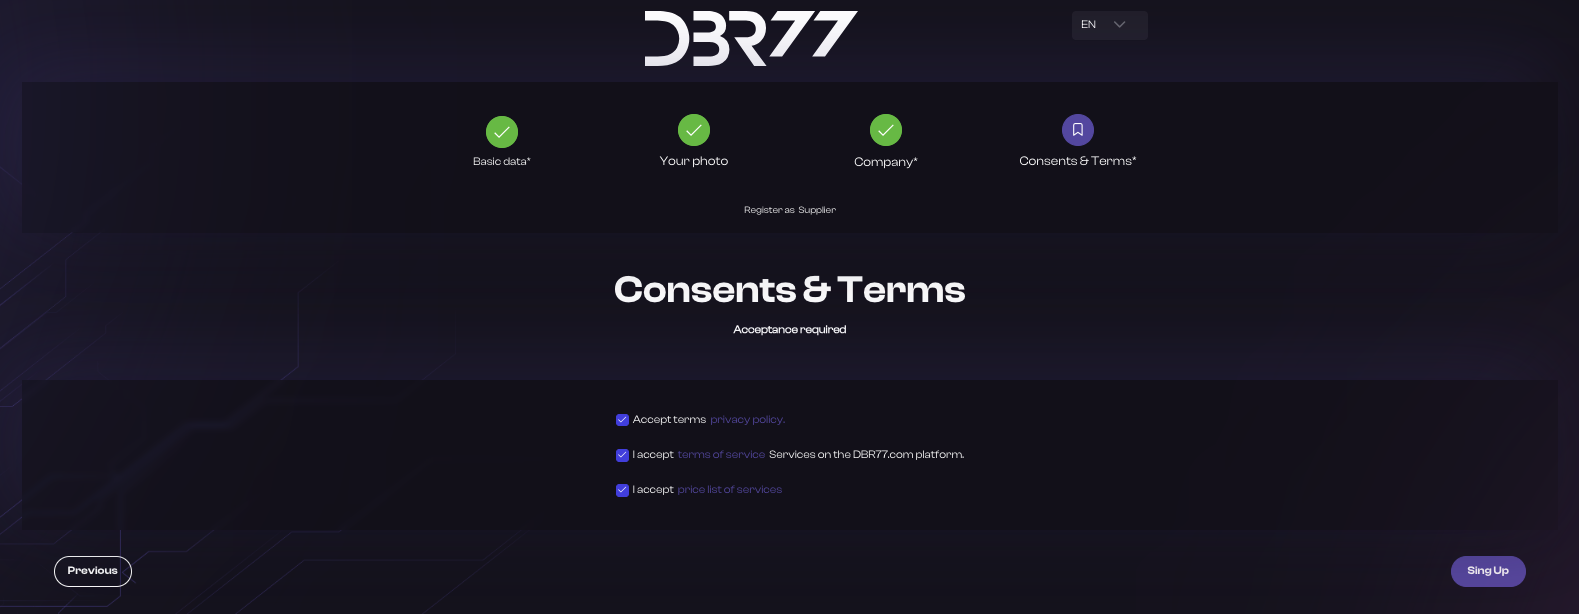
Complete the Registration:
- Click on “Register.”
Confirm Registration:
- Check your email inbox for a message from DBR77.
- Click on the activation link to confirm your email address and activate your account.
Congratulations!
You are now a registered user of the DBR77 platform and can utilize its features to support the digitalization, automation, and robotization of your production company.
After confirming your registration, return to the DBR77.com homepage.
- Click the “Sign In” button.
- Enter your email address and password, then click “Sign In.”
Complete Your Profile:
After your first login, navigate to the “Profile” section and add any additional information that may be required to fully access the platform's features.
Instructions for Registering with a Google Account on the DBR77 Platform
Open the Registration Page:
- Go to the DBR77.com homepage.
- Click the “Platform” button in the upper right corner.
- You will be redirected to the login page.
- Click the “Sign in with Google” button.
Automatic Redirect:
- After selecting registration with Google, you will be automatically redirected and signed in to the DBR77 platform. Next, you must select your user account type.
Select the Account Type:
On the registration page, select the account type that fits your role and needs:
- Production Company – Account for employees representing a production company.
Application: Users of this account type look for technological solutions tailored to the needs of their production facility. - Integrator – Account for employees representing an integration company.
Application: They specialize in implementing robotics and automation processes. Users of this account type aim to develop solutions meeting customer requirements. - Technology Provider – Account for employees representing a technology provider.
Application: Users of this account type want to present their products and solutions to potential customers on the platform. - Student – Account for students. Users of this account type want to acquire practical knowledge using the 3D design tools available on the platform.
Enter Company Information:
Filling out company information is required to fully utilize the DBR77 platform’s tools. This is essential for formal business proposal submissions.
If your company is not yet registered on the platform:
- Enter your company’s tax ID (e.g., VAT ID).
- The remaining company information will automatically populate from the platform’s database.
- Verify and confirm the information is correct.
- If the data does not load automatically, manually fill out the remaining fields:
- Enter the company name.
- Provide the company address (street, city, postal code, country).
- Enter the company’s phone number.
If your company is already registered on the platform:
- Search using your company’s tax ID (e.g., VAT ID).
- The remaining company information will automatically populate from the platform’s database.
- Verify and confirm the information is correct.
Important Information:
Organization Assignment:
- When you select an existing company on the platform, you will be assigned to two organizations: your own and the one you indicated in the form.
- However, simply stating affiliation is not sufficient for full access to the tools of the other organization. Full access becomes available only once an admin account holder accepts you as a member of the organization and grants you the appropriate permissions.
- If you have questions that our AI assistant cannot answer, feel free to email us at contact@dbr77.com.
- Click the “Next” button.
Accept Terms of Use and Privacy Policy:
- Carefully read the platform's Terms of Use and Privacy Policy.
- Check the box to confirm that you accept the terms and privacy policy.
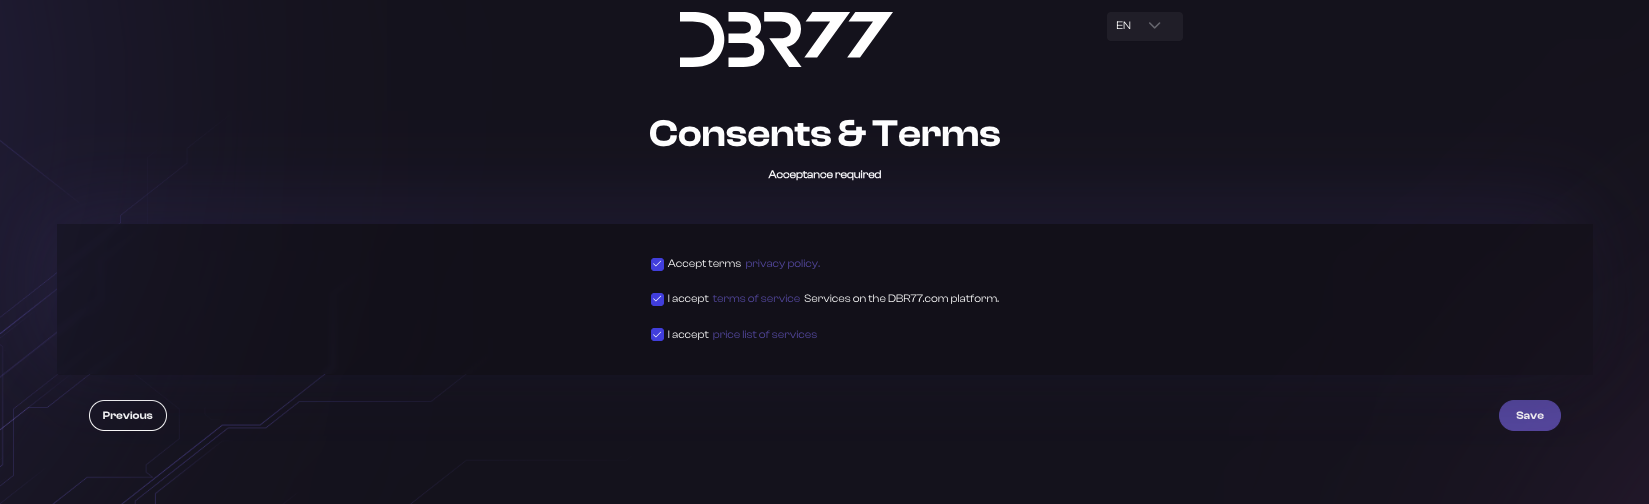
Save Changes:
- Click the “Save” button.
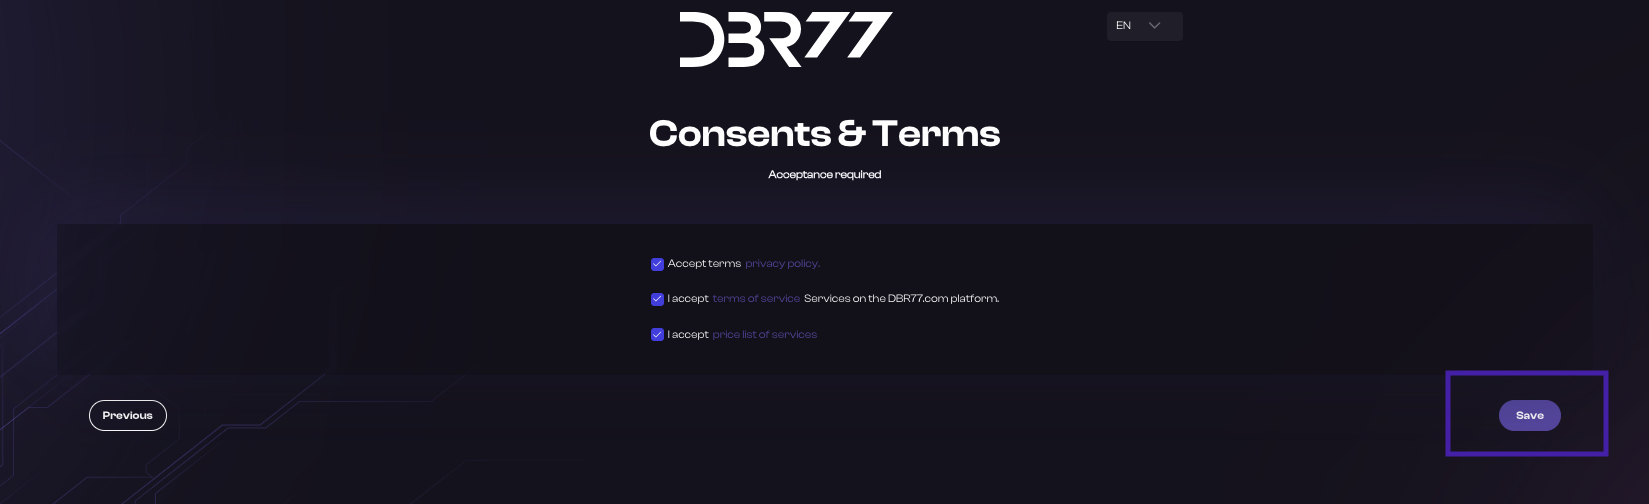
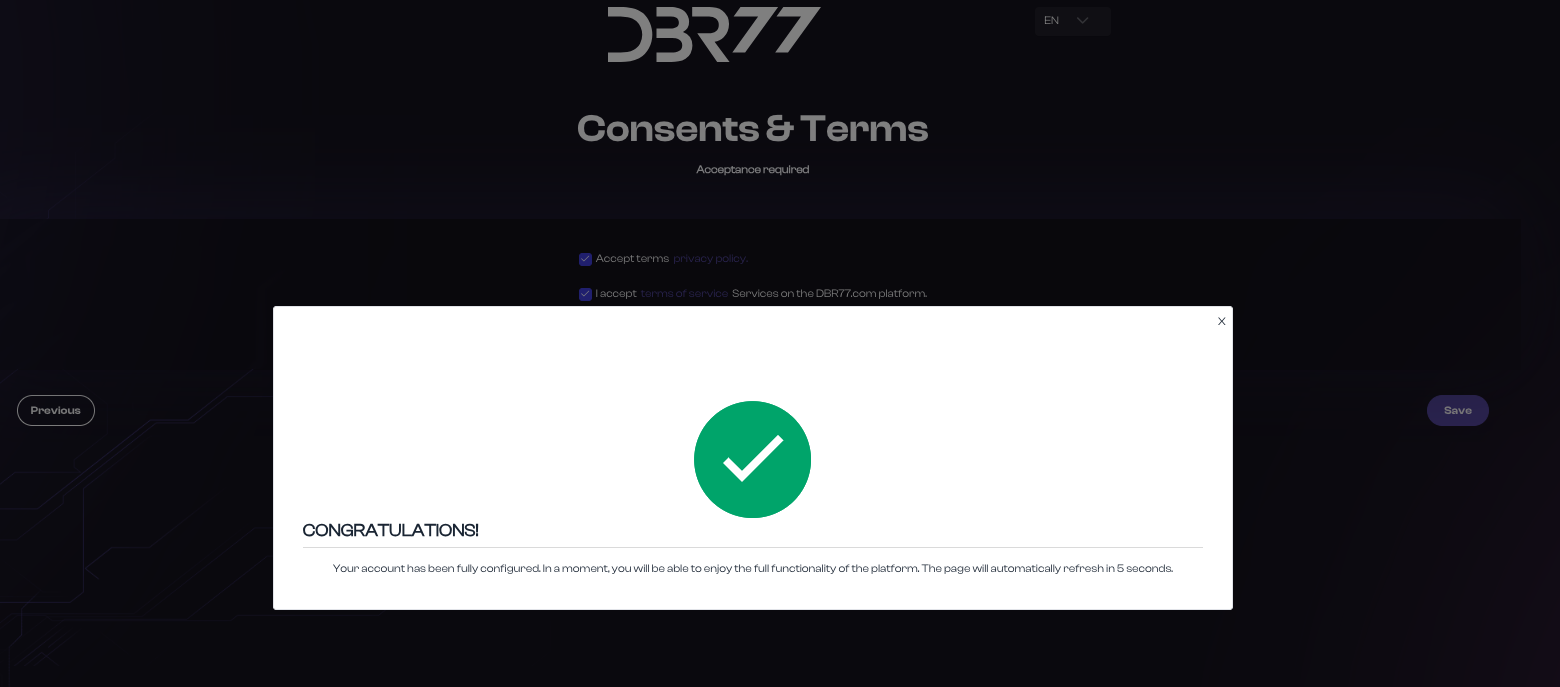
Registration Confirmation:
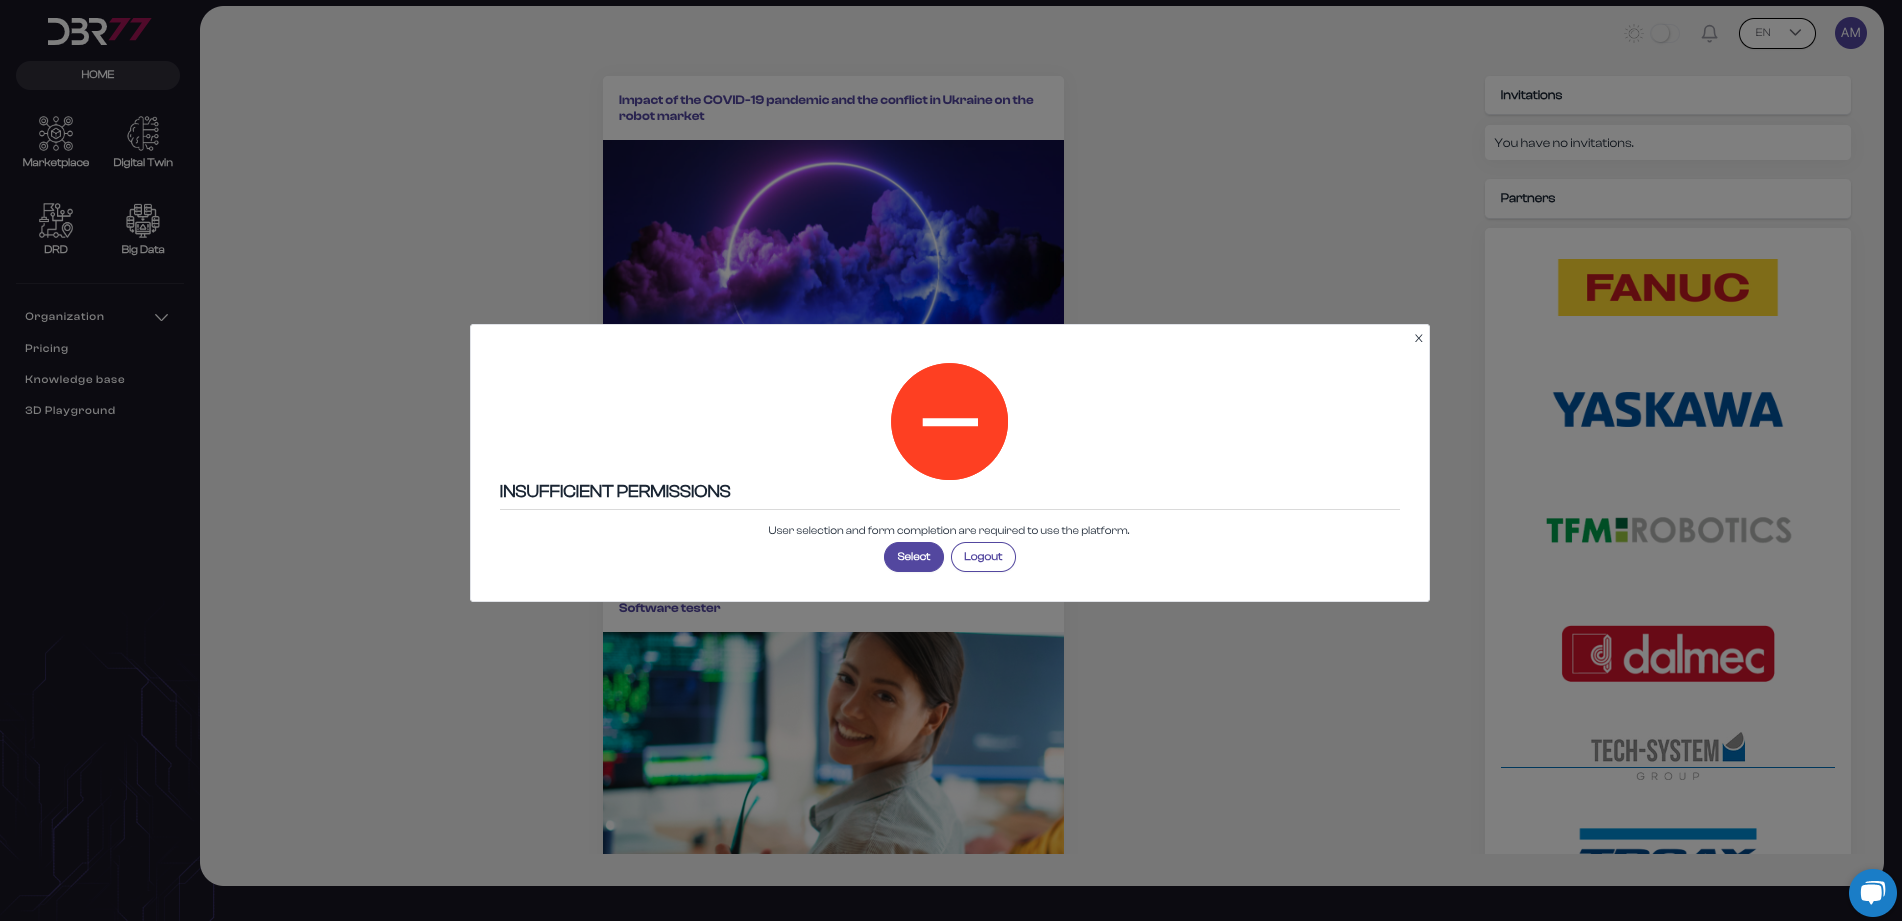
- A success message will appear on the screen, and the user will be automatically logged into the DBR77 platform.
Congratulations!
You are now a registered user of the DBR77 platform and can use its features to support the digitalization, automation, and robotization of your production company.
Complete Your Profile:
- After your first login, go to the “Profile” section and add any additional information that may be required to fully utilize the platform.
Instructions for Registering with a Facebook Account on the DBR77 Platform
Open the Registration Page:
- Go to the DBR77.com homepage.
- Click the “Platform” button in the upper right corner.
- You will be redirected to the login page.
- Click the “Sign in with Facebook” button.
Automatic Redirect:
- After selecting registration with Google, you will be automatically redirected and signed in to the DBR77 platform. Next, you must select your user account type.
Select the Account Type:
On the registration page, select the account type that fits your role and needs:
- Production Company – Account for employees representing a production company.
Application: Users of this account type look for technological solutions tailored to the needs of their production facility. - Integrator – Account for employees representing an integration company.
Application: They specialize in implementing robotics and automation processes. Users of this account type aim to develop solutions meeting customer requirements. - Technology Provider – Account for employees representing a technology provider.
Application: Users of this account type want to present their products and solutions to potential customers on the platform. - Student – Account for students. Users of this account type want to acquire practical knowledge using the 3D design tools available on the platform.
Enter Company Information:
Filling out company information is required to fully utilize the DBR77 platform’s tools. This is essential for formal business proposal submissions.
If your company is not yet registered on the platform:
- Enter your company’s tax ID (e.g., VAT ID).
- The remaining company information will automatically populate from the platform’s database.
- Verify and confirm the information is correct.
- If the data does not load automatically, manually fill out the remaining fields:
- Enter the company name.
- Provide the company address (street, city, postal code, country).
- Enter the company’s phone number.
If your company is already registered on the platform:
- Search using your company’s tax ID (e.g., VAT ID).
- The remaining company information will automatically populate from the platform’s database.
- Verify and confirm the information is correct.
Important Information:
Organization Assignment:
- When you select an existing company on the platform, you will be assigned to two organizations: your own and the one you indicated in the form.
- However, simply stating affiliation is not sufficient for full access to the tools of the other organization. Full access becomes available only once an admin account holder accepts you as a member of the organization and grants you the appropriate permissions.
- If you have questions that our AI assistant cannot answer, feel free to email us at contact@dbr77.com.
- Click the “Next” button.
Accept Terms of Use and Privacy Policy:
- Carefully read the platform's Terms of Use and Privacy Policy.
- Check the box to confirm that you accept the terms and privacy policy.
Save Changes:
- Click the “Save” button.
Registration Confirmation:
- A success message will appear on the screen, and the user will be automatically logged into the DBR77 platform.
Congratulations!
You are now a registered user of the DBR77 platform and can use its features to support the digitalization, automation, and robotization of your production company.
Complete Your Profile:
- After your first login, go to the “Profile” section and add any additional information that may be required to fully utilize the platform.
Login
Standard Login
Instructions for Standard Login on the DBR77 Platform
Open the Login Page:
- Go to the DBR77.com homepage.
- Click the “Platform” button in the upper right corner.
- You will be redirected to the login page.
- Click the “Login” button.
Enter Your Personal Information:
- Enter your email address in the designated field.
- Enter the password you previously set.
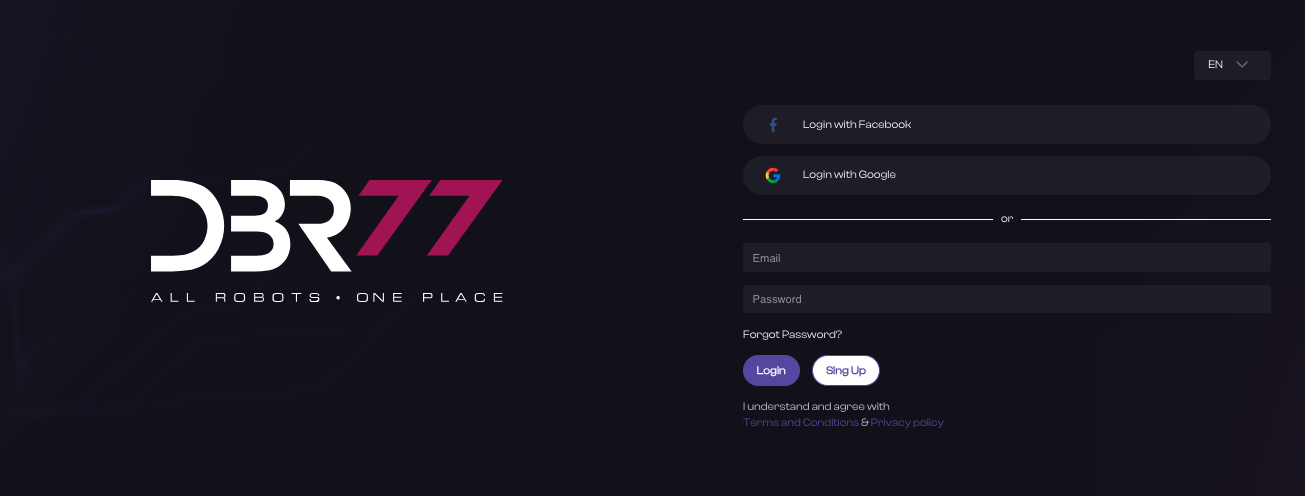
Click “Login” to complete authentication.
- After successful login, you will have full access to the DBR77 platform's functionality. It is important to keep your login information secure and not share it with third parties.
Google- Login
Instructions for Logging in with Google on the DBR77 Platform
Open the Login Page:
- Go to the homepage at DBR77.com.
- Click on the “Platform” button in the upper right corner.
- You will be redirected to the login page.
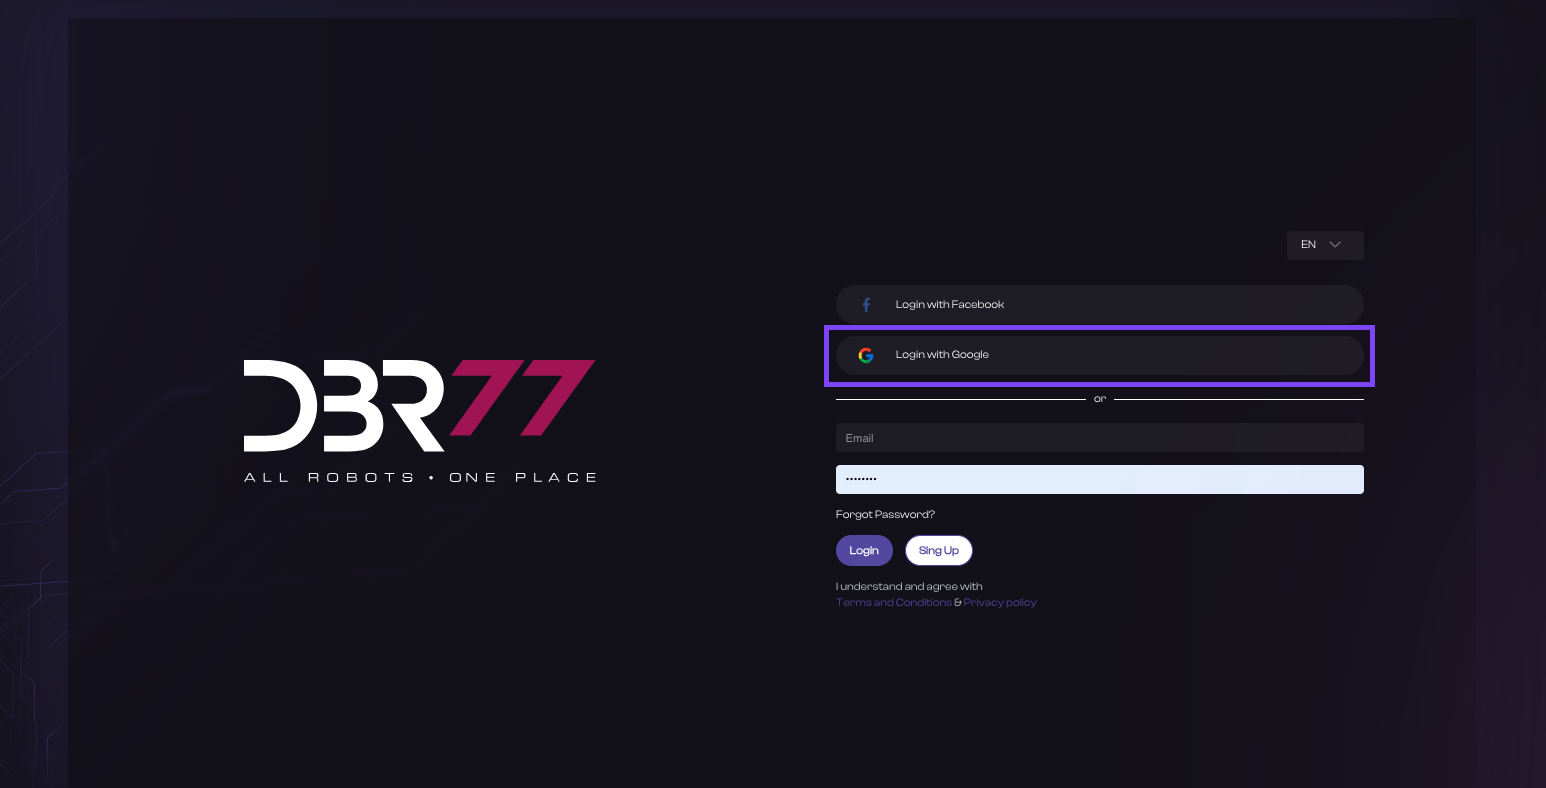
Log in with Google:
- Click on the “Login” button.
- On the login page, instead of entering your personal details, locate the “Sign in with Google” button (it may also be displayed as “Login with Google” or with the Google icon).
- Click on the “Sign in with Google” button.
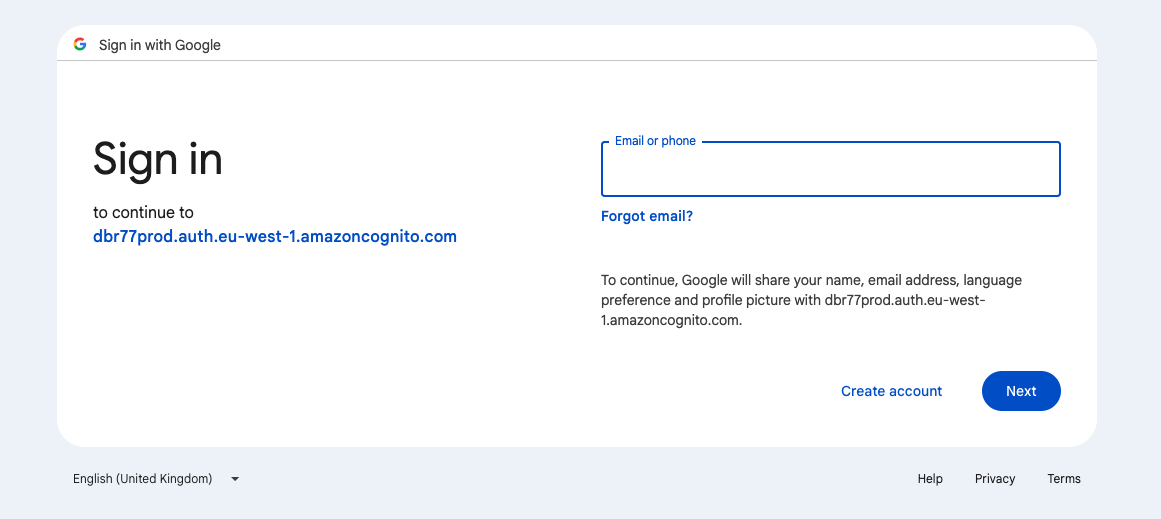
Google Authentication:
Enter your Google login details:
- Enter the email address associated with your Google account in the appropriate field.
- Click “Next.”
- Enter your Google password.
- Click “Next.”
Authorize Access:
- If logging in for the first time, you may be asked to authorize DBR77 platform access to your Google account. Click “Allow” to grant the necessary permissions.
Platform Access:
- After successful login with Google, you will have full access to the features of the DBR77 platform.
Security:
- It is important to keep your Google login credentials secure and not share them with third parties.
- By following these steps, you can log in conveniently and securely to the DBR77 platform using your Google account.
Logging in with Facebook
Instructions for Logging in with Facebook on the DBR77 Platform
Open the Login Page:
- Go to the homepage at DBR77.com.
- Click on the “Platform” button in the upper right corner.
- You will be redirected to the login page.
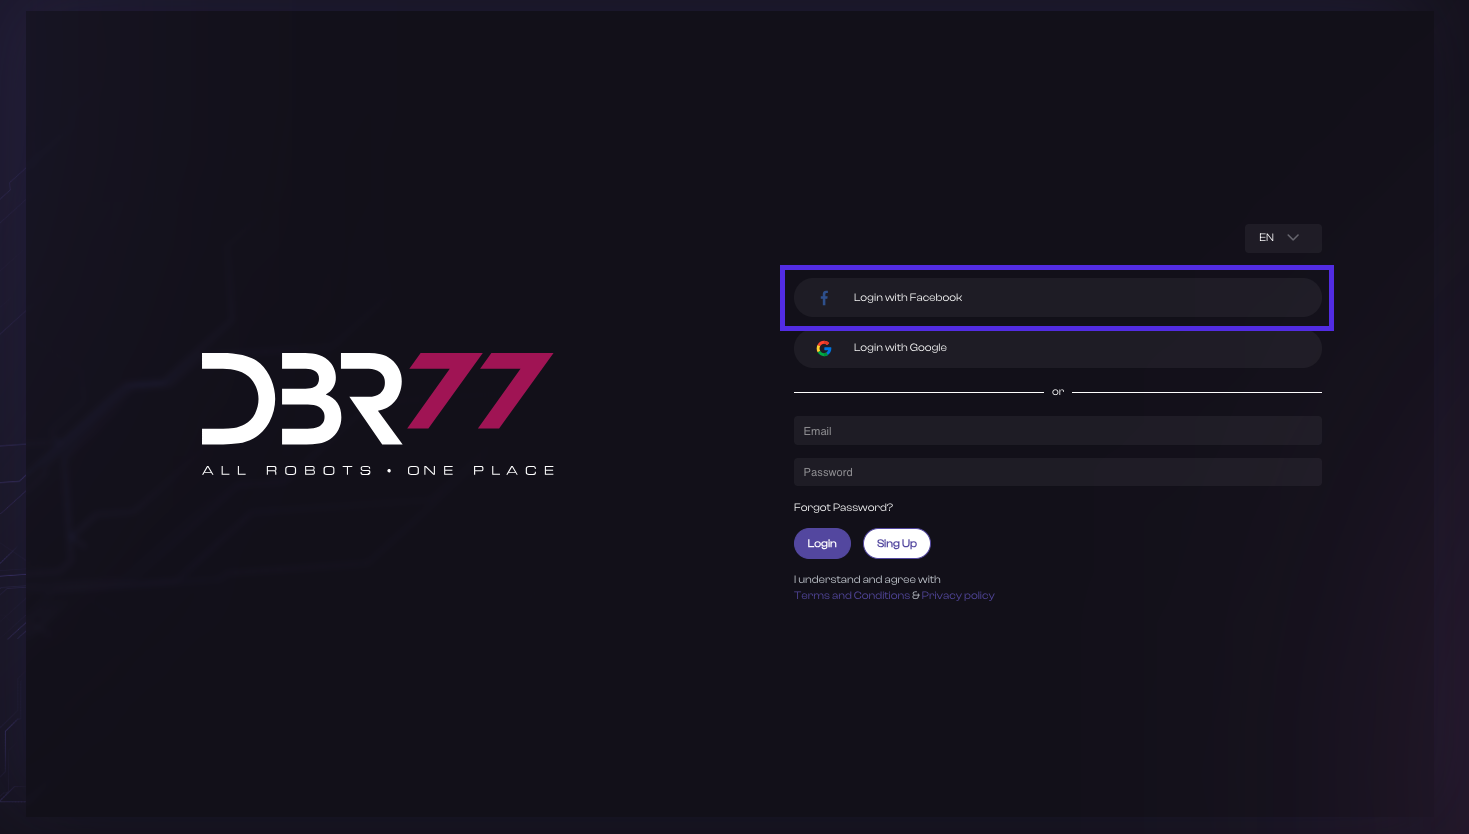
Log in with Facebook:
- On the login page, instead of entering your personal details, locate the “Log in with Facebook” button (it may also appear as “Login with Facebook” or with the Facebook icon).
- Click on the “Log in with Facebook” button.
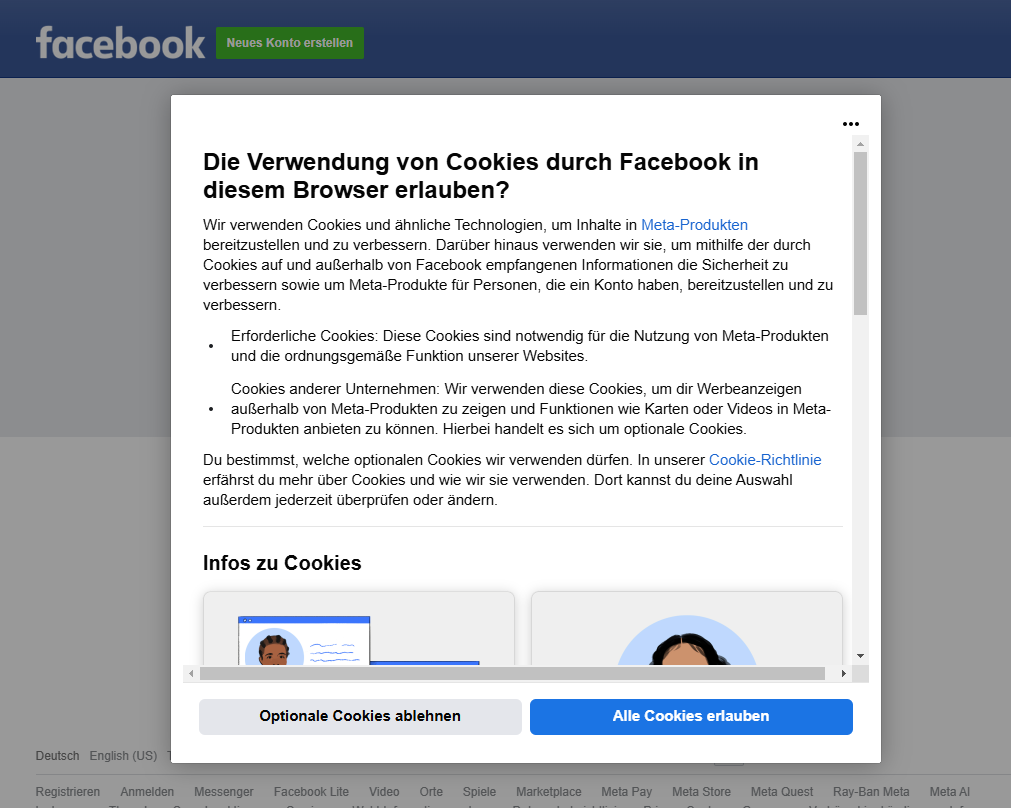
Facebook Authentication:
- Enter your Facebook login credentials:
- Enter the email address or phone number associated with your Facebook account.
- Enter your Facebook password.
- Click “Log in.”
- Authorize Access:
- If logging in for the first time, you may be prompted to allow DBR77 platform access to your Facebook account.
- Click “Continue as [Your Name]” to grant the required permissions.
Platform Access:
- After successful login with Facebook, you will have full access to the DBR77 platform's features.
Security:
- It is important to keep your Facebook login credentials secure and not share them with third parties.
- By following these steps, you can log in conveniently and securely to the DBR77 platform using your Facebook account.
Resetting Your Password
Instructions for Resetting Your Password on the DBR77 Platform
Open the Login Page:
- Go to the DBR77.com homepage.
- Click on the “Platform” button in the upper right corner.
- You will be redirected to the login page.
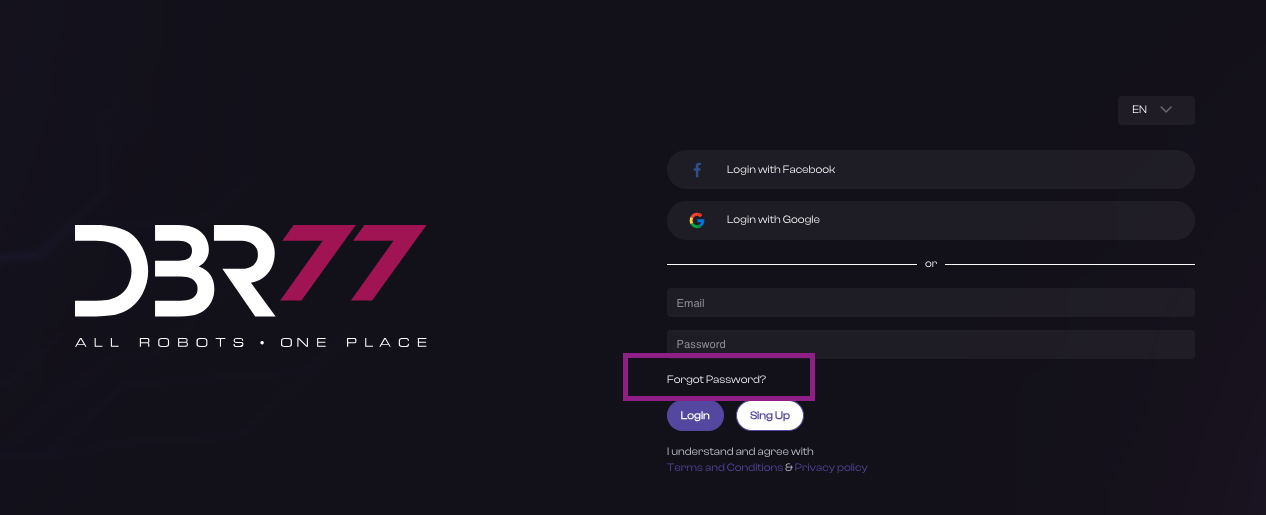
Start the Password Recovery Process:
- On the login page, below the fields for entering your details, find and click on the “Forgot Password?” link.
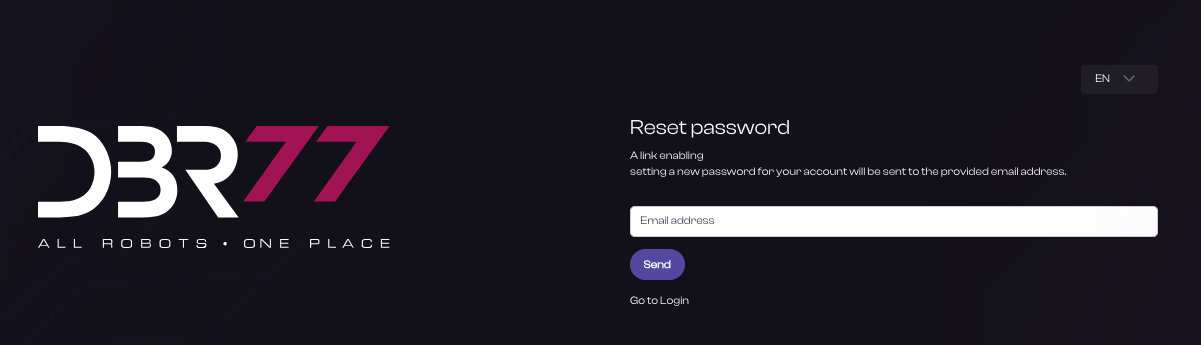
Enter Your Email Address:
- Enter the email address you used to register your DBR77 platform account.
- Click the “Submit” button.
Check Your Email Inbox:
- Open your email inbox associated with the account.
- Look for an email from DBR77 with instructions on resetting your password. Check your “Inbox,” “Spam,” or “Trash” folders if necessary.
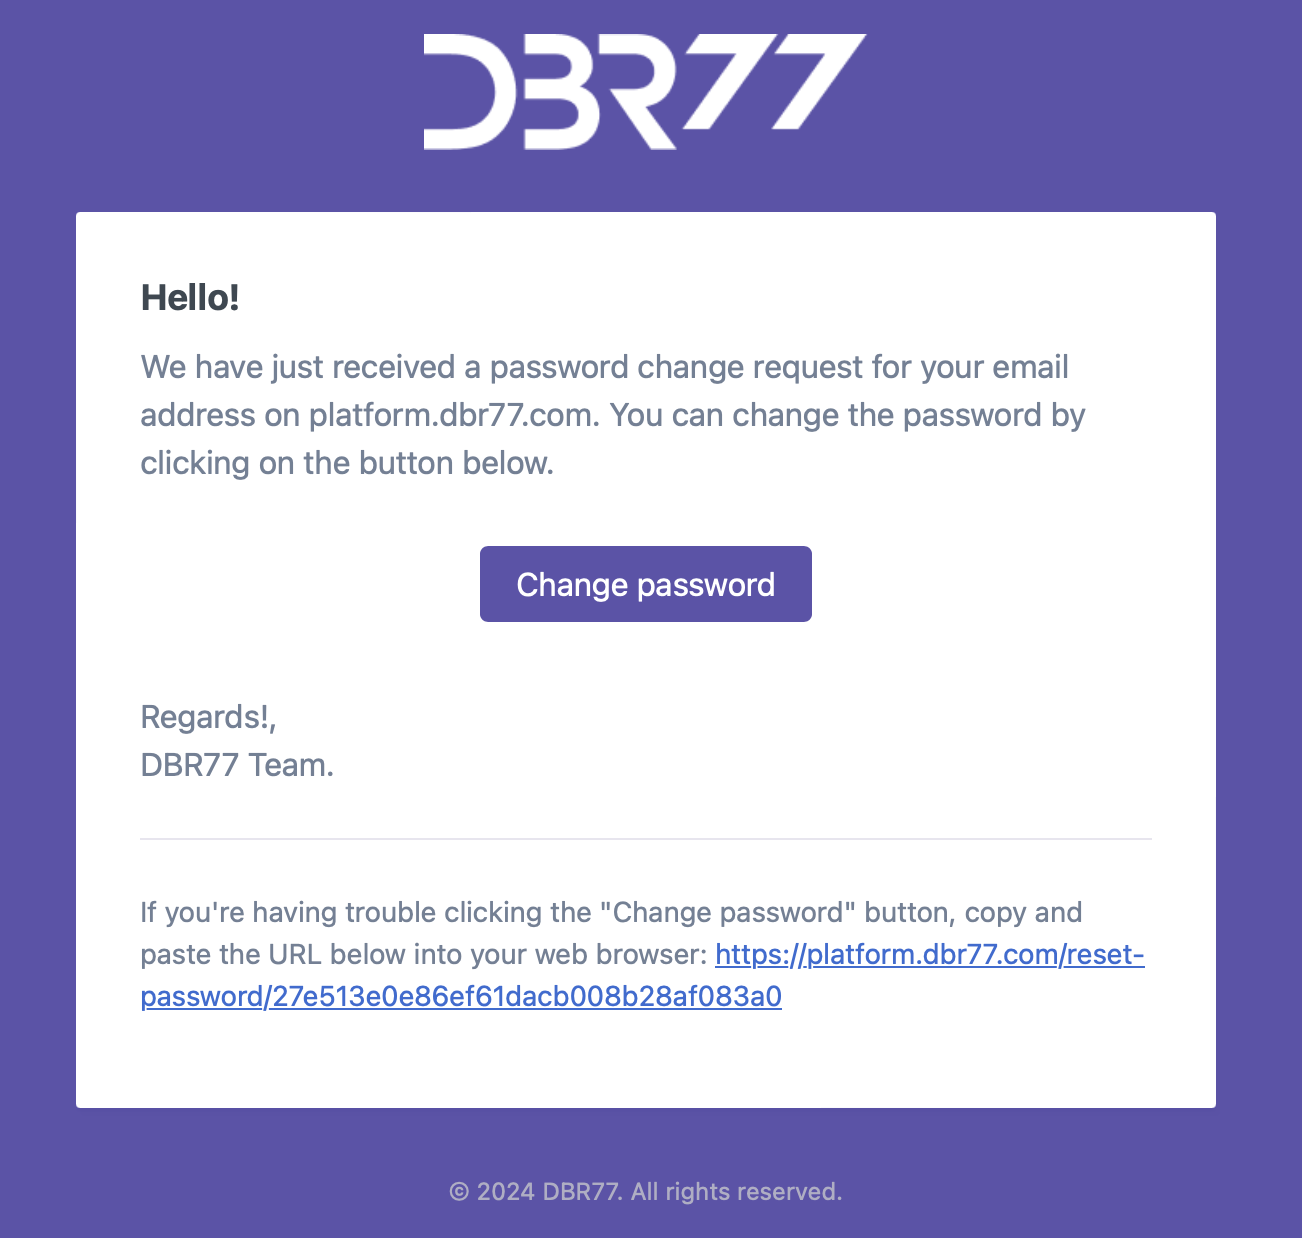
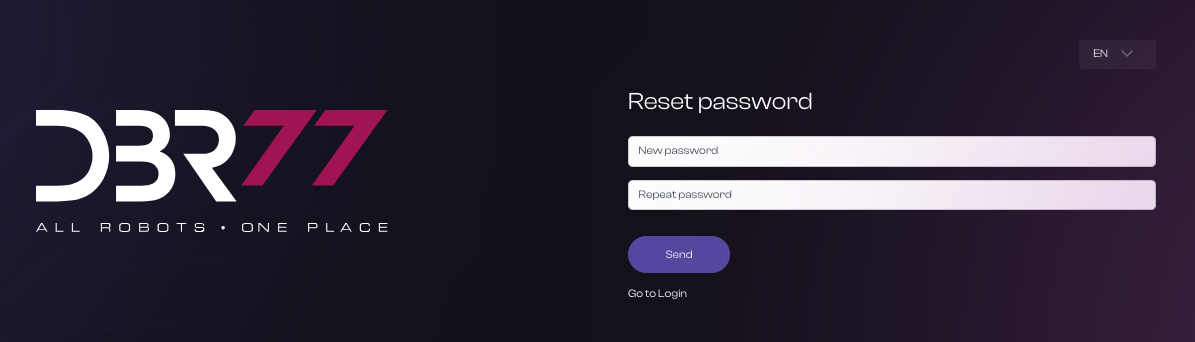
Reset Your Password:
- Click on the password reset link in the email. You will be redirected to the password reset page.
- Enter a new password in the designated fields. Ensure the new password is strong and hard to guess.
- Confirm the new password by re-entering it in the appropriate field.
- Click the “Submit” button.
Log In to the Platform:
- After successfully resetting your password, return to the login page.
- Enter your email address and new password.
- Click “Log in” to complete authentication.
Security:
- It is important to keep your new password secure and not share it with others.
- By following these steps, you will regain access to your account on the DBR77 platform.
Home
Notifications
Instructions for Using Notifications on the DBR77 Platform
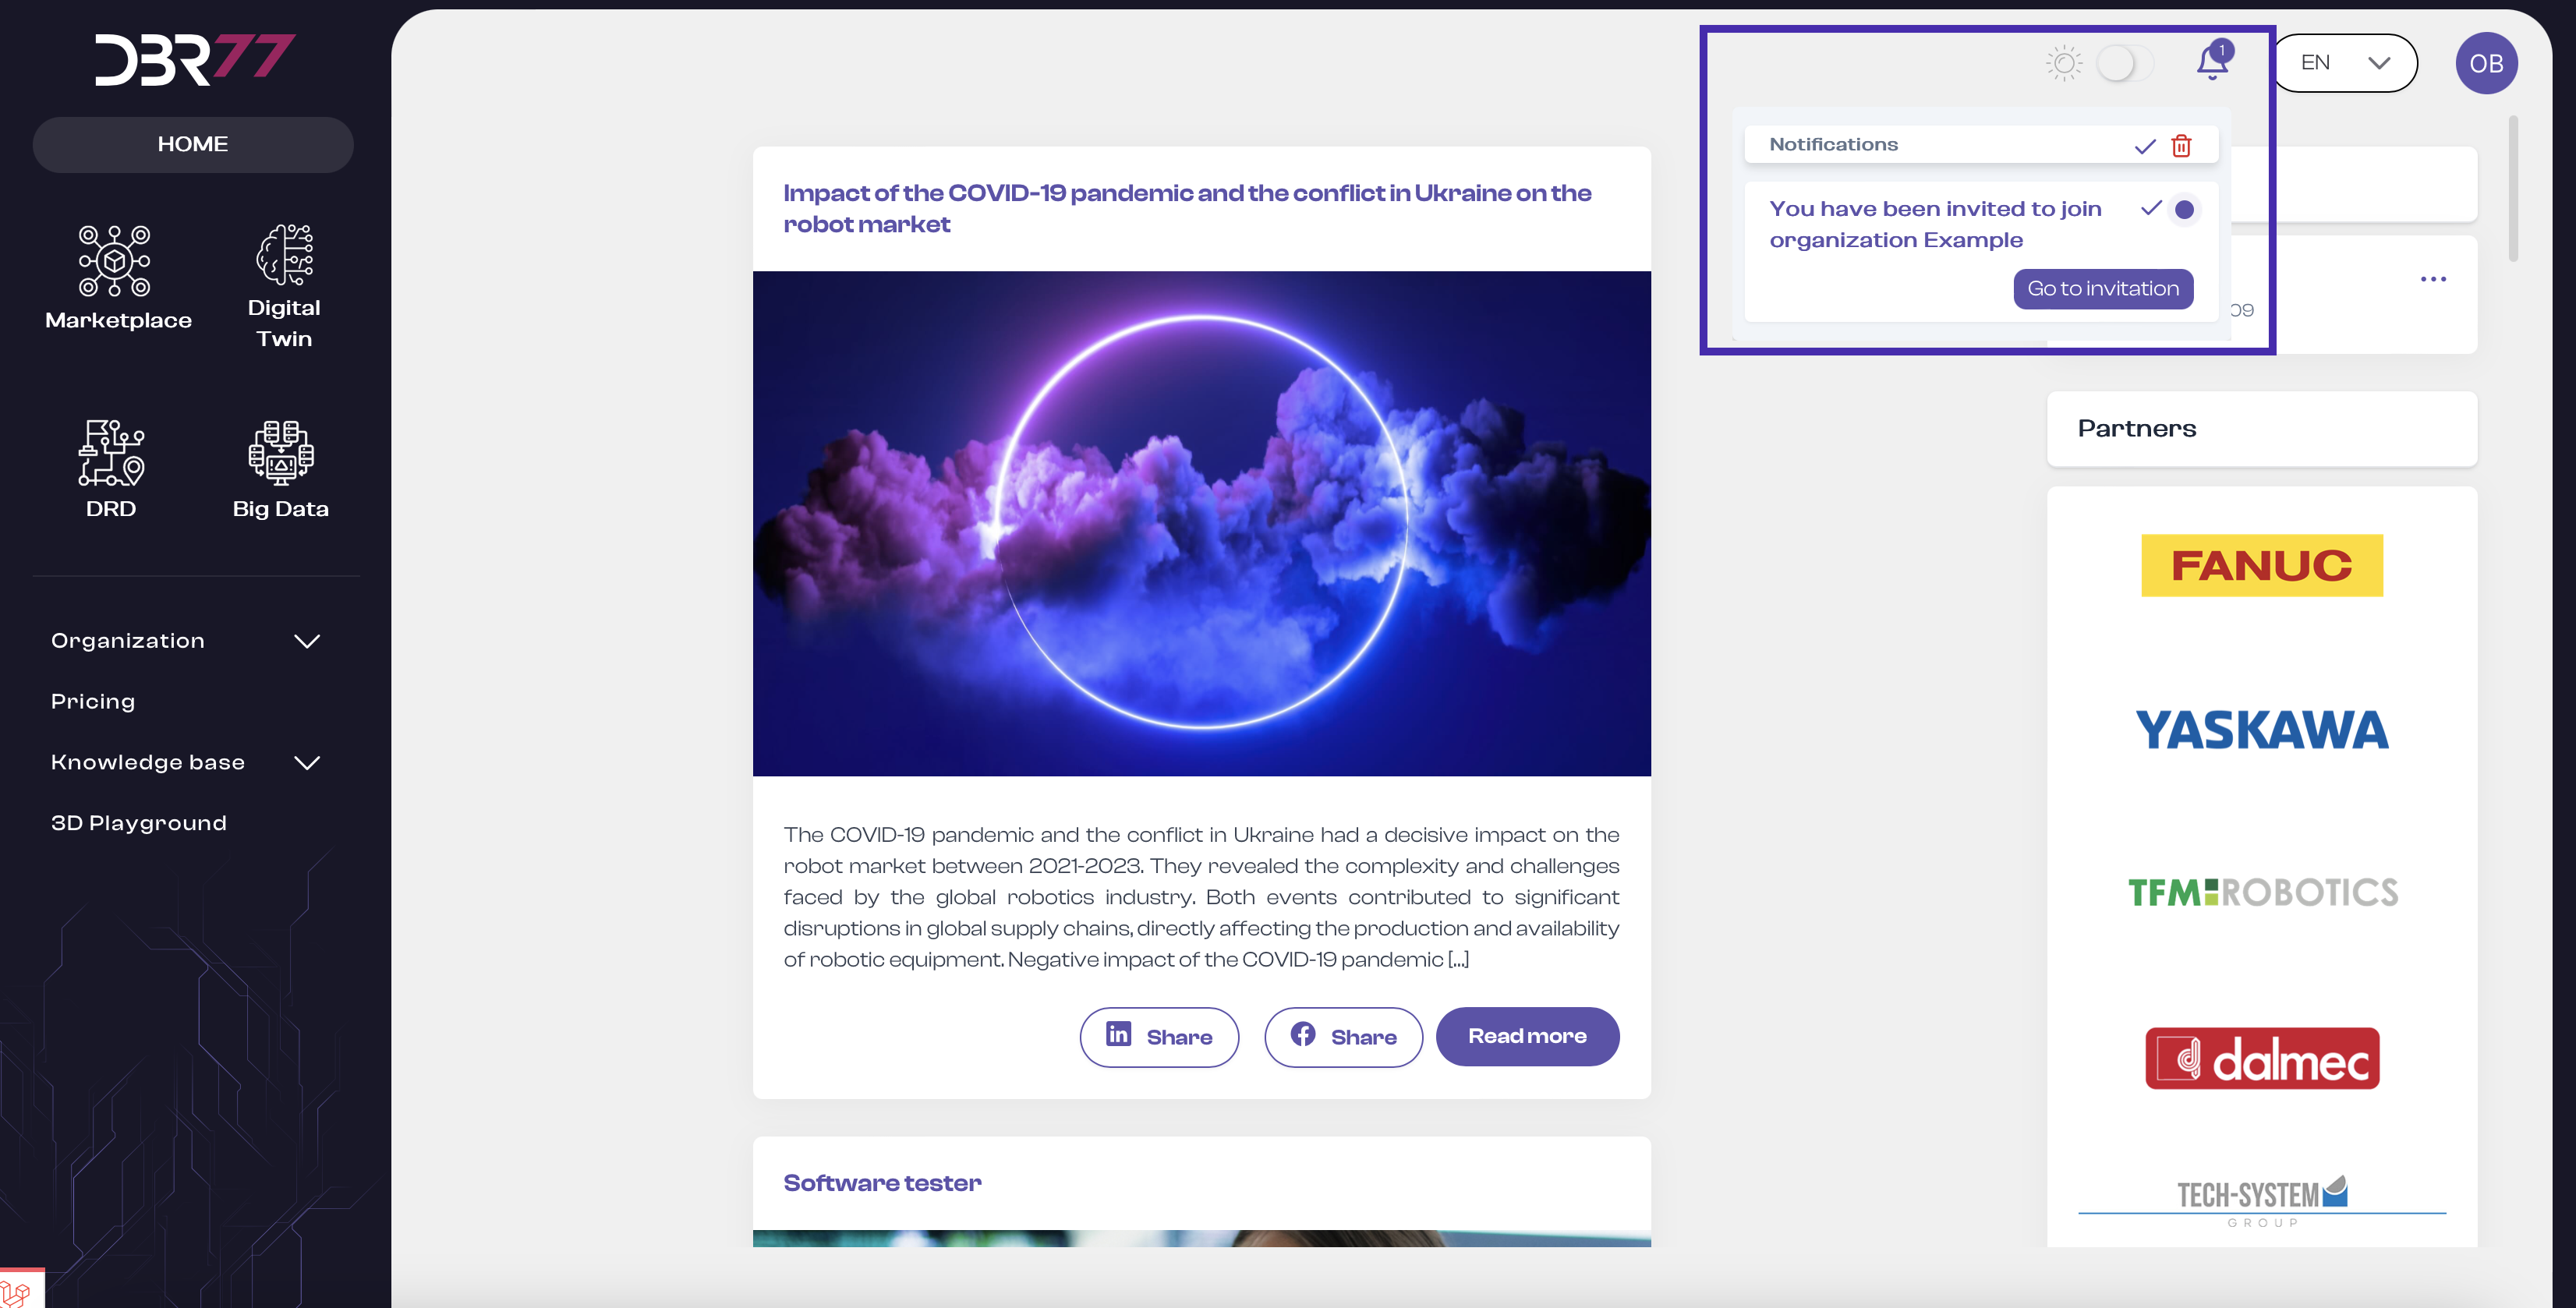
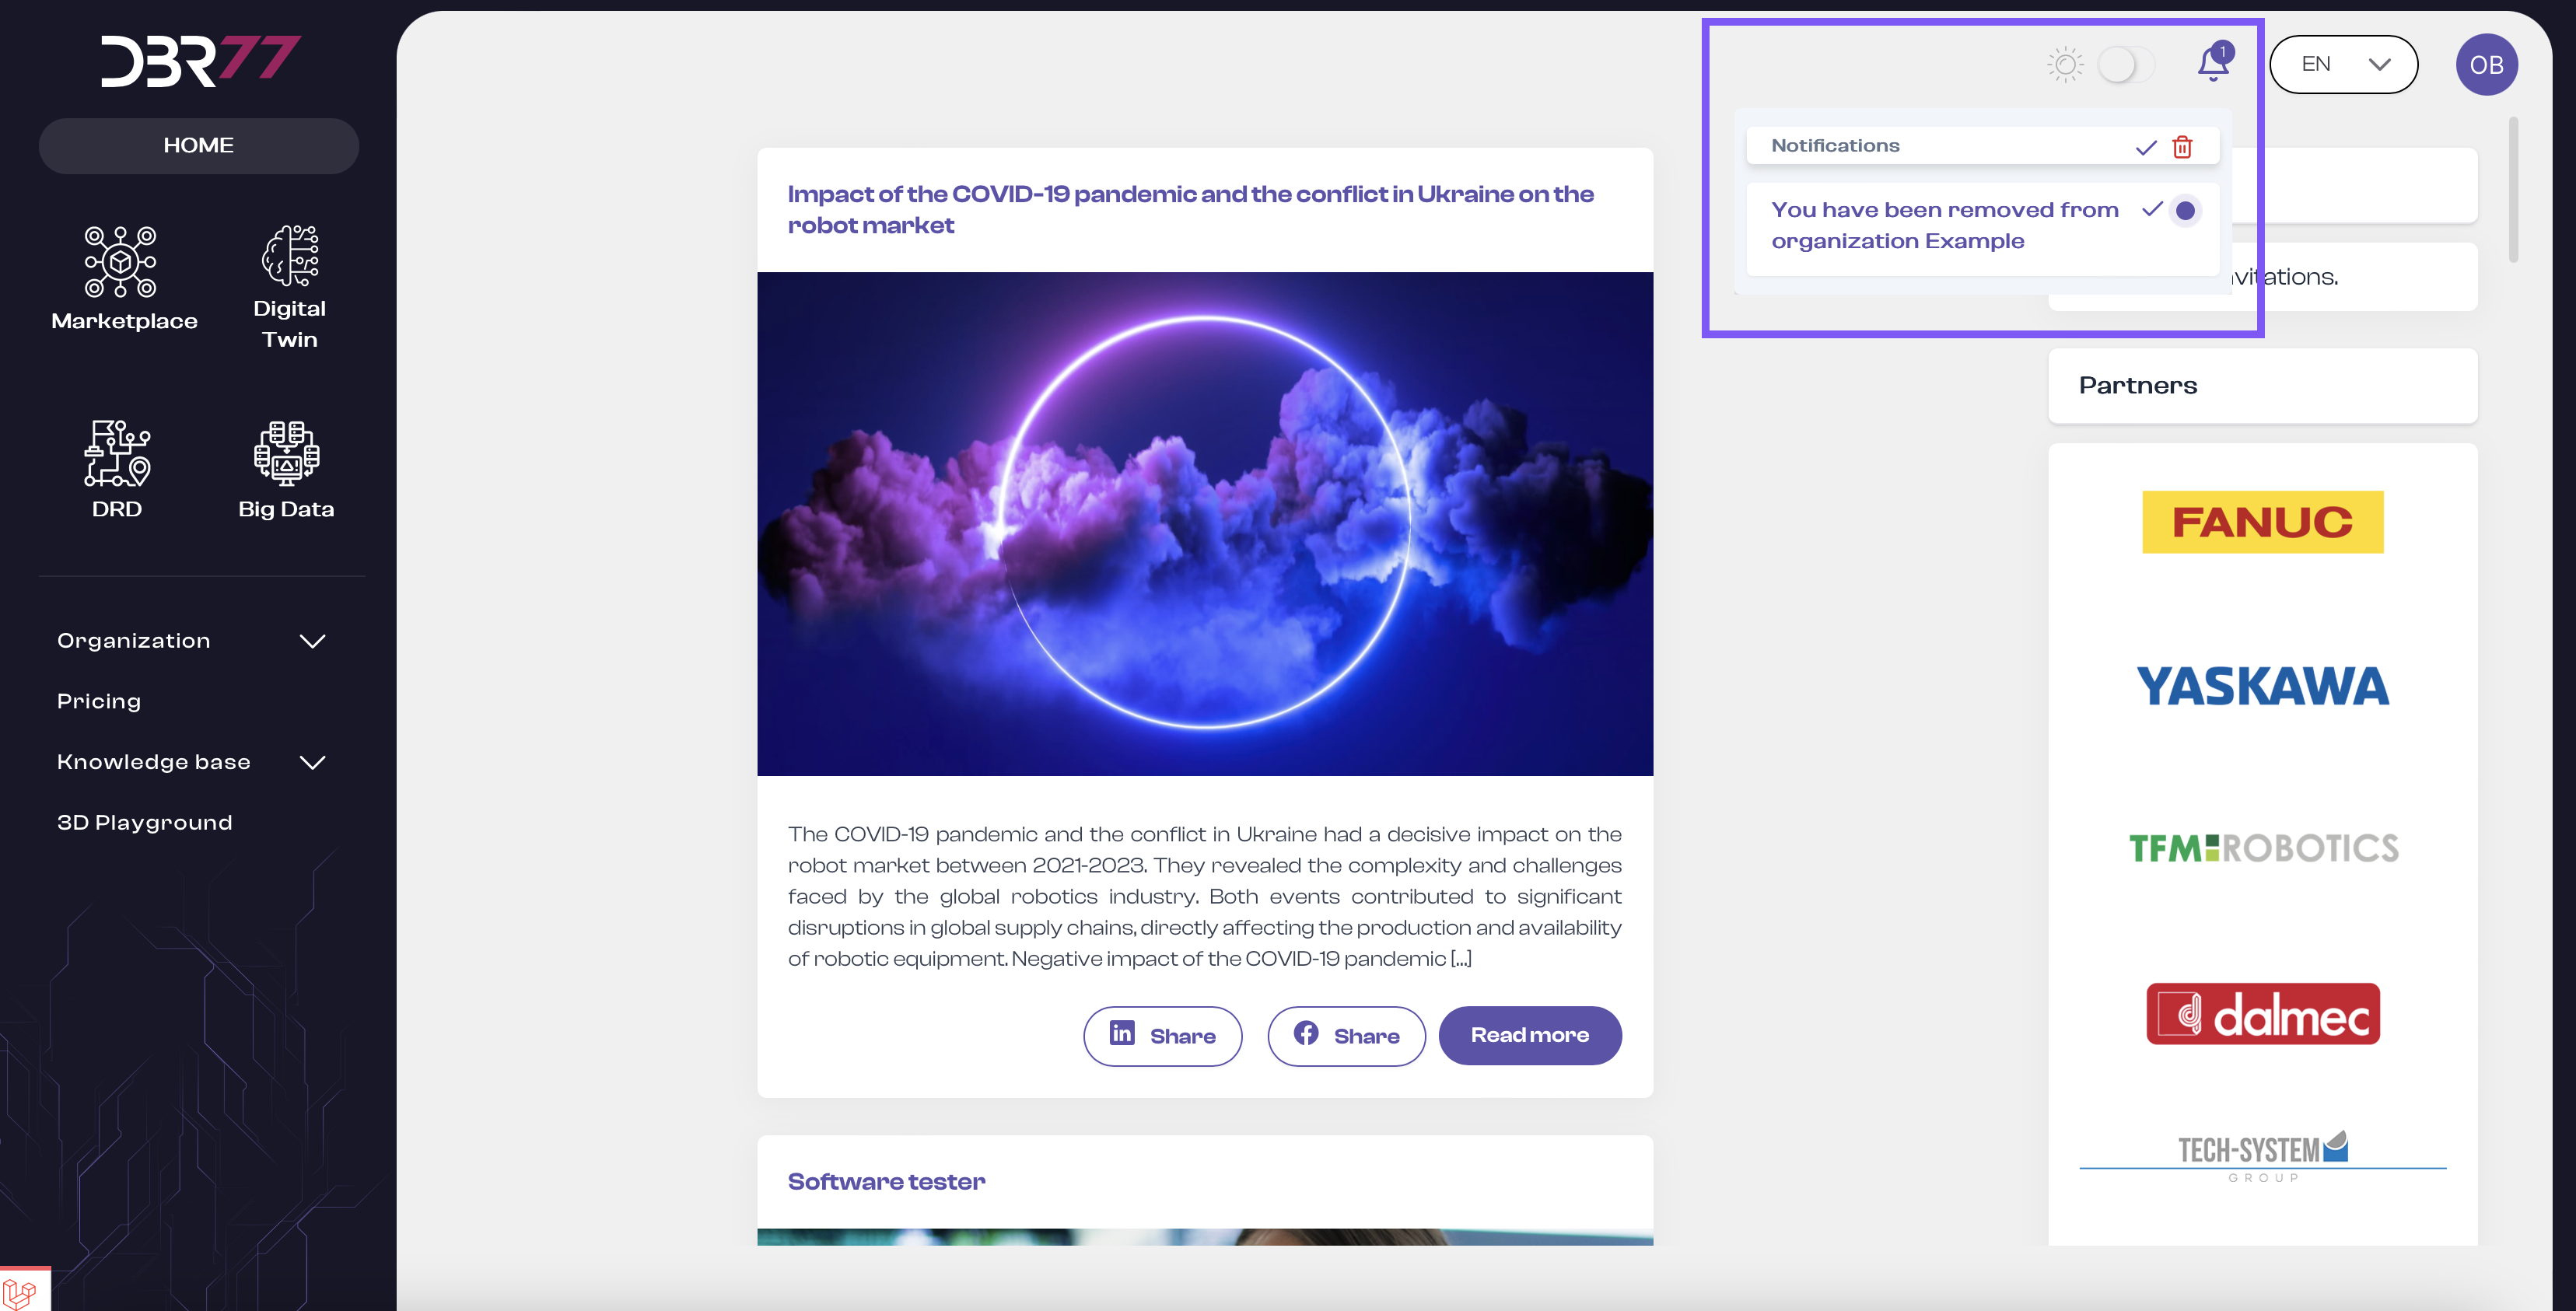
After logging in to the DBR77 platform, you can find notifications in the upper right corner of the navigation bar.
Location of Notifications:
In the upper right corner of the screen on the navigation bar, you will see a bell icon. All notifications appear here.
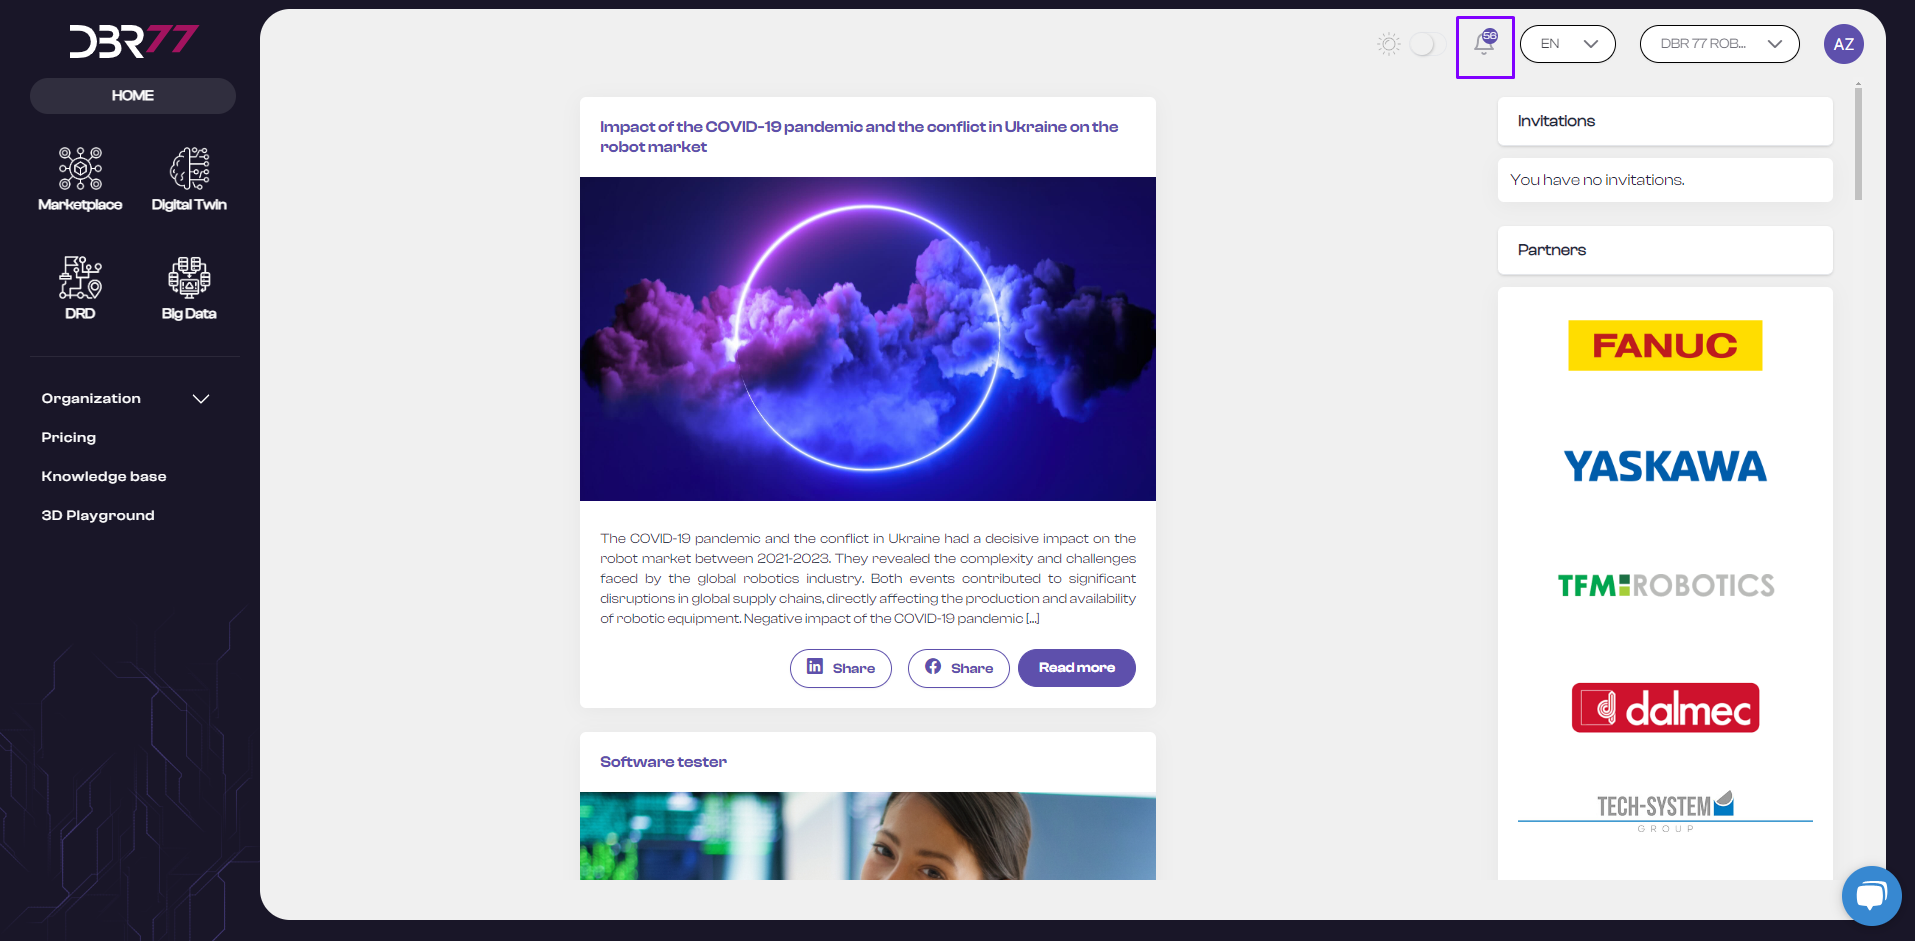
Checking Notifications:
- Click on the bell icon to open the list of notifications.
- Here you will see the latest information, updates, and important messages about your account and activities on the platform.
- The system alerts you to new notifications by displaying a number on the bell icon.
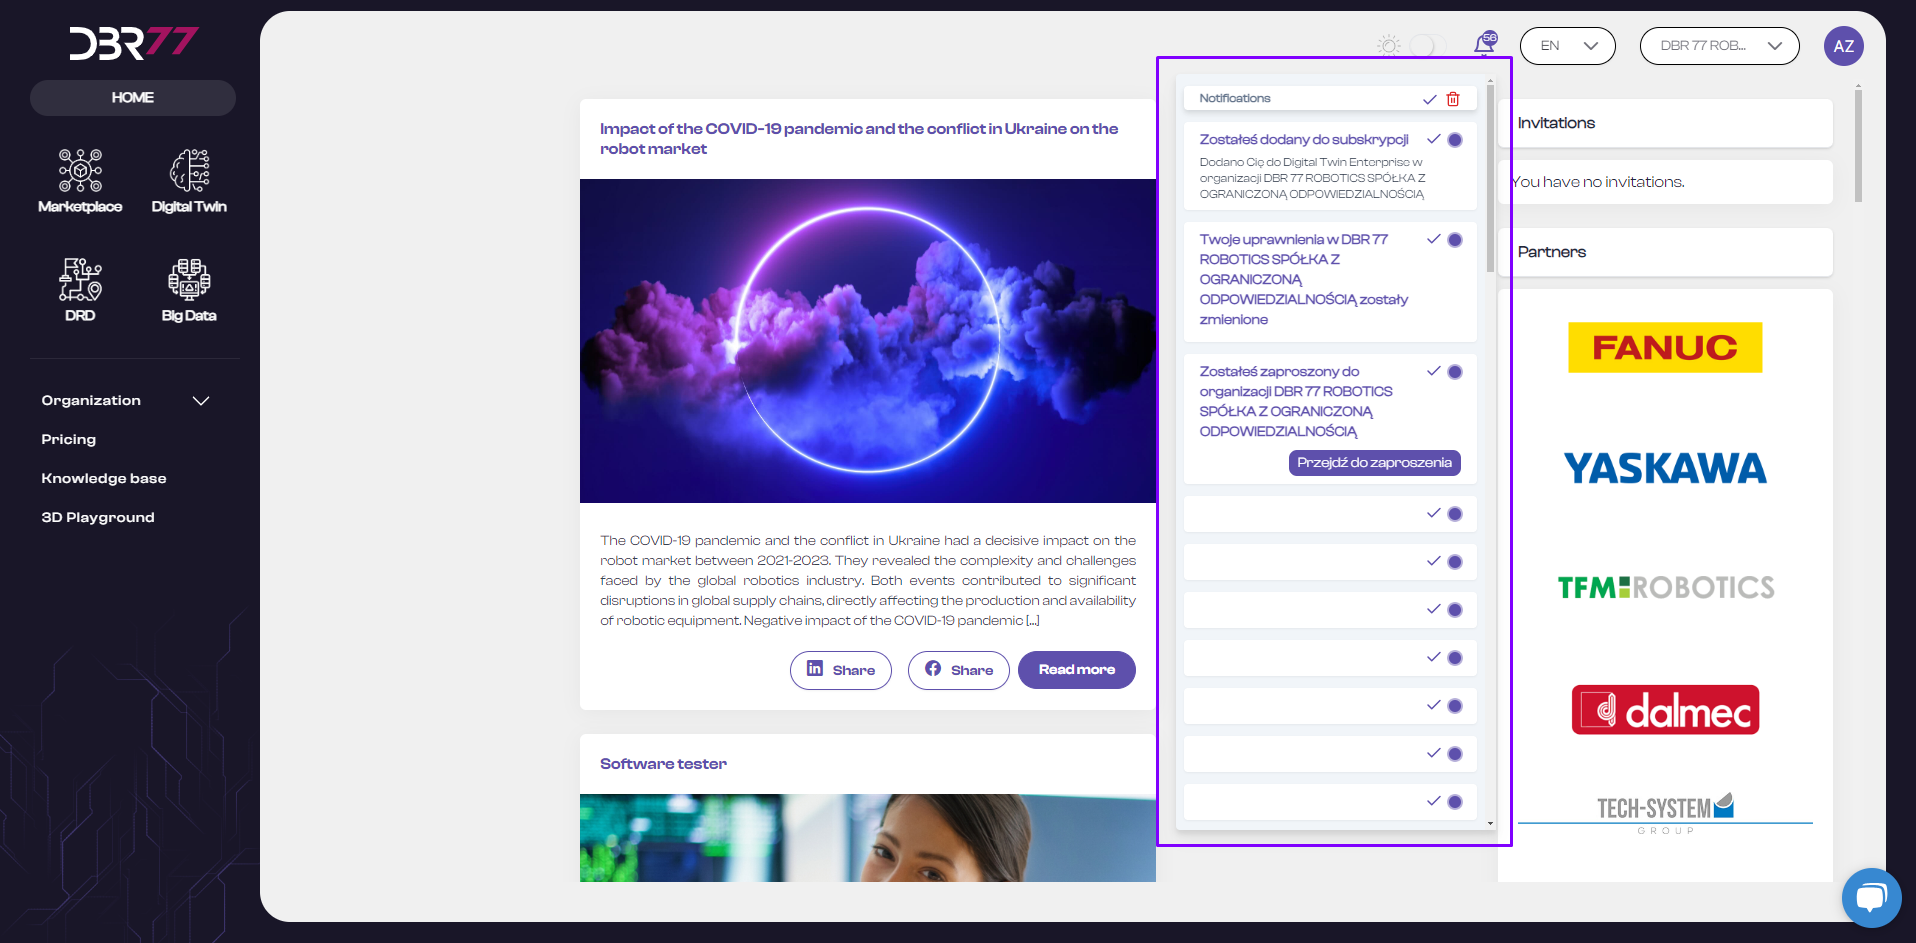
Managing Notifications:
- Read each notification carefully.
- After reading a notification, you can mark it as “read” by clicking the checkmark on the right side of the notification, helping you keep track of what you’ve reviewed.
- To delete a notification, click the trash icon next to it.
- To quickly mark all notifications as read or delete them, click the checkmark or trash icon at the top of the notification list.

Actions After Receiving a Notification:
- After clicking on a notification, you will be redirected to the relevant section of the platform where you can take further actions as needed.
- Notifications on the DBR77 platform are essential for staying updated on important information and ensuring you don’t miss any critical updates.
Setting the Language Version
Instructions for Setting the Language Version on the DBR77 Platform
After logging in to the DBR77 platform, you can easily change the language by following these steps:
Find the Navigation Bar:
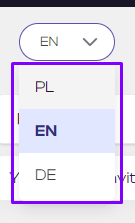
In the upper right corner of the screen, on the navigation bar, locate the language selection icon. Click on it to open the list of available language options.
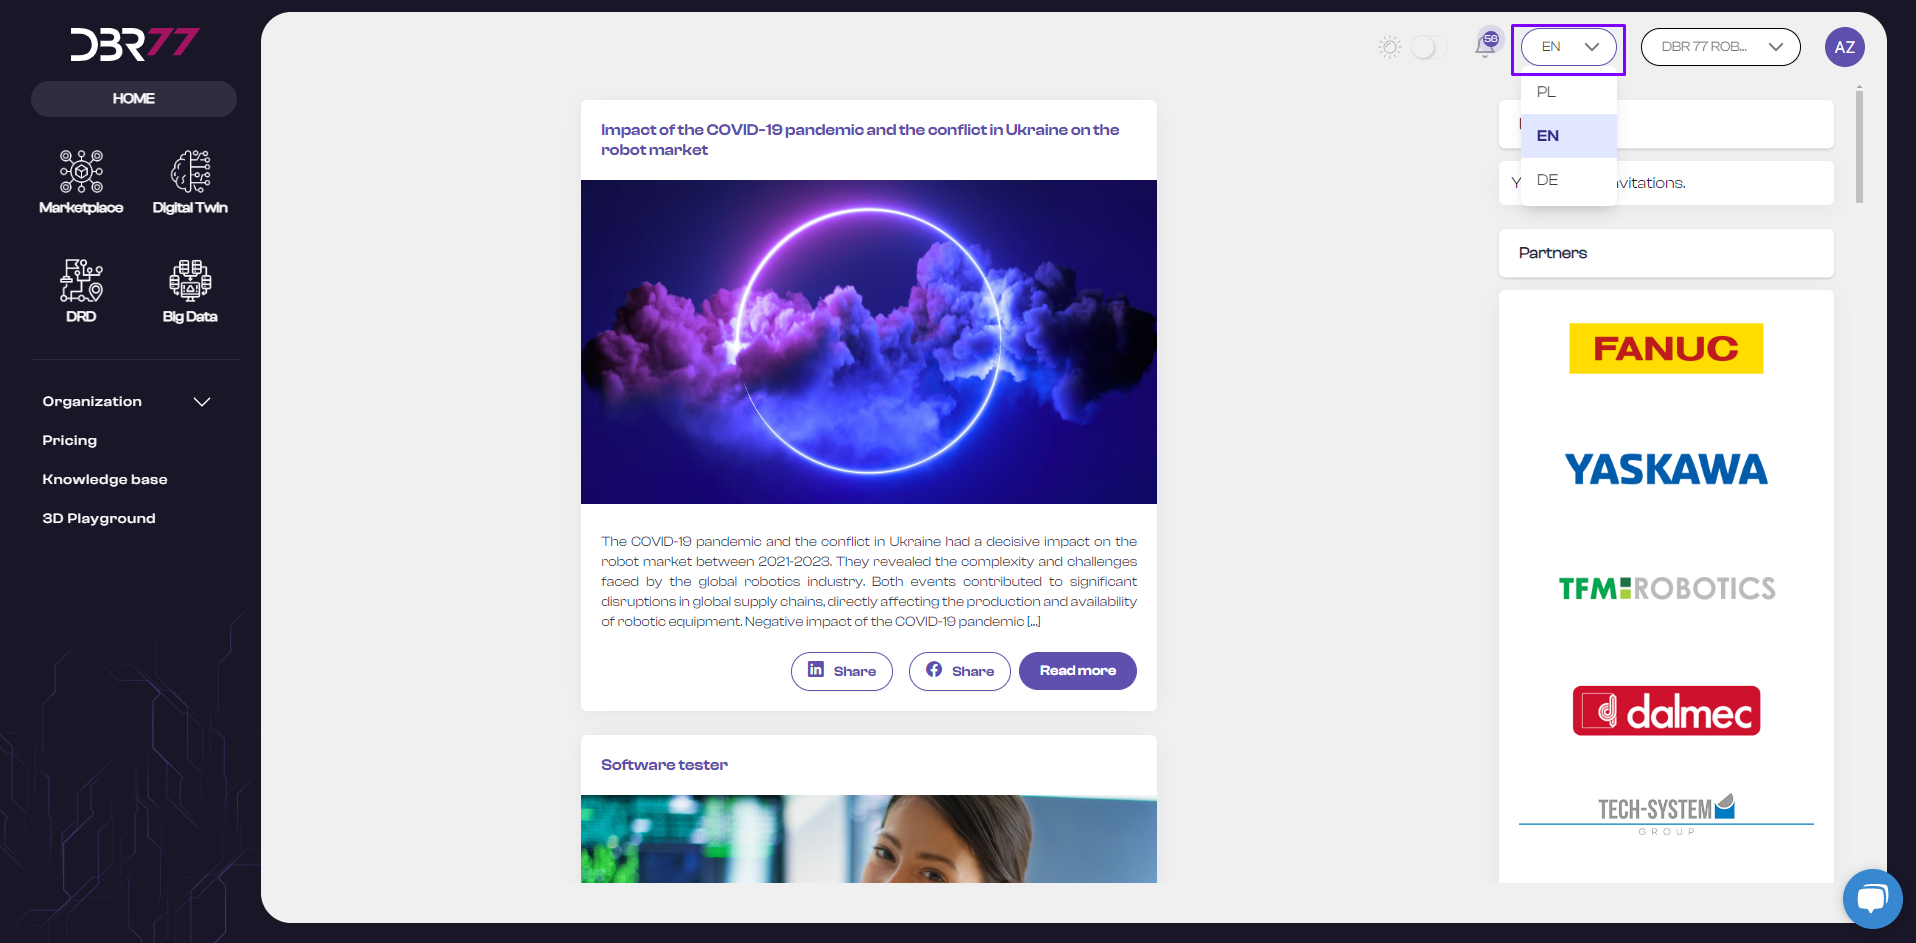
Select Your Preferred Language:
- Click on the language option and choose your preferred language from the list of available options.
- Once selected, the platform will automatically translate to the chosen language.
Your Language Version Has Been Changed!
You can now use the DBR77 platform in your selected language.
Switching Between Organizations
Instructions for Switching Between Organizations on the DBR77 Platform
During registration on the DBR77 platform, you enter company information in the third step.
If you select an existing company, you will be assigned to two organizations: your own and the one to which you declared affiliation in the form. You can also become a member of multiple organizations. After selecting an organization, all actions on your account will be associated with that organization.
After logging in to the DBR77 platform, you can easily switch between organizations by following these steps:

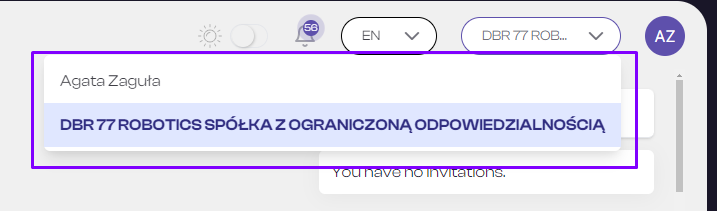
Select the Organization:
- Click on the organization area and choose from the list of available organizations.
- The page will automatically refresh after selection.
Your Organization Has Been Changed!
You can now use the DBR77 platform as a member of the selected organization.
Profil
Instructions for Using Notifications on the DBR77 Platform
Go to the homepage at DBR77.com and log into your account.
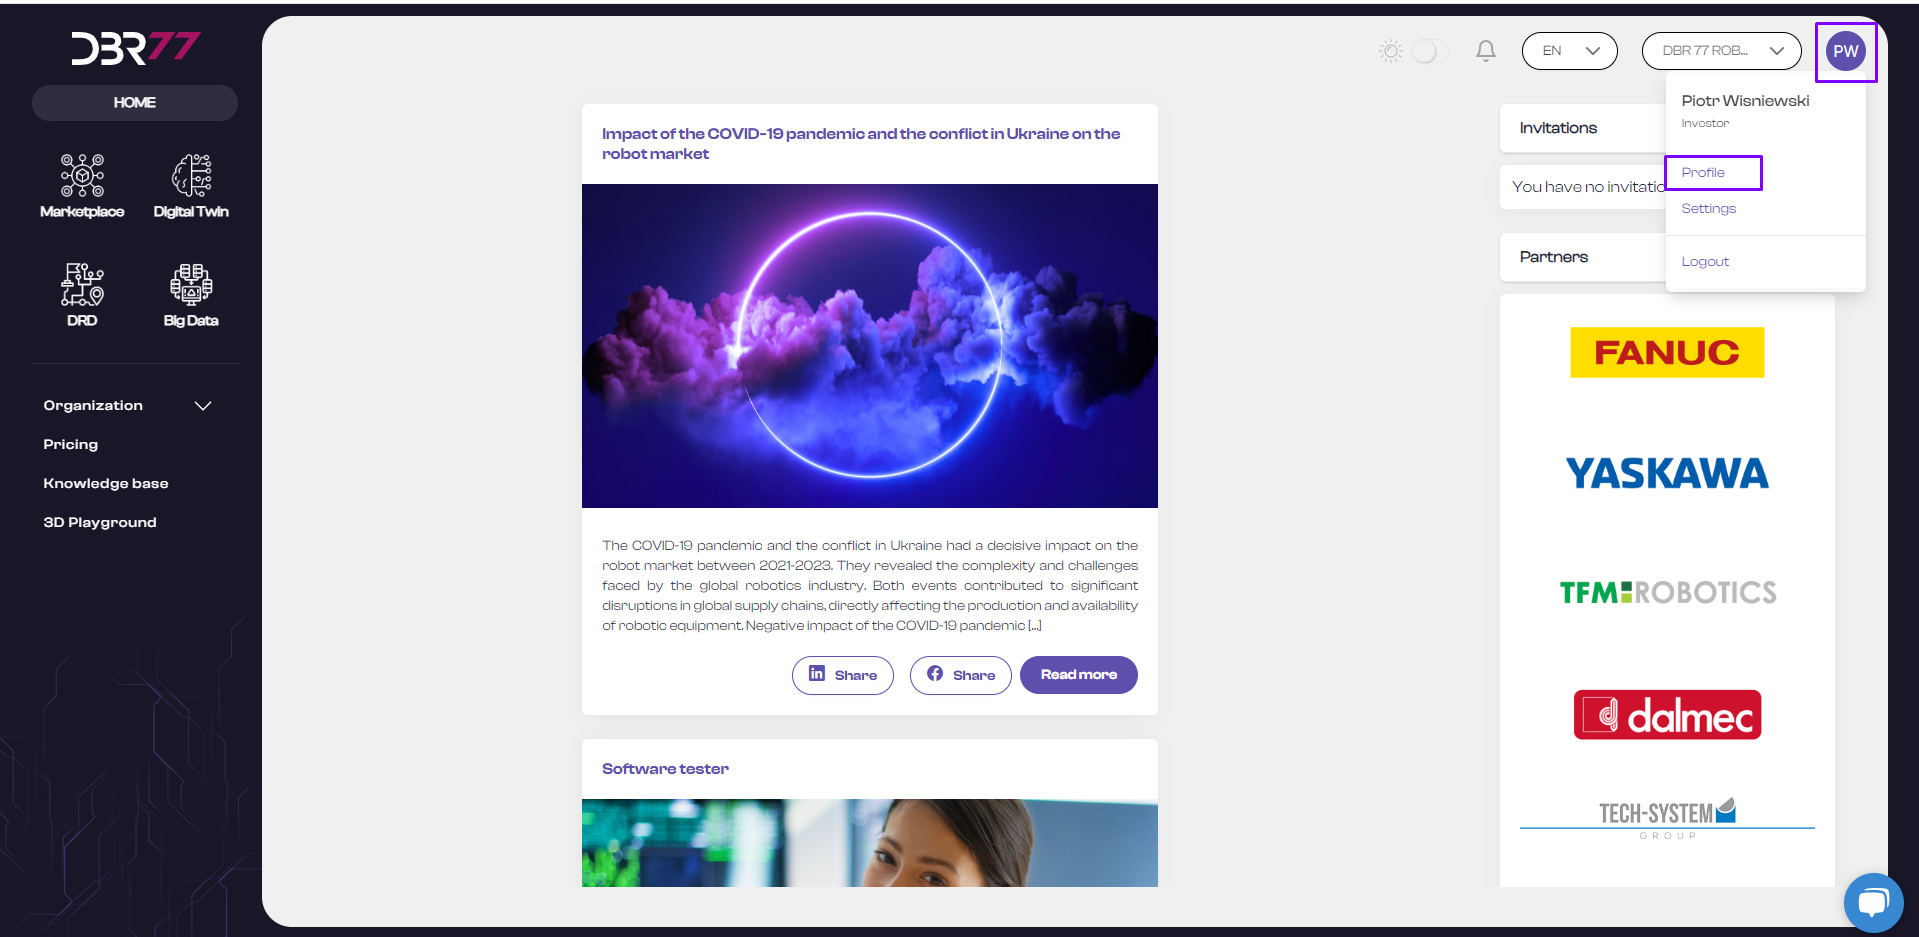
Find the User Menu:
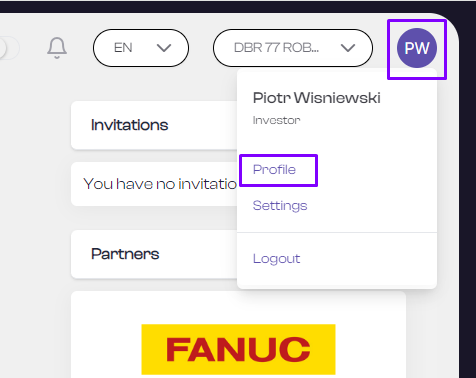
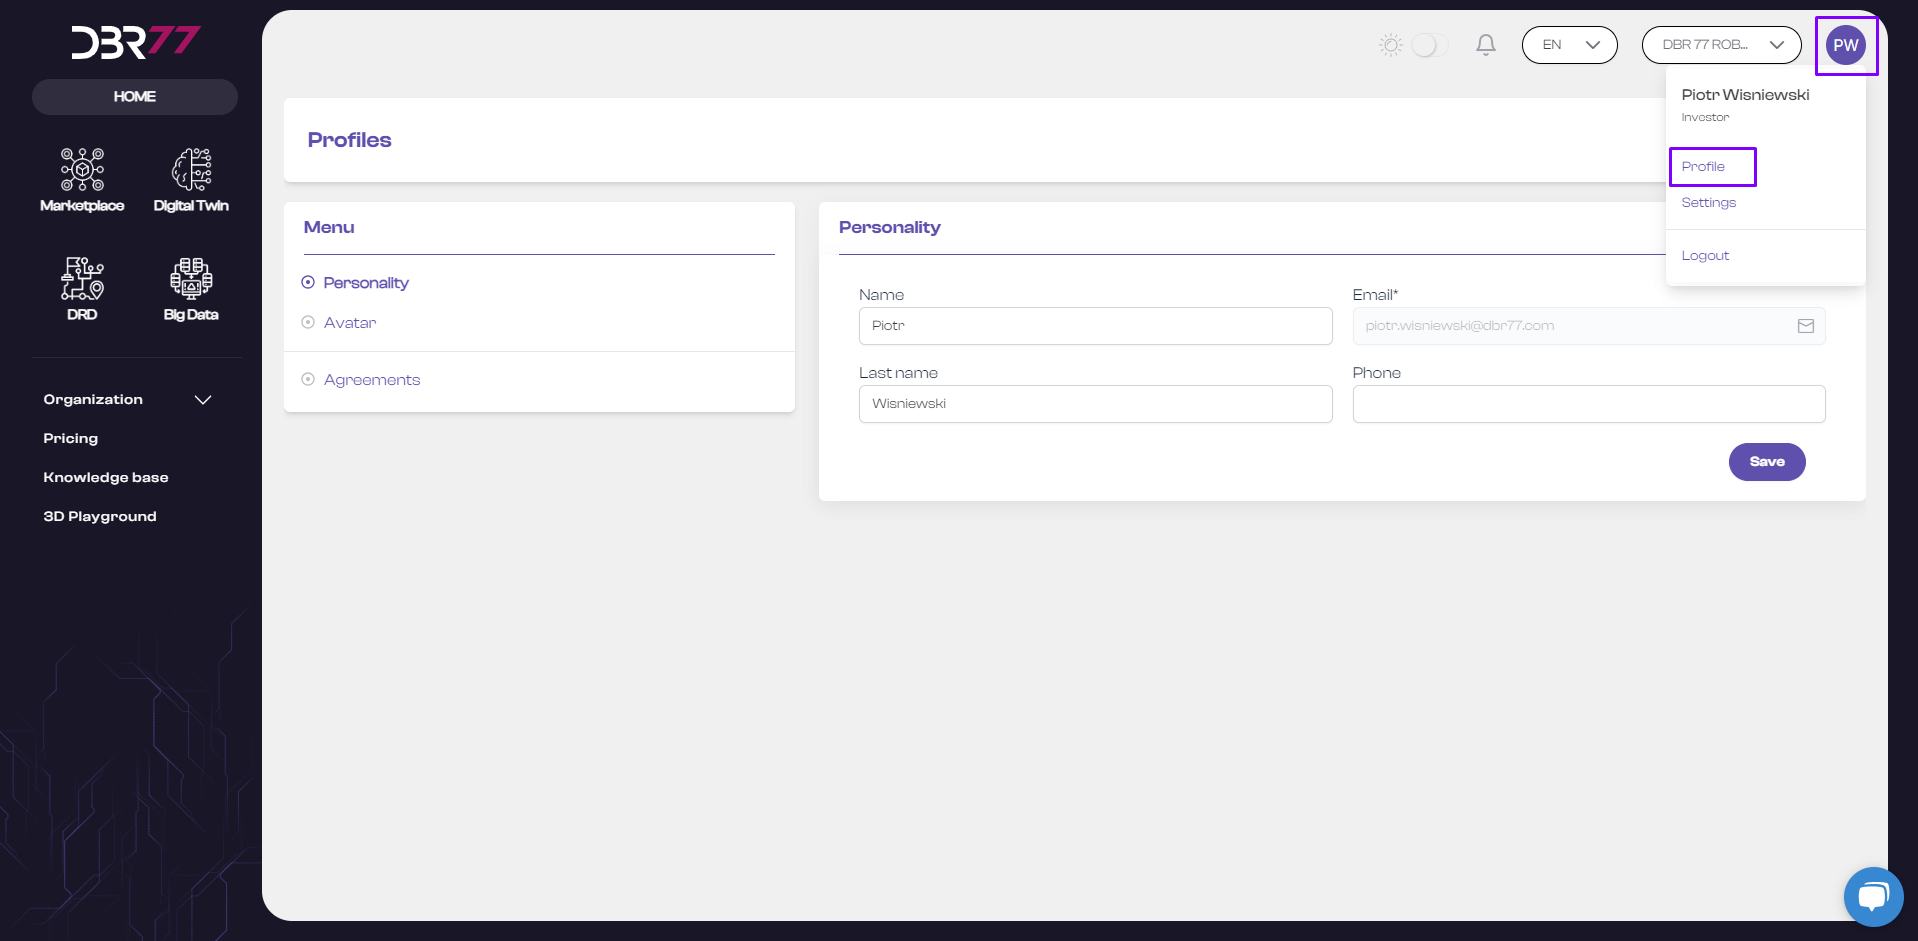
In the upper right corner of the screen, on the navigation bar, locate your profile icon. Click on it to open the user menu.

Go to Your Profile:
- Select “Profile” from the user menu to view or edit your data.
- In the profile menu, you can view and edit your information, add or change an avatar, and review the consents accepted during registration.
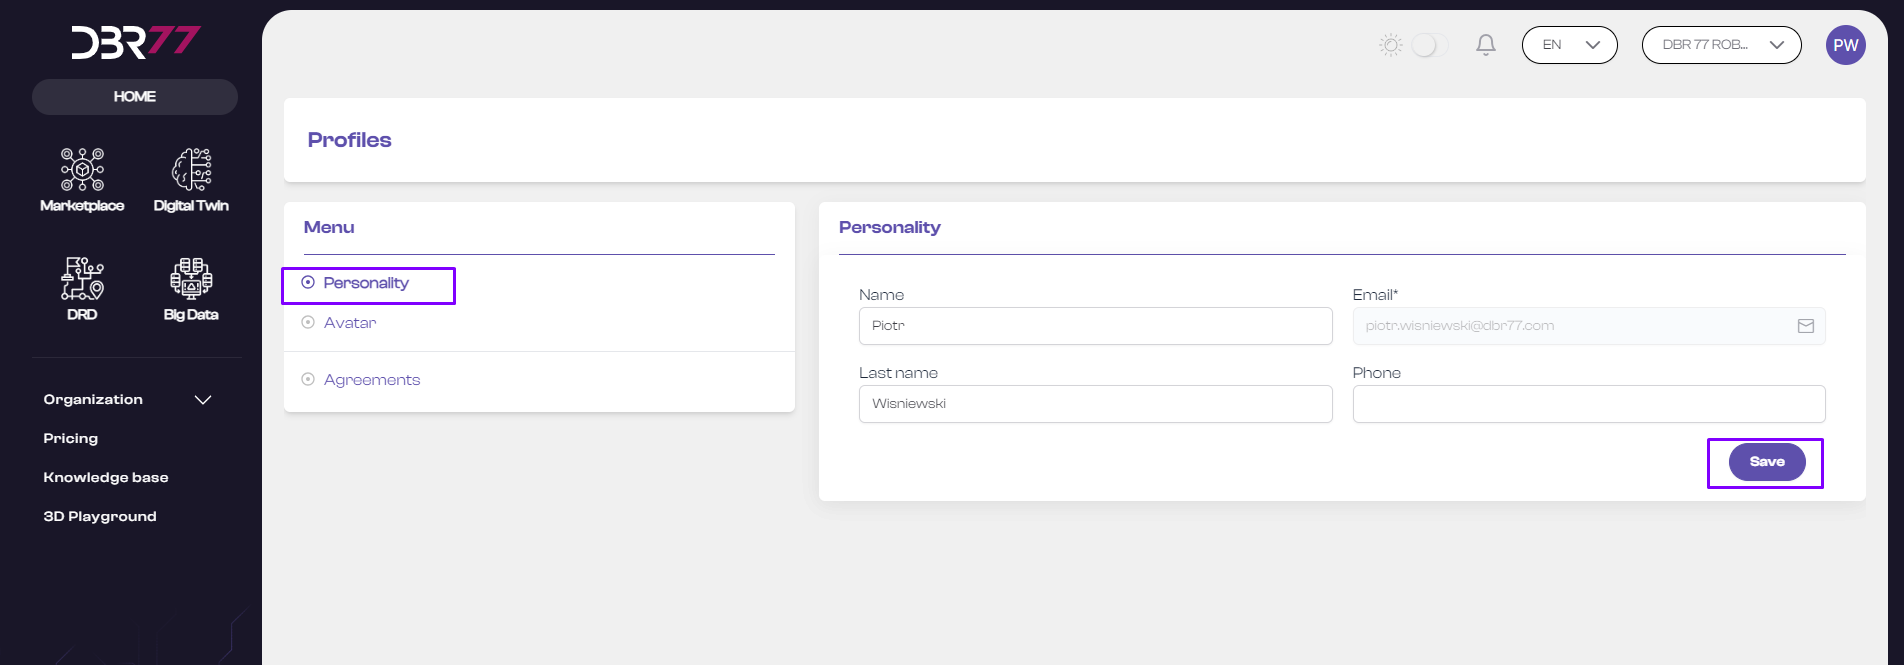
Edit Your Personal Information:
- On the profile page, you can edit personal details such as first name, last name, and phone number.
- Ensure all information is current and accurate.
- After making edits, click the “Save” button.

Edit Your Profile Picture – Avatar:

Save Changes:
- After making all necessary changes, click the “Save” button to confirm them.
Consents:
- Select “Agreements” in the user menu.
- Consents cannot be revoked; to maintain an account on the platform, all consents must be accepted.
- To view a specific document, click on it.

Invitations
Instructions for Managing Invitations on the DBR77 Platform
Go to the homepage at DBR77.com and log into your account.
Select the Homepage:
- In the upper left corner of the screen, below the DBR77 logo, you’ll find the Home icon.
- Click it to open the main view of the platform.

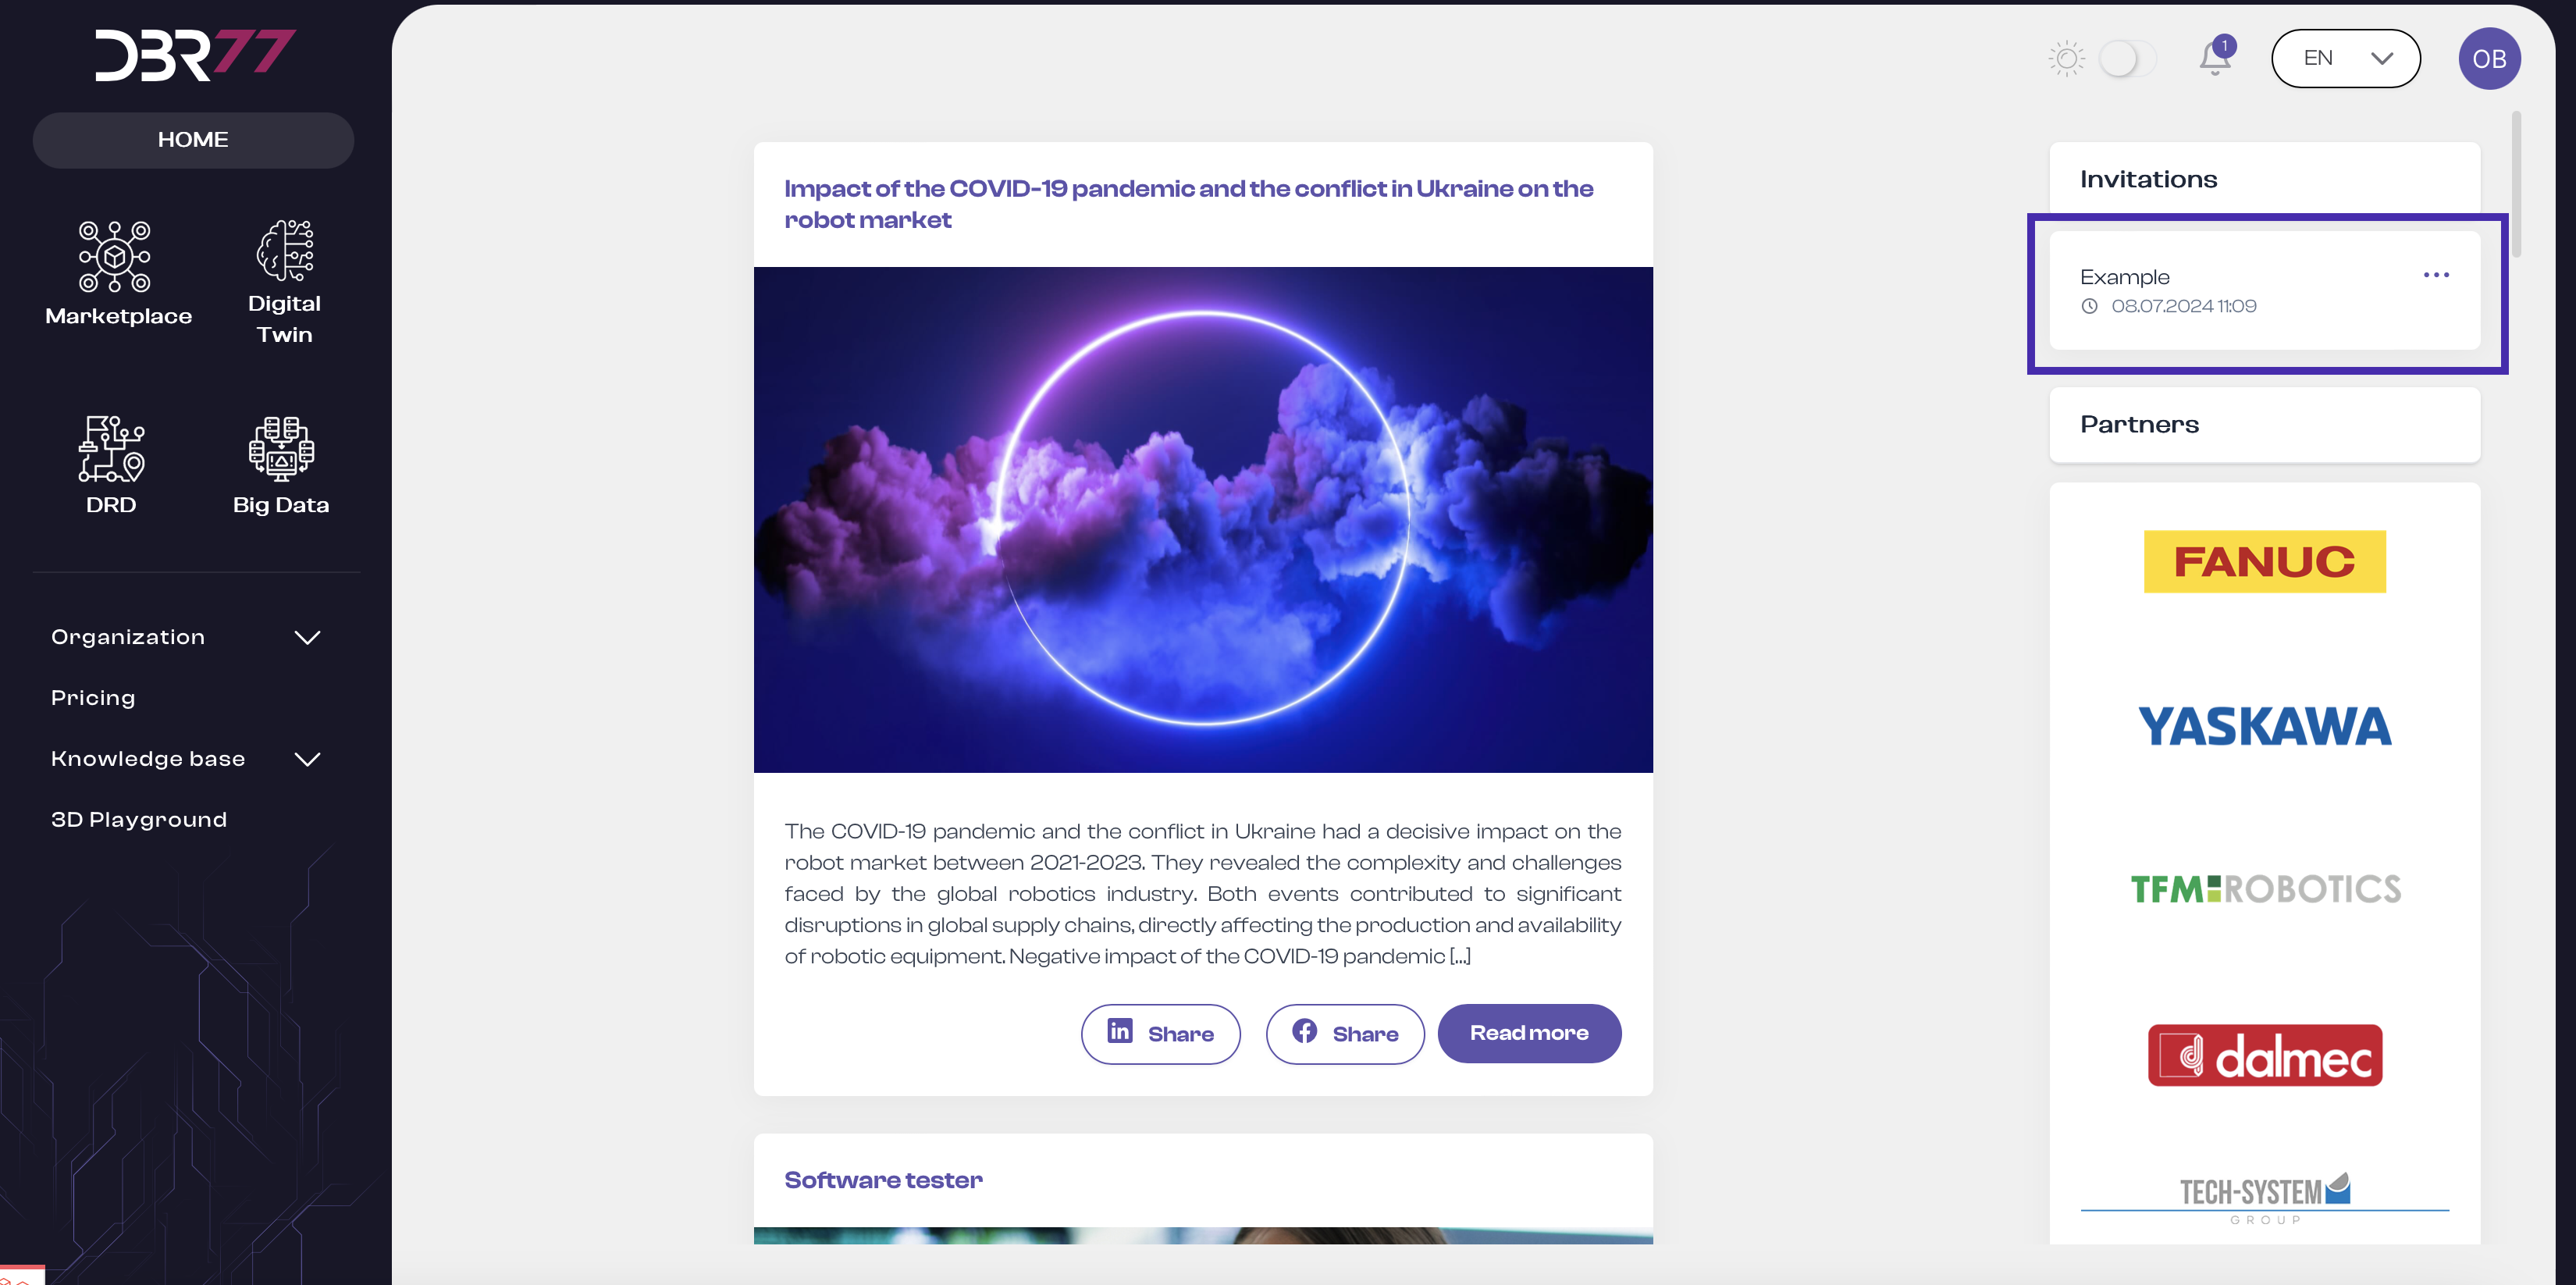
Where to Find Invitations:
- In the upper right corner of the screen, under the navigation bar, you’ll find the “Invitations” option.
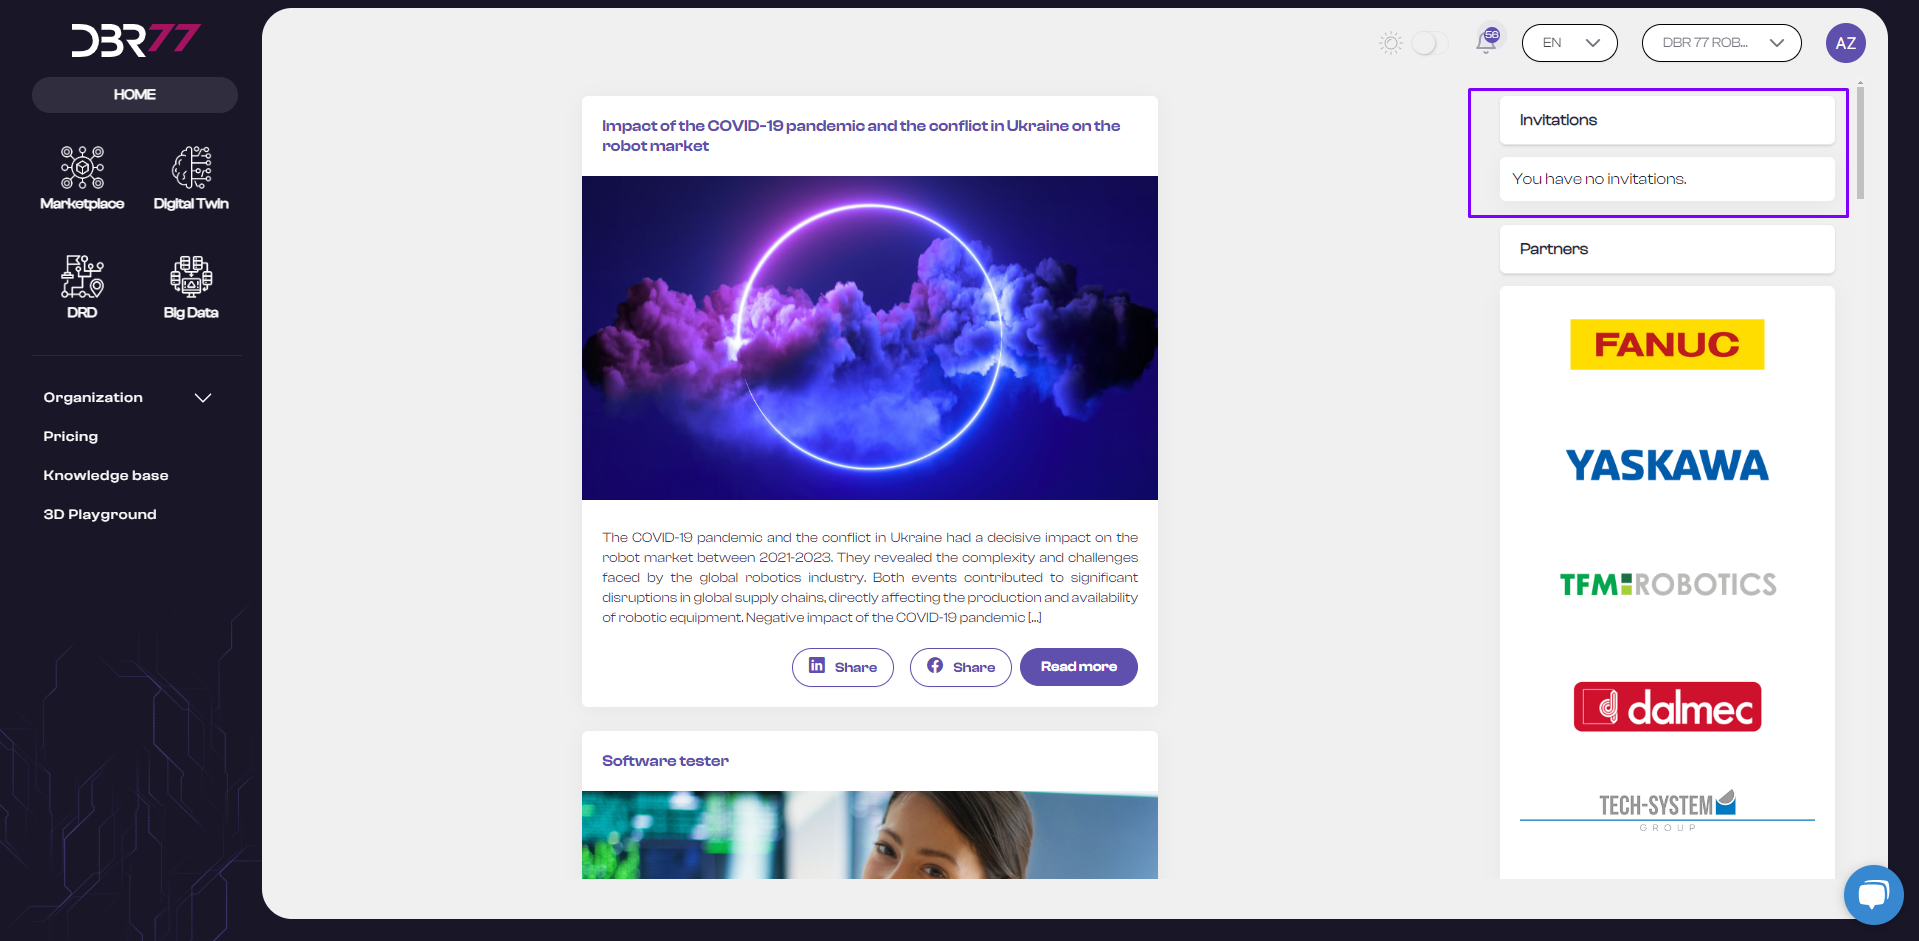
Browse Invitations:
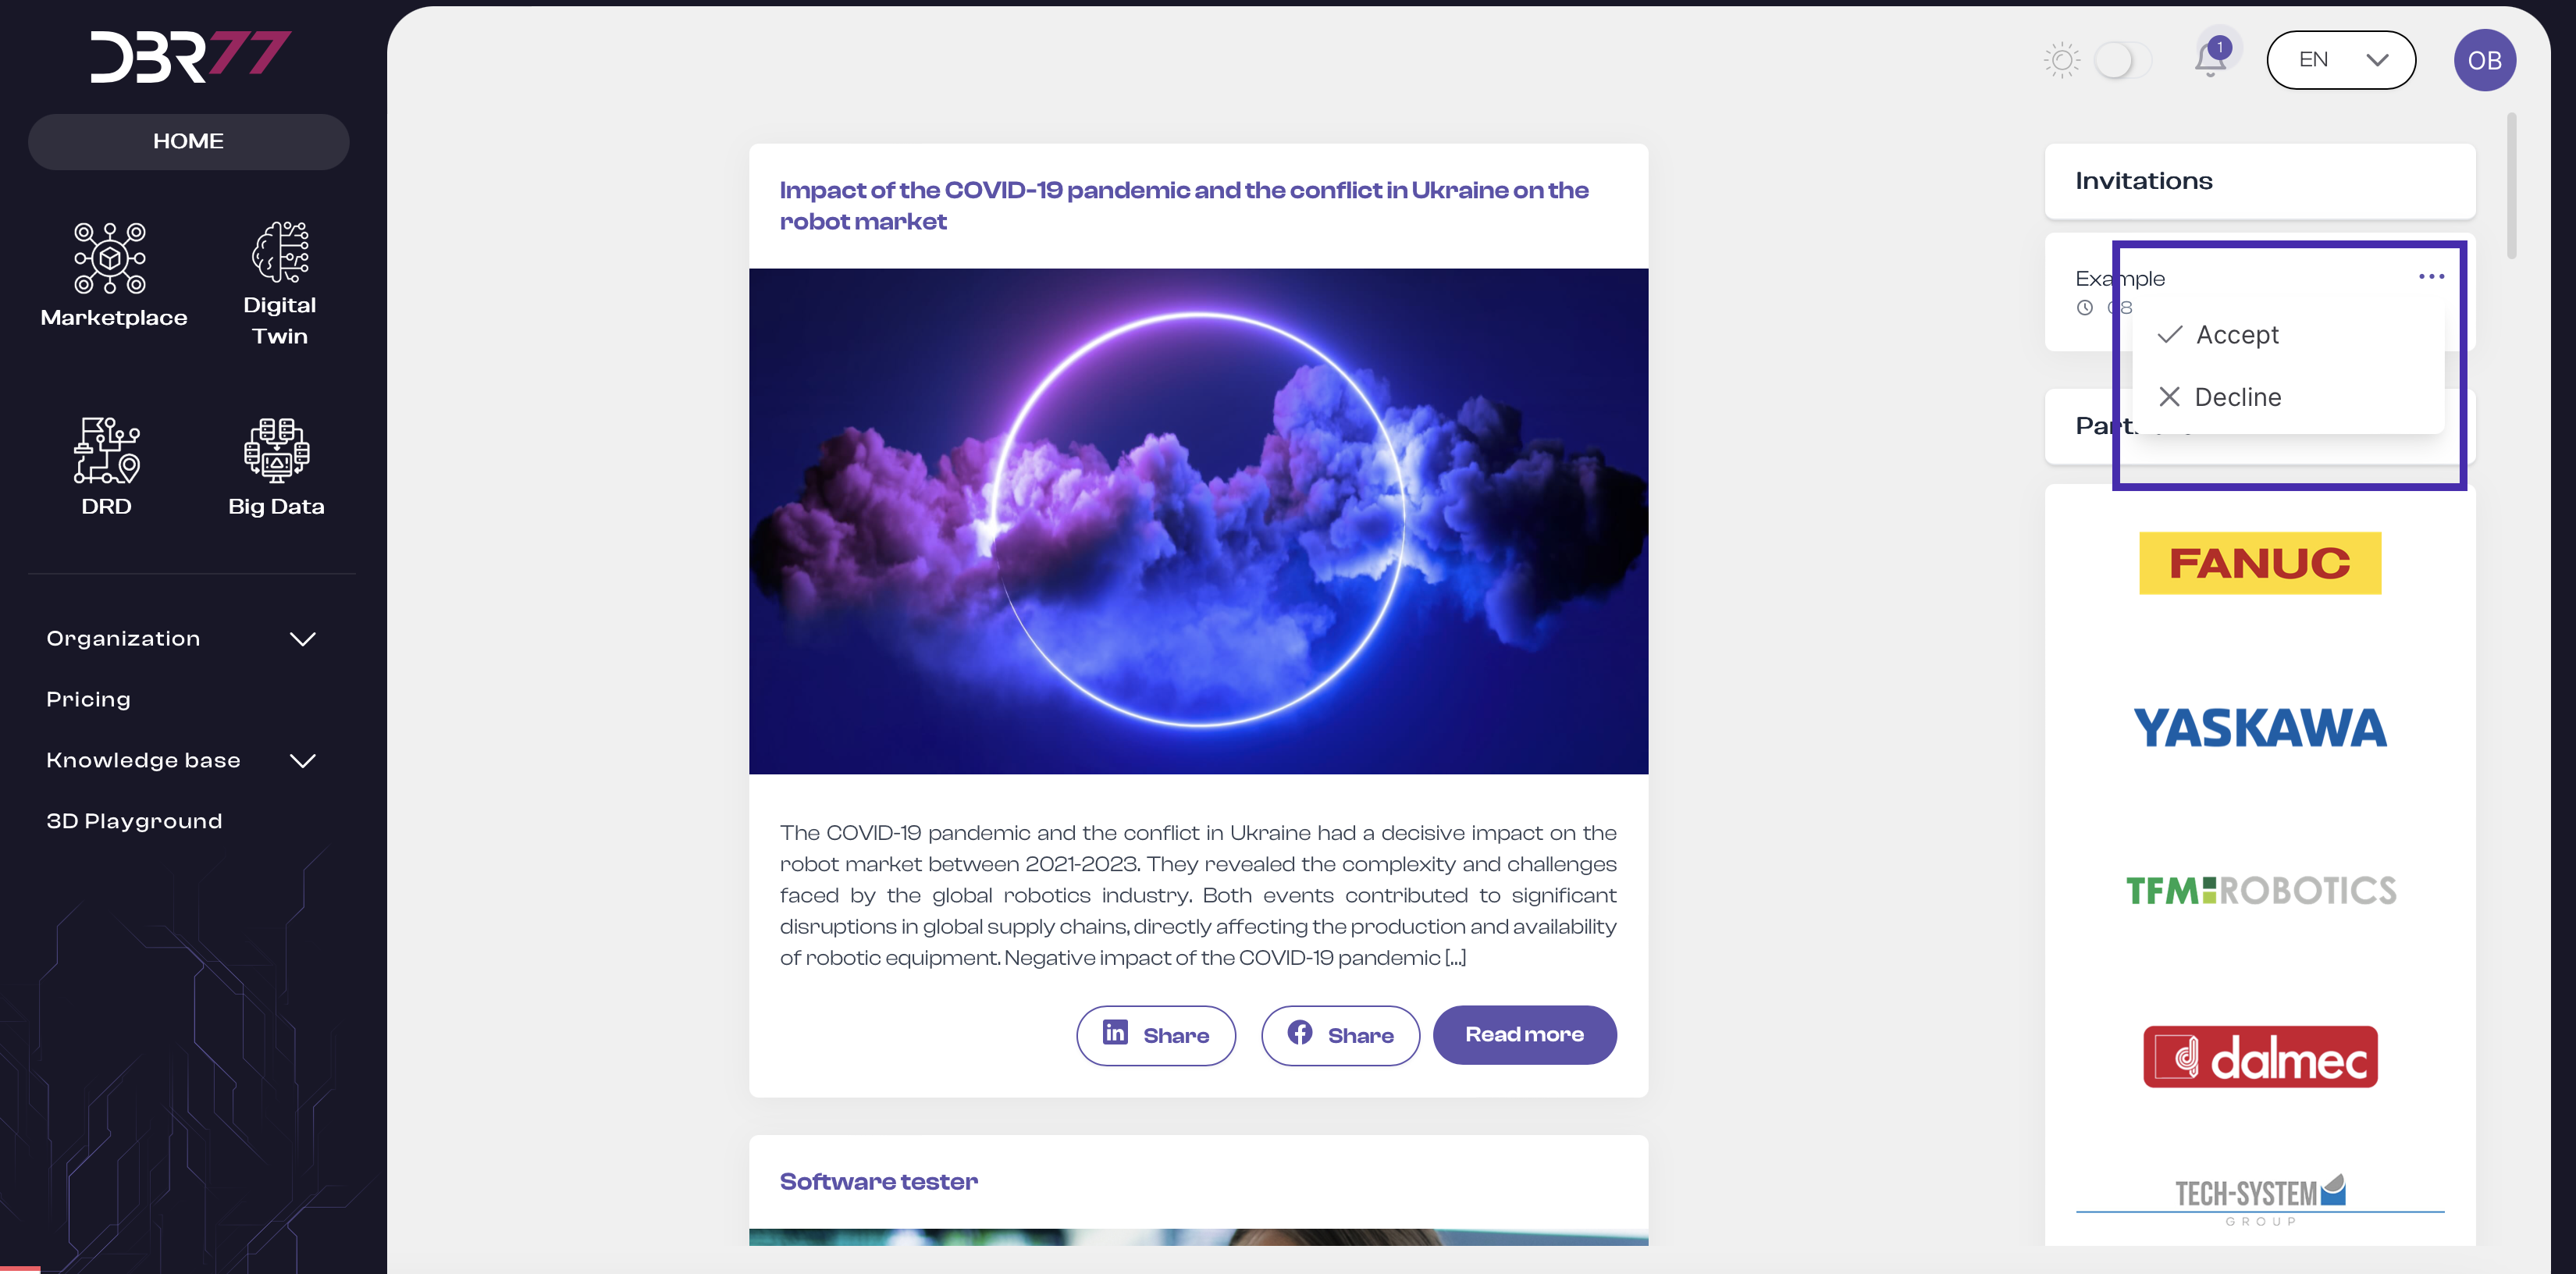
- In the “Invitations” tab, you’ll see a list of invitations to organizations. Each invitation provides details such as the organization name, the sender of the invitation, and options to accept or decline.
Accept or Decline Invitations:
- Click “Accept” or “Decline” next to each invitation, depending on your choice.
Confirm Your Action:
- Ensure that your decision (acceptance or decline) has been correctly recorded on the platform.
Invitation Validity:
- Remember: An invitation expires 7 days after receipt. Be sure to respond before the invitation limit expires.
- Now you know how to find and manage invitations on the DBR77 platform!
Products
Instructions for Accessing Products on the DBR77 Platform
Go to the homepage at DBR77.com and log into your account.
Find the Products:
In the upper left corner of the screen, below the DBR77 logo, you’ll find the Product menu.
Hover your mouse over the Product icon and click to automatically open the Product menu with its available content.
Product Menu:
- Marketplace: A section where you can post requests for automation implementations for your production company and offer various solutions and tools tailored to the manufacturing industry.
- Digital Twin: A tool that enables the creation of virtual replicas of physical production processes to simulate, analyze, and optimize them.
- Big Data: DBR77’s cloud-based big data service for collecting, validating, and visualizing data on production and logistics processes.
- DRD (Digital Roadmap): A digital roadmap from DBR77—a long-term plan covering all critical organizational aspects.
Now you know how to find and access products on the DBR77 platform!
Menu
Instructions for Navigating the Menu on the DBR77 Platform
Go to the homepage at DBR77.com, open your browser, and log into your account.
Location of Products:
In the upper left corner of the screen, under the DBR77 logo, you’ll find the Product menu.
Product Menu Overview:
On the DBR77 platform, you have access to four main products:
- Marketplace: A section where you can post requests for automation implementations for your production company and offer various solutions and tools tailored to the manufacturing industry.
- Digital Twin: A tool that creates virtual replicas of physical production processes, enabling simulation, analysis, and optimization.
- Big Data: A cloud-based method for collecting, validating, and visualizing data on production and logistics processes.
- DRD (Digital Roadmap): A digital roadmap from DBR77, providing a long-term plan covering all essential organizational aspects.
Standard Options:
- Organization: Access information about the organization, users, and subscriptions.
- Pricing: View the pricing list for DBR77 platform products.
- Knowledge Base: Access information, manuals, and updates on the platform and its features.
- 3D Playground: Access the 3D Studio environment.

Variable Elements (Depending on Selected Product):
- Marketplace:
- Challenges: Customer requests for integrators.
- Solutions: Automation and robotics solutions in response to requests.
- Offers: Offers created for accepted solutions.
- Projects: Active projects in the implementation phase following offer acceptance.
- Teams: Ability to create teams for projects.
- Digital Twin:
- List of Twins: Available digital twin scenes, based on subscription choices.
- DRD (Digital Rapid Deployment):
- Development Map
- Digital Pathfinder
- Teams
- Big Data
Now you know how to navigate through the menu on the DBR77 platform!
News
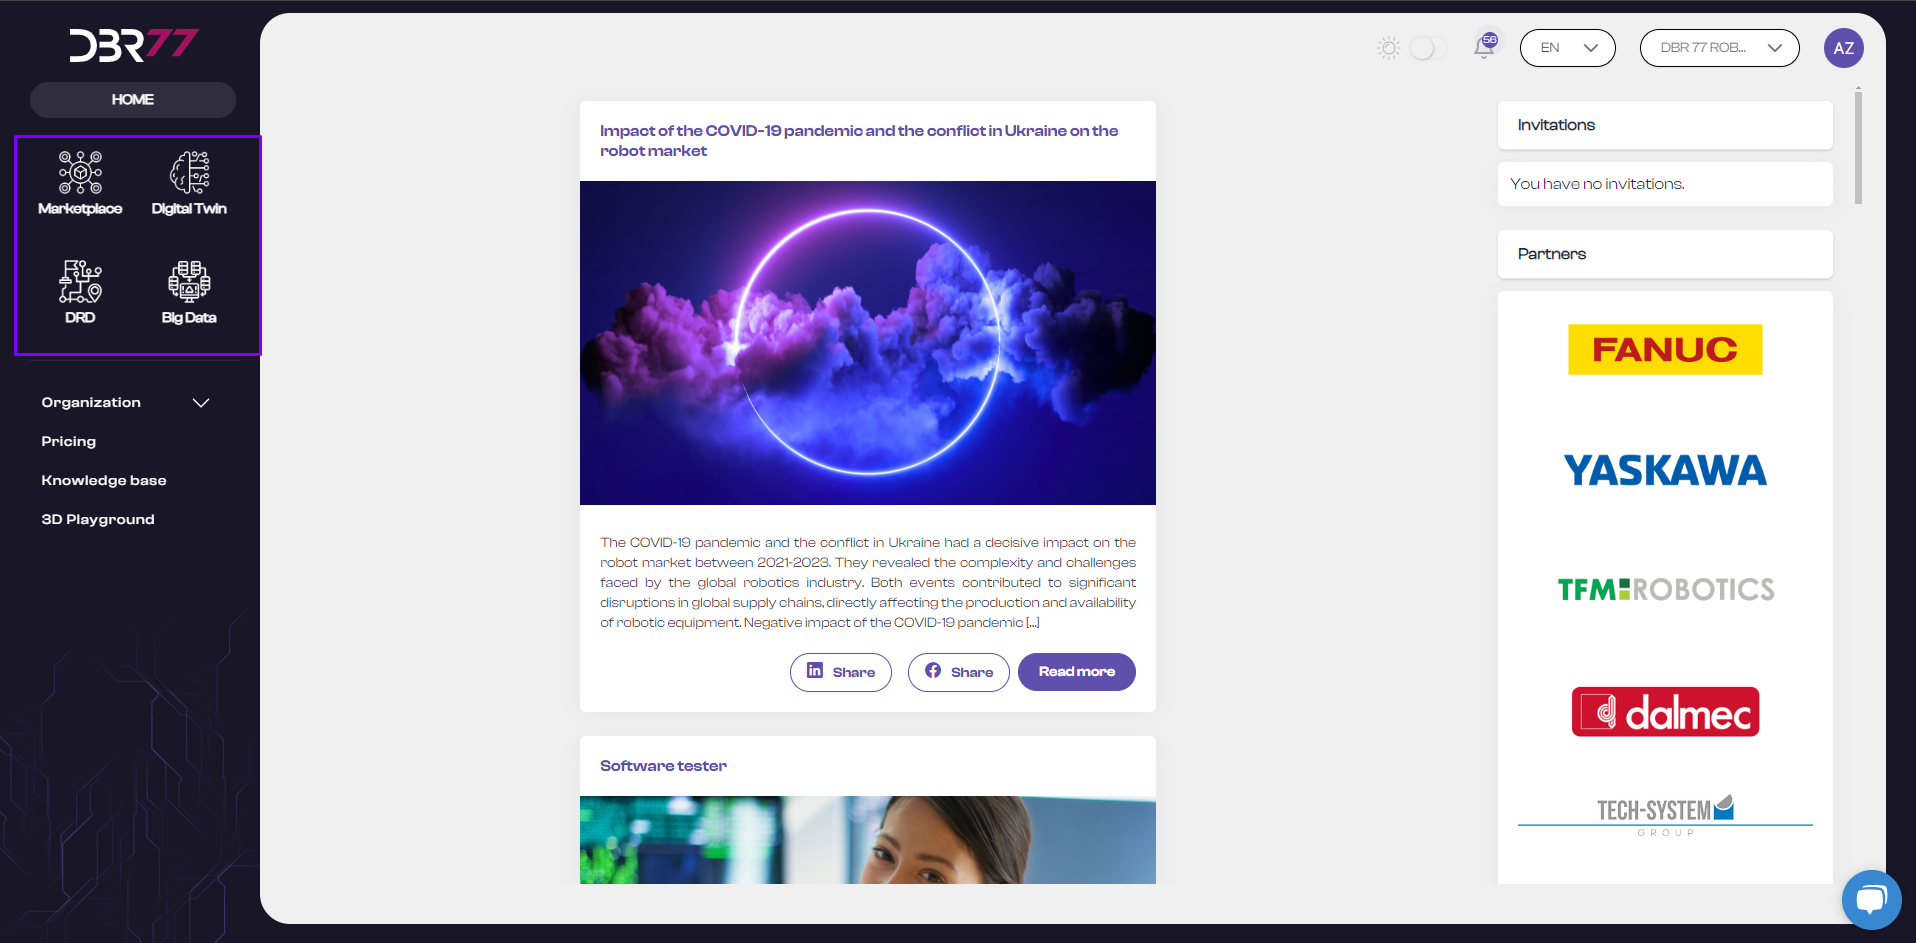
Instructions for Browsing News on the DBR77 Platform
Go to the DBR77 Homepage:
Open your web browser, go to DBR77.com, and log into your account.
Find the Navigation Menu:
After logging in, locate the navigation menu at the top of the page.
Locate the News Section:

Click on the Home Tab:
- Click the “Home” tab to access the section with the latest information, articles, and announcements on the DBR77 platform.
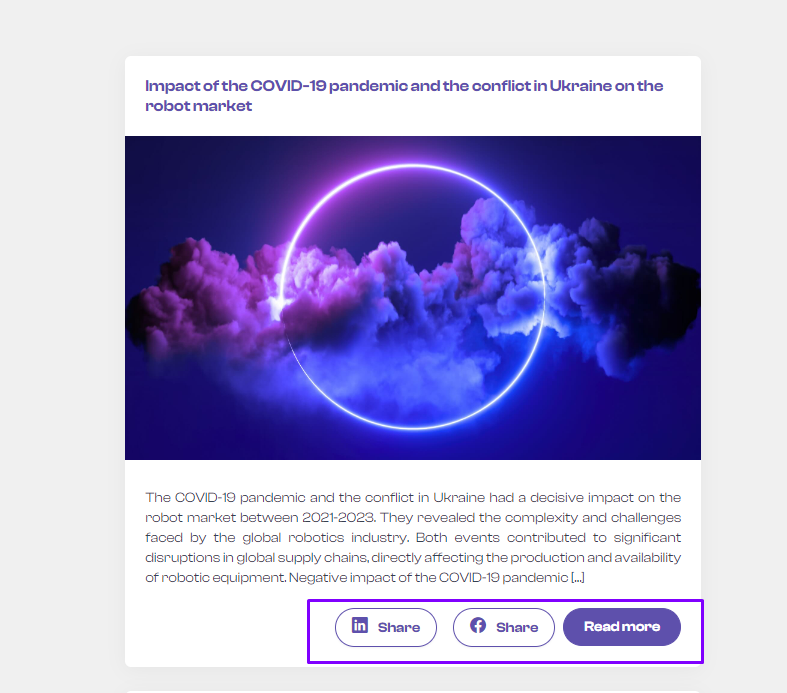
Browse News:
- In the “News” section, you’ll find a list of the latest articles and announcements. Click on the title of any news item that interests you to read the full article.

Share:
- If you find an article you consider important or interesting, you can share it with others using the available sharing options.
Now you know how to browse the news on the DBR77 platform!
Profile
Personalizing Your Profile
Instructions for Personalizing Your Profile on the DBR77 Platform
- Go to the homepage at DBR77.com and log into your account.
Find the User Menu:
- In the upper right corner of the screen, in the navigation bar, locate your profile icon. Click on it to open the user menu.
Access Your Profile:
Edit Your Personal Information:
- On the “Profile Settings” page, you can edit personal details such as first name, last name, and phone number.
- Ensure that all information is current and accurate. After making changes, click the “Save” button.
Profile Picture
Instructions for Adding a Profile Picture on the DBR77 Platform
- Go to the homepage at DBR77.com and log into your account.
- Find the User Menu: In the upper right corner of the screen, in the navigation bar, locate your profile icon. Click on it to open the user menu.
- Access Your Profile: In the user menu, select the “Profile” option to view or edit your information.
- In the profile menu, you can view and edit your data, add or change a profile picture, and review the consents accepted during registration.
Edit Profile Picture:
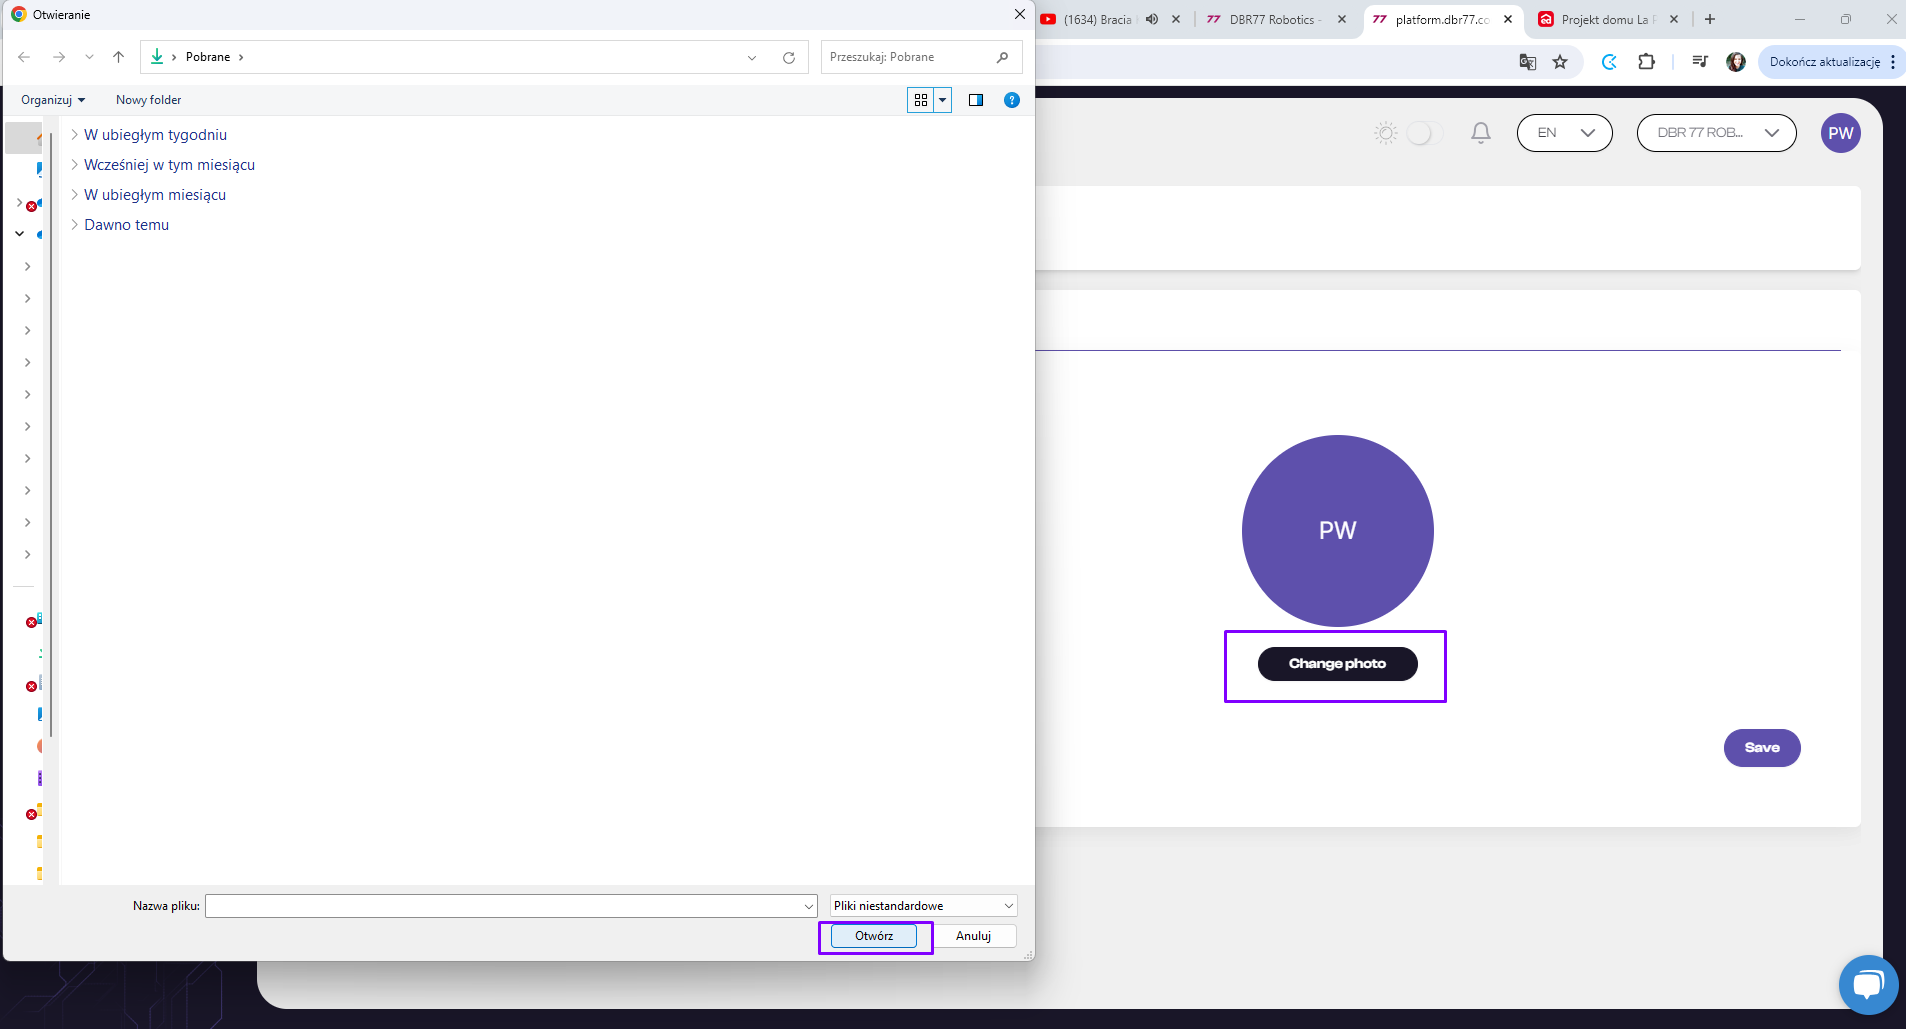
Your profile picture has now been updated on the DBR77 platform!
Changing Your Password
Instructions for Changing Your Password on the DBR77 Platform
- Go to the homepage at DBR77.com and log into your account.
Find the User Menu:
- In the upper right corner of the screen, in the navigation bar, locate your profile icon. Click on it to open the user menu.
Access Settings:
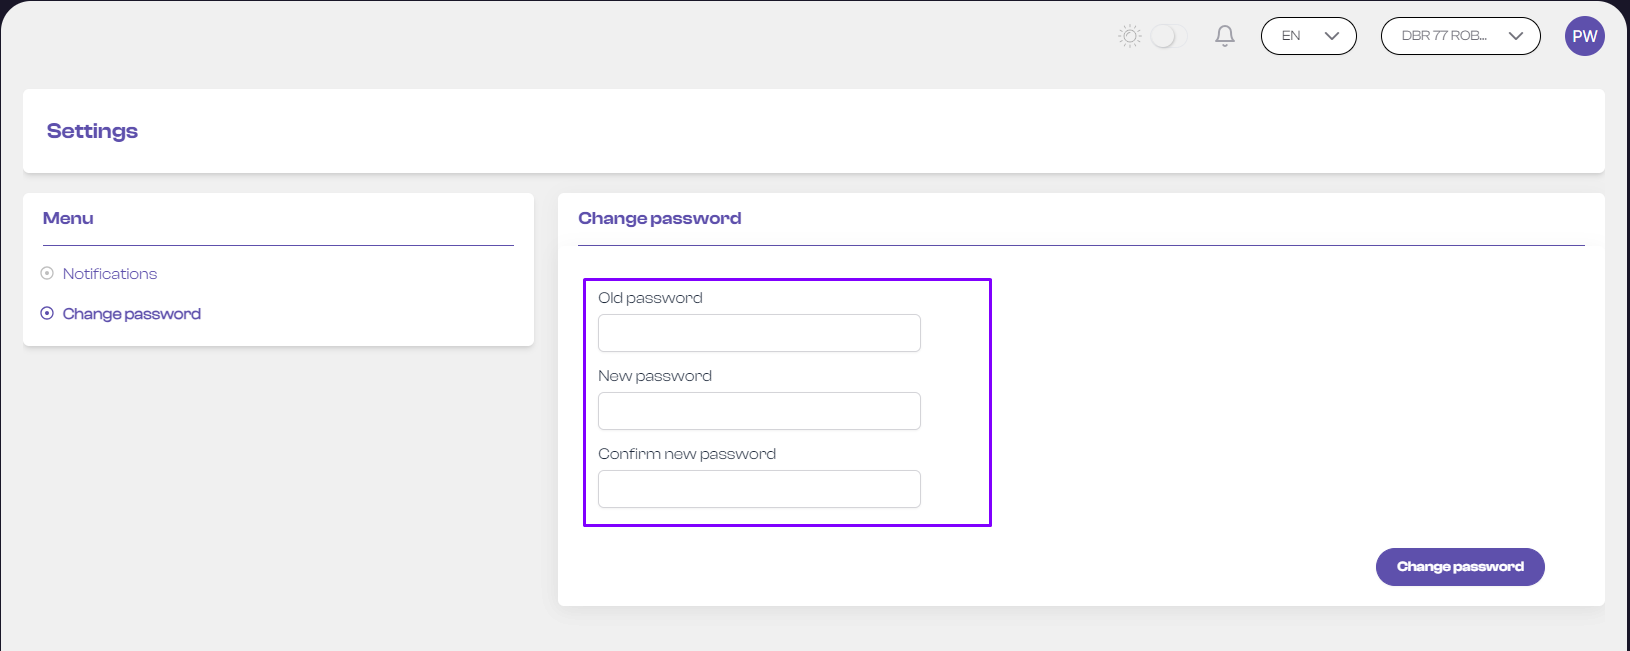
Locate the Password Change Section:
- In the account settings, find the section labeled “Change Password.”
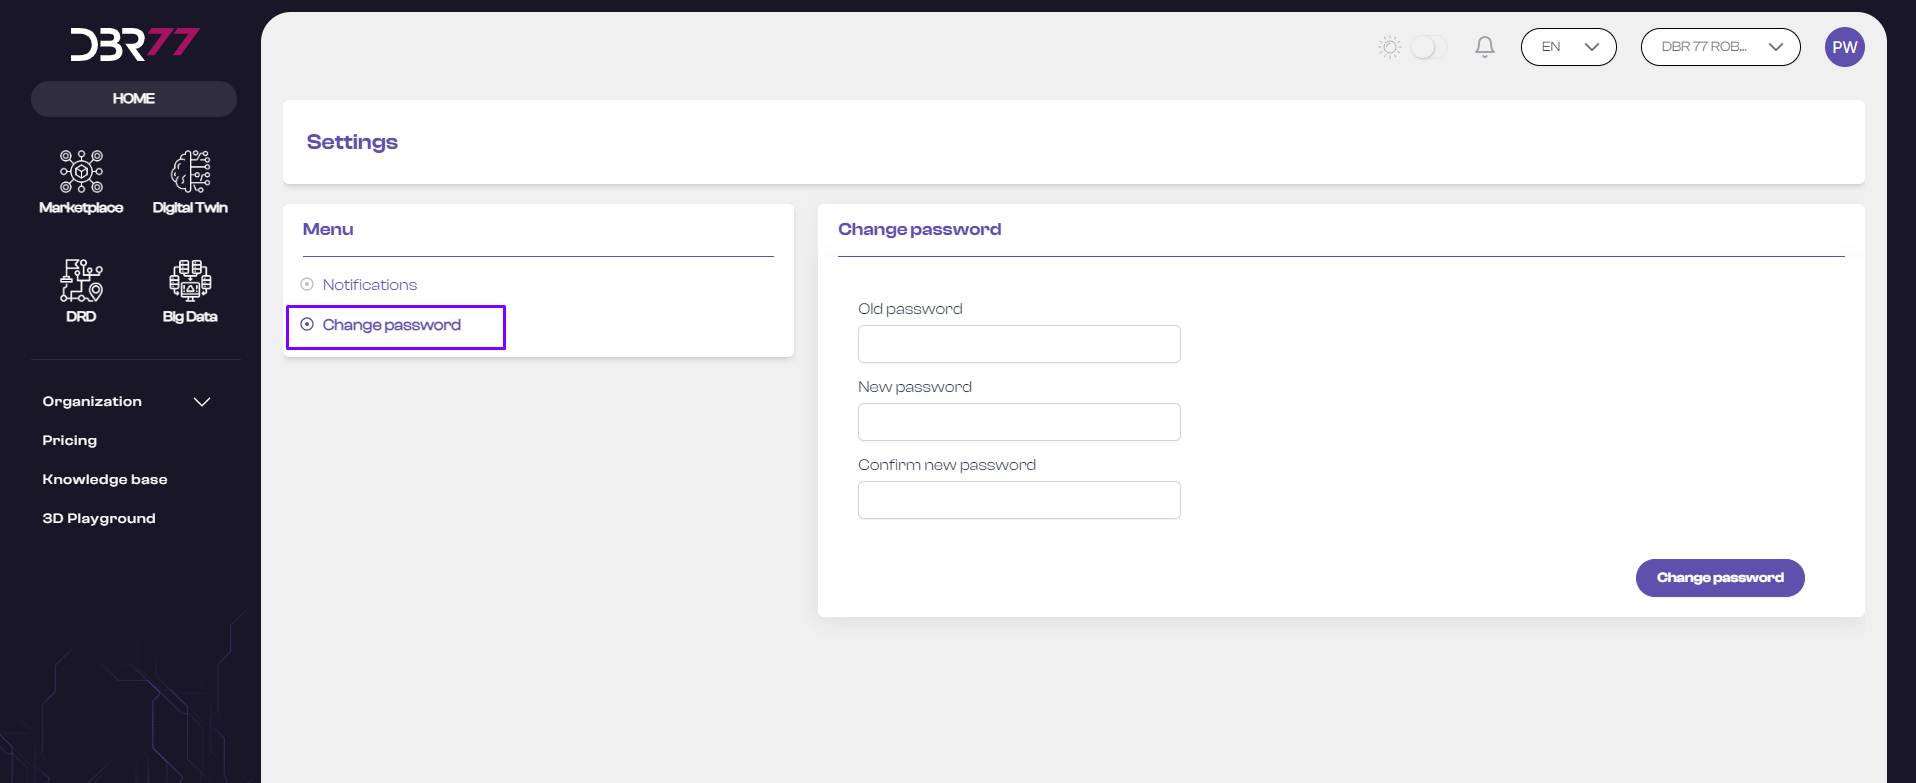
Enter Current Password:
- In the password change form, first enter your current password in the designated field.
Enter New Password:
- Enter the new password in the “New Password” field. Ensure it meets the length and complexity requirements.
- Re-enter the new password in the “Confirm New Password” field to verify accuracy.
Save Changes:
- Click the “Change Password” button to save the changes. Your password will now be updated.
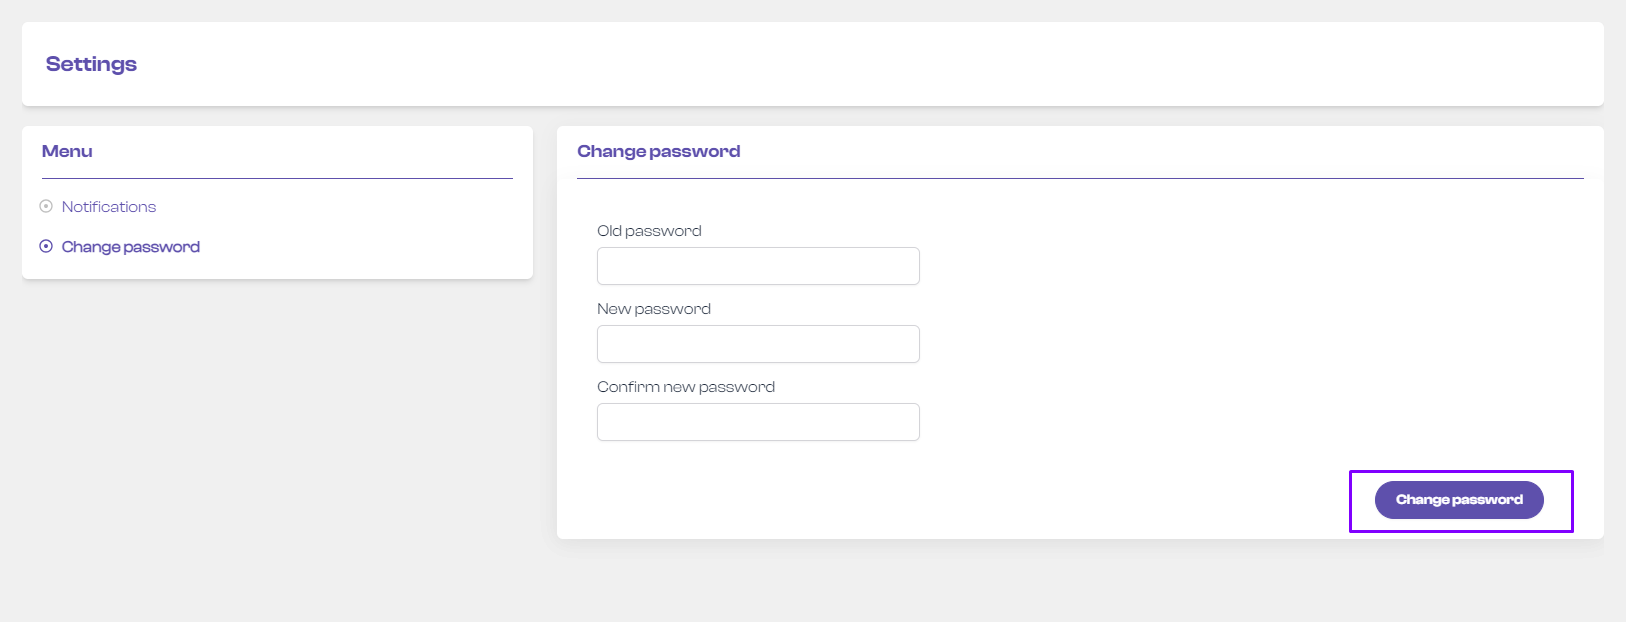
Now you know how to change your password on the DBR77 platform!
Settings
Notification
Instructions for Managing Notifications on the DBR77 Platform
- Go to the DBR77 Homepage:
- Open your browser, go to DBR77.com, and log into your account.
- Find the User Menu:
- In the upper right corner of the screen, in the navigation bar, locate your profile icon.
- Click on it to open the user menu.
- Access Settings:
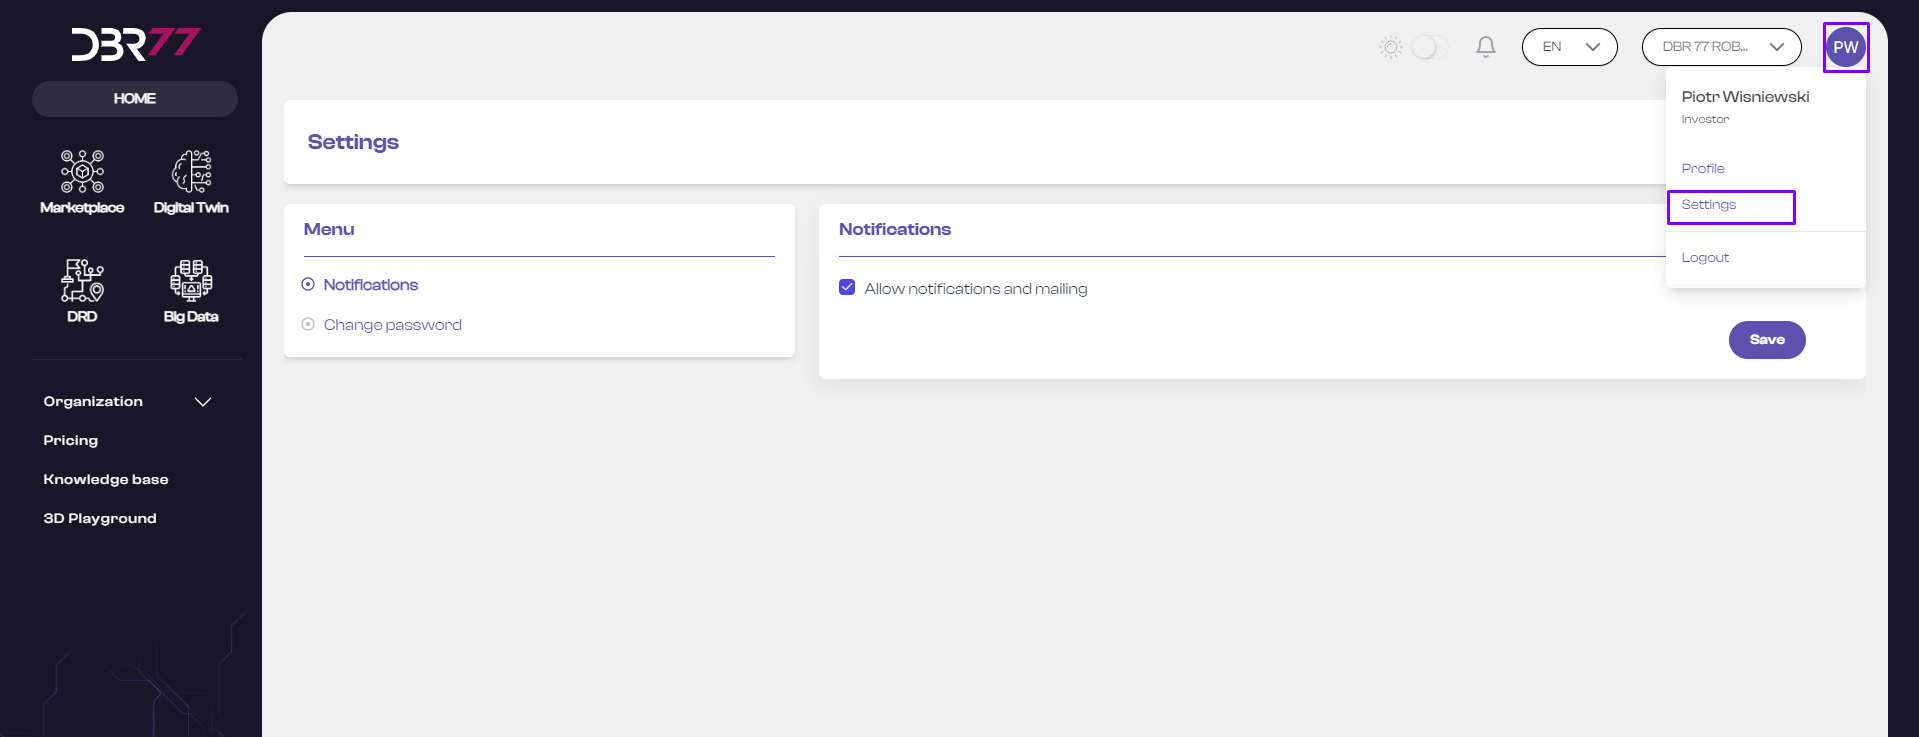
- In the dropdown menu, select “Settings.”
Notifications:
- In the account settings, look for the section labeled “Notifications.”
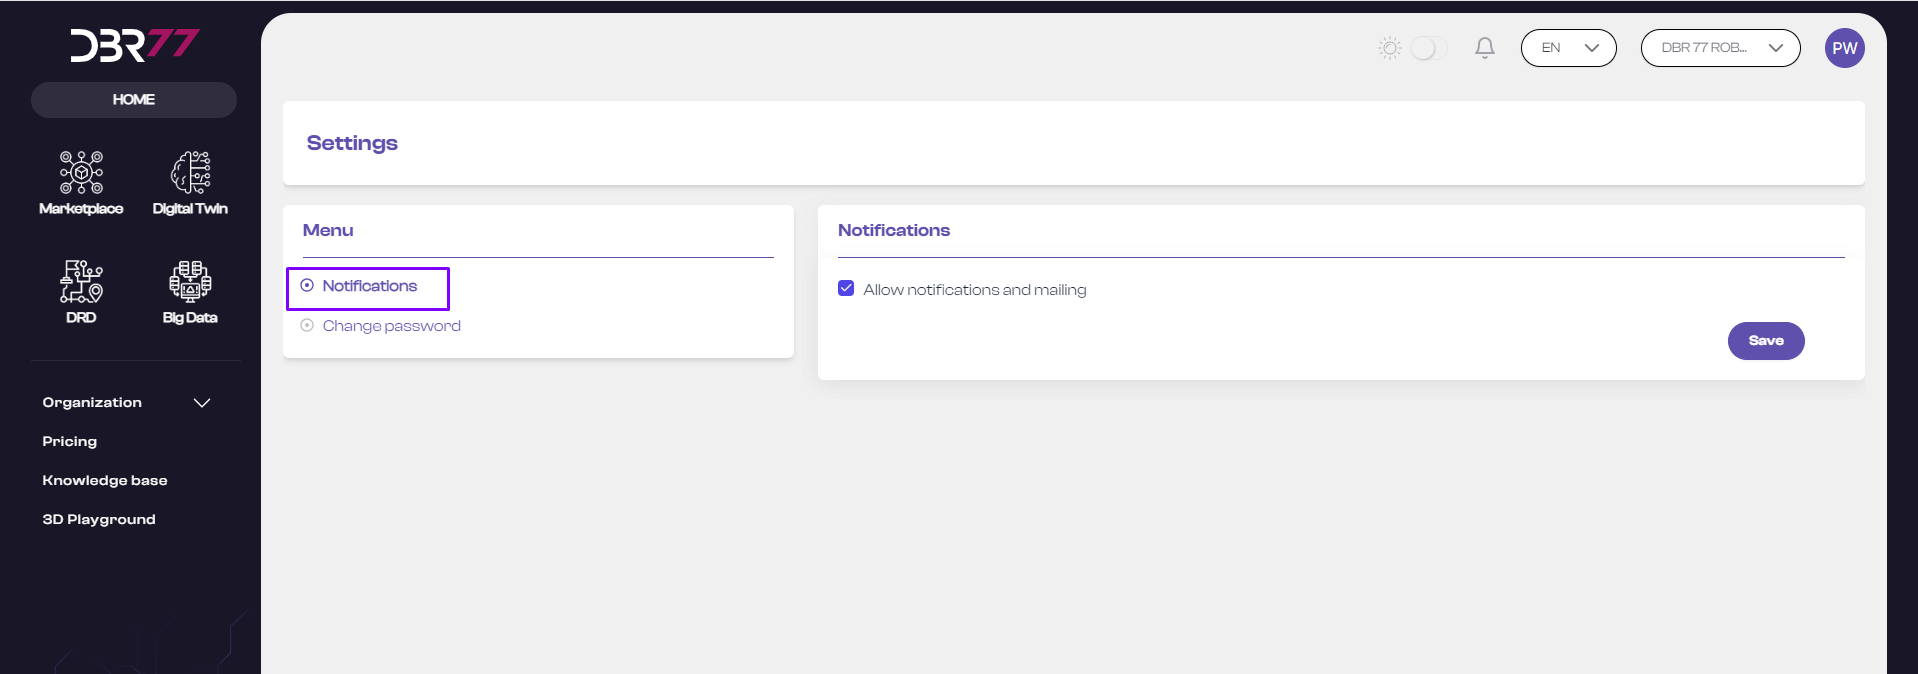
Manage Notifications:
- In the notifications area, you can enable or disable notifications (e.g., email, push notifications).
- To enable notifications, check the box next to the notification option.
- To disable notifications, uncheck the box.

Save Changes:
- After making your changes, click the “Save” button to apply the new notification settings.
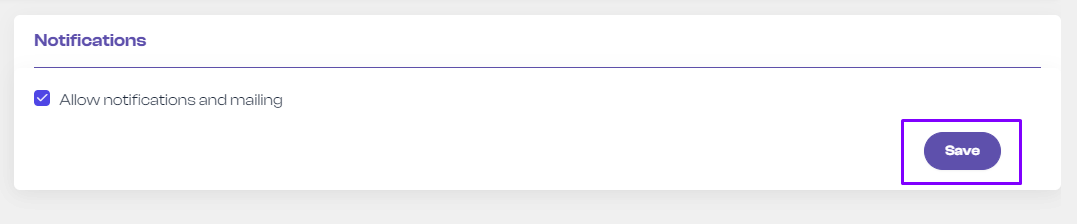
Now you know how to enable or disable notifications on the DBR77 platform!
Passwort ändern
Instructions for Changing Your Password on the DBR77 Platform
- Go to the homepage at DBR77.com and log into your account.
Find the User Menu:
- In the upper right corner of the screen, in the navigation bar, locate your profile icon. Click on it to open the user menu.
Access Settings:
Locate the Password Change Section:
- In the account settings, find the section labeled “Change Password.”
Enter Current Password:
- In the password change form, first enter your current password in the designated field.
Enter New Password:
- Enter the new password in the “New Password” field. Ensure it meets the length and complexity requirements.
- Re-enter the new password in the “Confirm New Password” field to verify accuracy.
Save Changes:
- Click the “Change Password” button to save the changes. Your password will now be updated.
Now you know how to change your password on the DBR77 platform!
Organisation
Company Data
Go to Company Data.
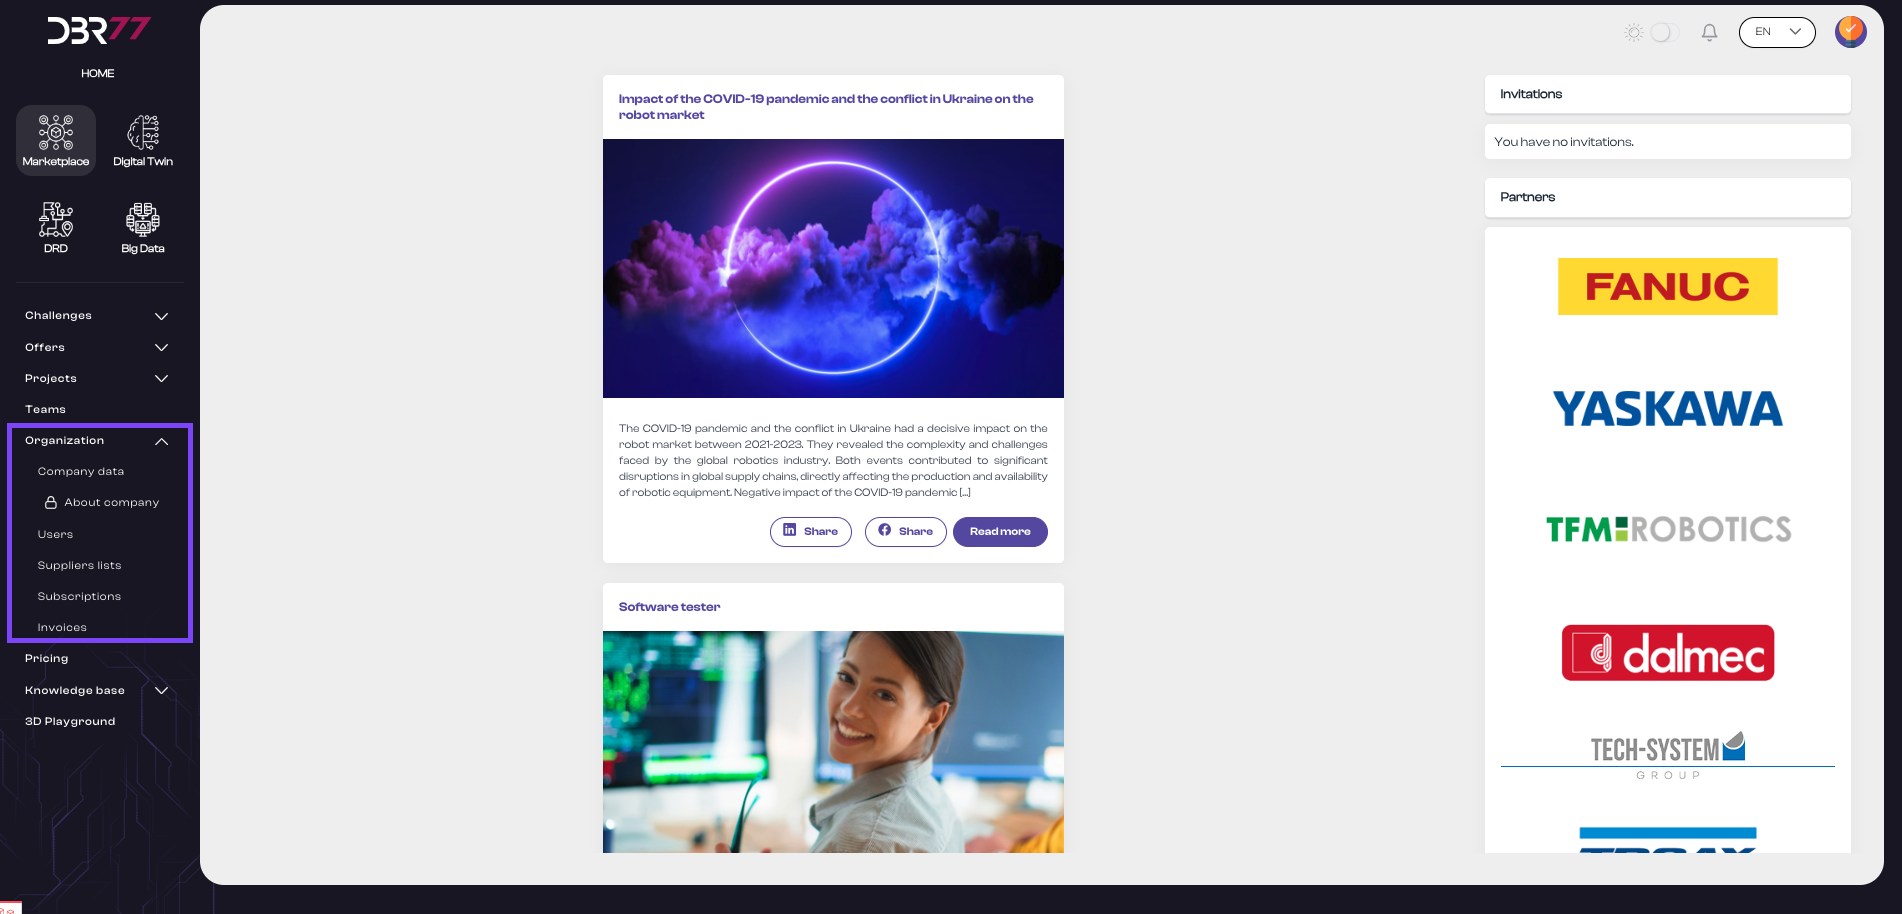
Start View:
The following graphic shows the view of the "Company Data" section on the DBR77 platform, consisting of two main parts:
- Company Data and Billing Data
- Settings – this section is only available for "Investor" account types.
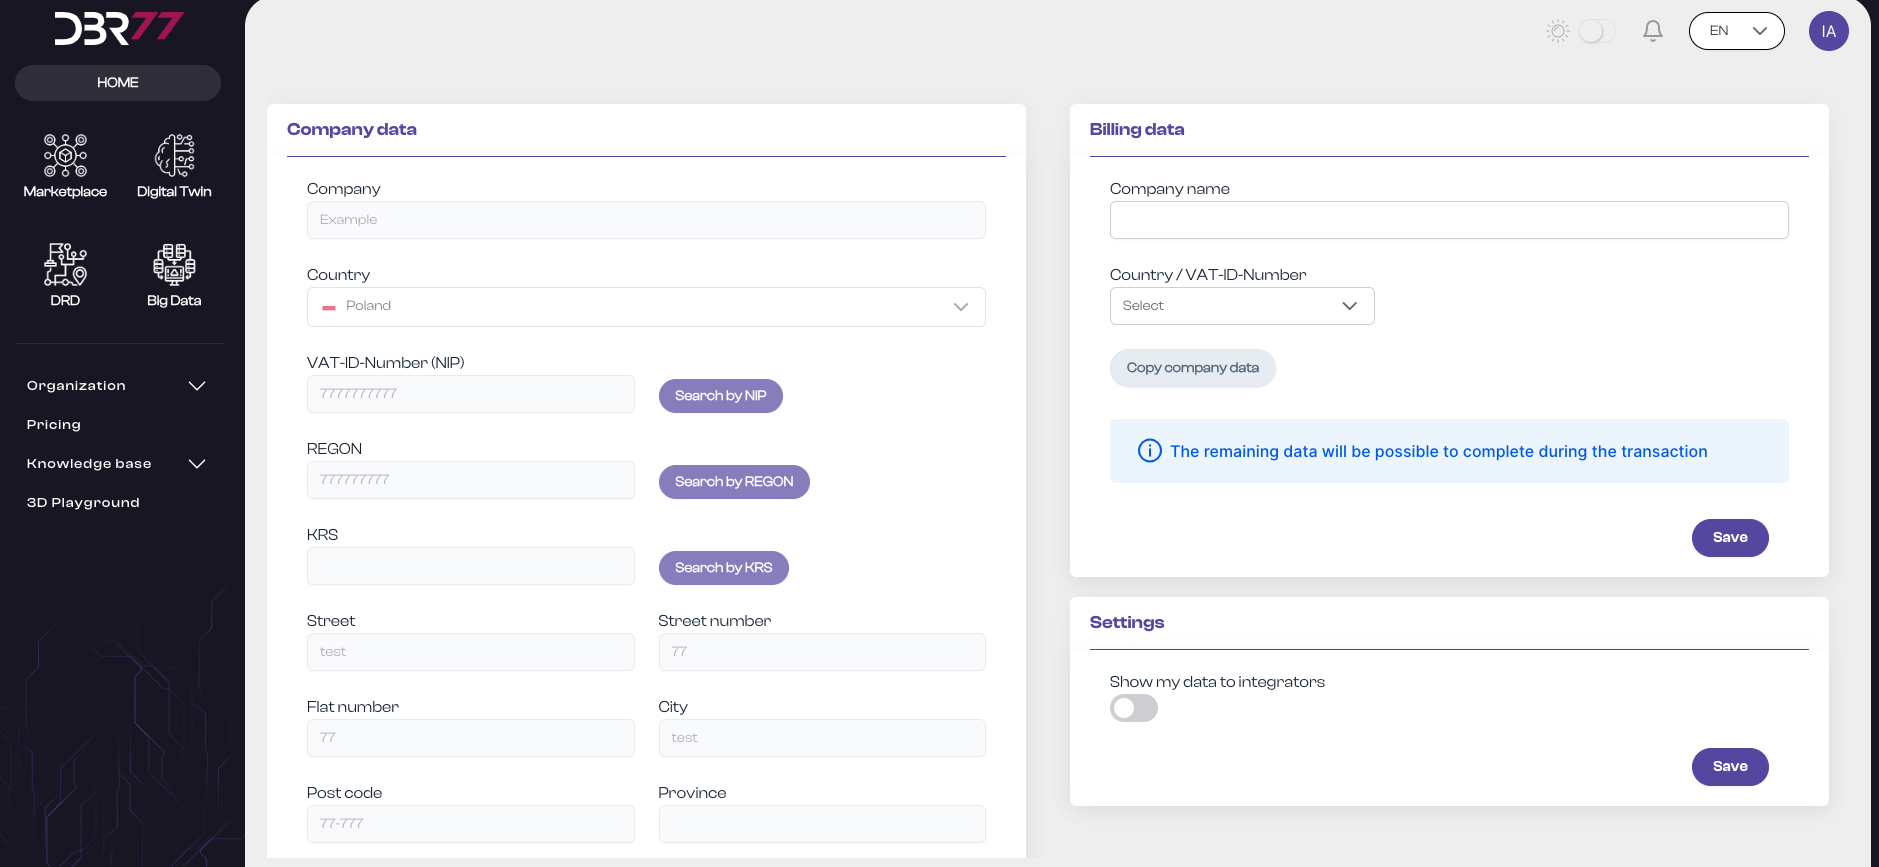
Company Data:
- Company: Field that contains the company name registered in the system.
- Country: Dropdown list for selecting the country in which the company is registered.
- Tax Identification Number (VAT ID): Field for entering the company's VAT ID number or equivalent tax identification number, along with an optional "Search VAT ID" button for countries that allow automatic retrieval of company data based on the entered VAT ID number.
- If your region requires entering a trade registry number or tax number, the relevant fields will appear. Please fill these out as well.
- Address:
- Street: Field to enter the street name.
- Building Number: Field to enter the building number.
- Address Additions: Optional field for entering additional information (e.g., backyard, or Hall 3).
- Postal Code: Field to enter the postal code.
- City: Field to enter the city name.
- Region: Optional field for entering the region name (not necessary in all countries).
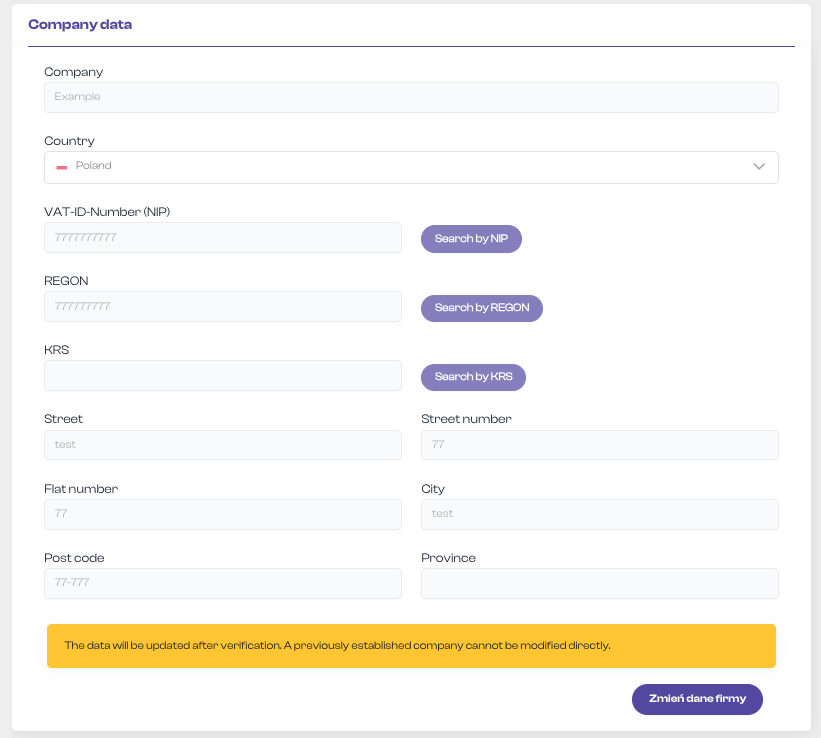
Updating Company Data
The following graphic shows an additional element in the "Company Data" section on the DBR77 platform. It is the "Edit Company Data" button, which allows users to edit the previously filled-out form.
Special attention should be given to the message on a yellow background:
"The data will be updated after verification. A previously created company cannot be directly modified."
This message informs the user that all changes to the company data are subject to a verification process. This means that changes will not take effect immediately but only after the appropriate review. Also, once created, company data cannot be modified directly by the user.
This notice ensures that users are aware of the procedures for updating company data on the DBR77 platform. It guarantees that company data is protected from unauthorized changes and that each update is carefully reviewed before implementation.

Clicking the "Edit Company Data" button allows the user to initiate the process of changing company data. The user is automatically directed to a procedure that enables them to submit a request to change data, which will then undergo the verification process.
In this window, the user can make changes to selected fields or all fields of the company data as needed.
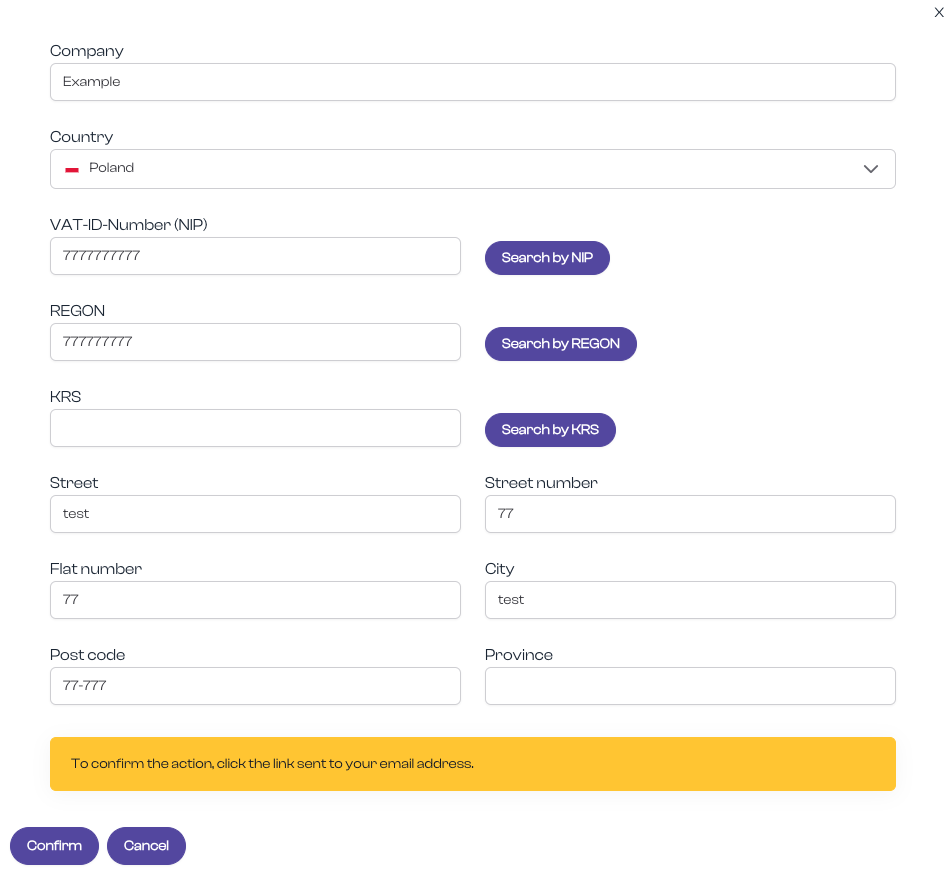
After filling in the fields, the process must be completed by clicking "Confirm." According to the next message on a yellow background, the system saves the changes made and prompts for double confirmation by sending a verification link to the email address associated with the account.
The new company data will be forwarded to the system administrator for final approval. The user will receive an email notification about the success or rejection of the changes.
Billing Data
- Company Name: Field containing the name of the company registered in the system or another, if the payer is a separate organization.
- Country / Tax Identification Number: Dropdown list for selecting the country and field for entering the VAT ID number.
- Copy Company Data: Button that enables automatic copying of data from the "Company Data" section.
- Additional Information: Information field with the message "Additional data can be added during the transaction."
- Save: Button for saving the entered data.
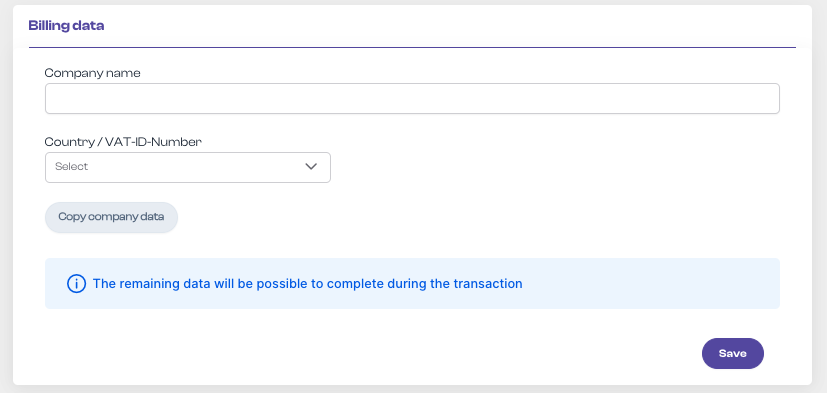
The above view allows for complete management of company and billing data on the DBR77 platform, which is crucial for maintaining current and accurate information in the system.
Settings
This section is only available for the "Investor" account type. It allows users to make their data visible to other platform users. This data is only displayed in the investor's published challenges.

The button is disabled by default, and the data is not displayed. If you want to make a change, click the slider and confirm the change by clicking "Save."
About the Company
Go to the "About the Company" tab.
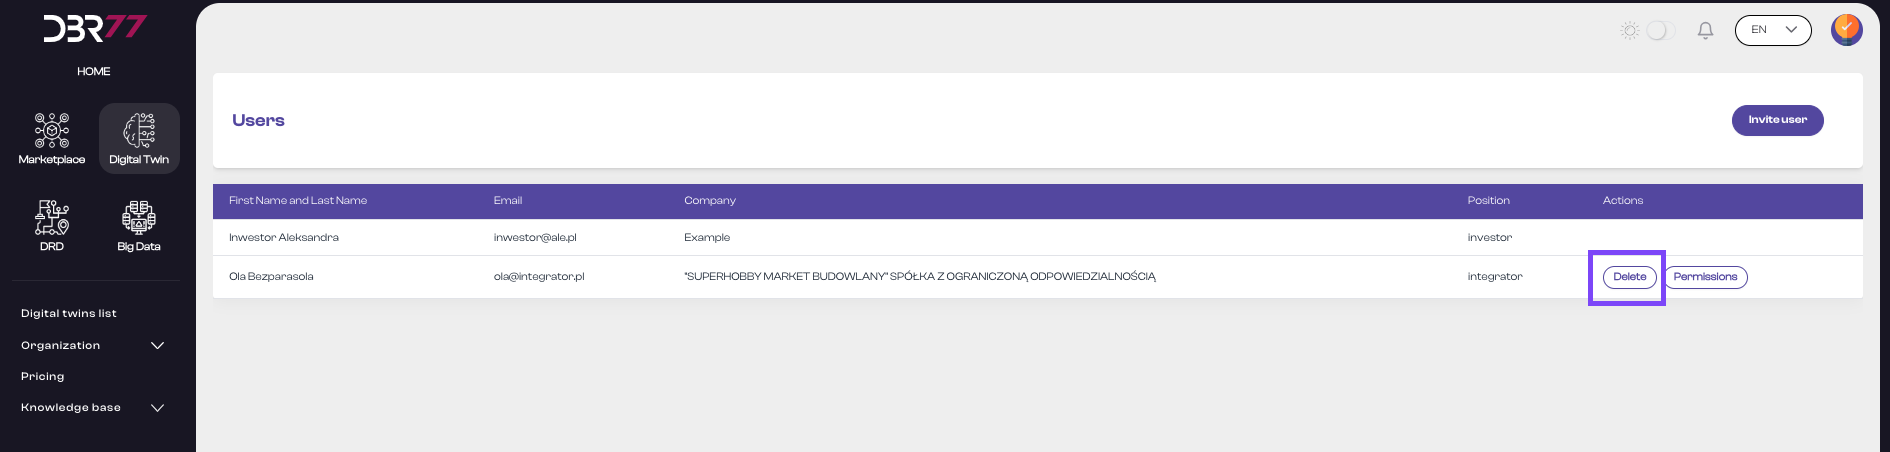
User
Go to the User List.
The user list view on the DBR77 platform is a central tool for managing organization members. It allows administrators to efficiently manage user data, control their permissions, and ensure that each organization member has appropriate access to the platform's resources.
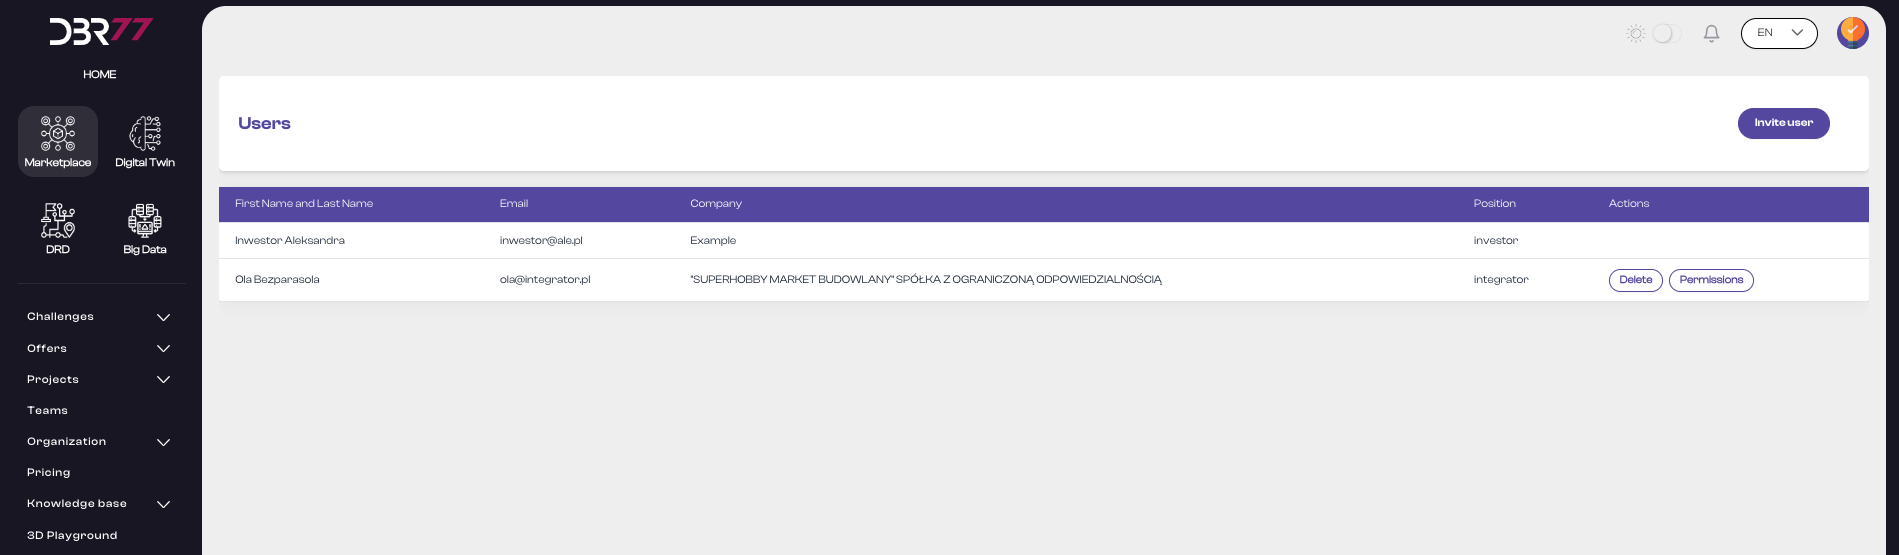
Elements of the User List View:
List Header:
- Column "First and Last Name": Displays the full name of each user registered in the organization.
- Column "Email Address": Shows the email address under which the user is registered on the platform.
- Column "Company": Displays the name of the company the user represents.
- Column "Account Type": Indicates the user's account type, such as "Investor," "Integrator," or "Supplier."
- Column "Actions": Allows two types of actions for each individual user:
- Delete: Enables the removal of the user from the organization.
- Permissions: Provides access to the user’s permissions.

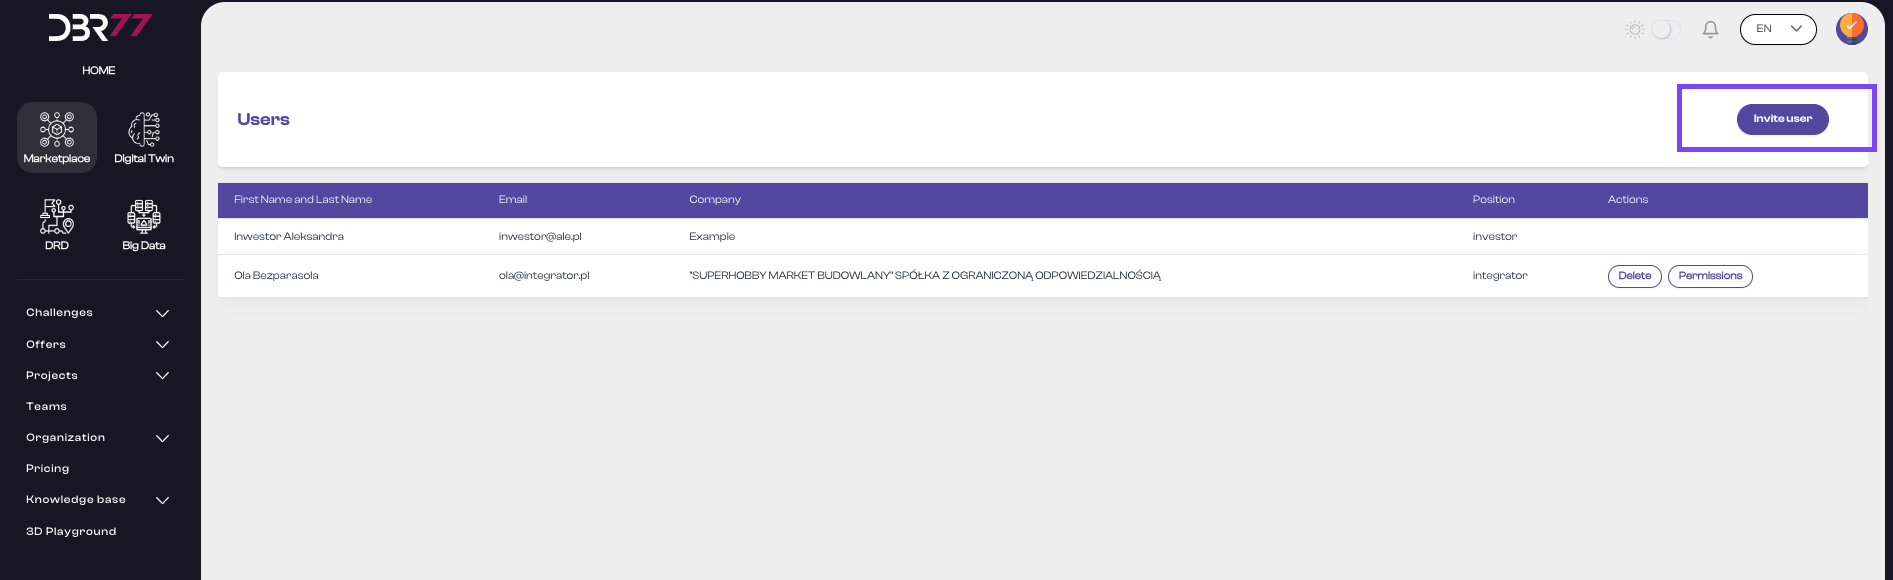
User Management Options in the List View:
Adding a New User:
- Click the "Add User" button.
- A form will appear to enter the new user's email address.
Enter Email Address:
- Enter the new user’s email address in the corresponding field.
- Ensure the user is already registered on the DBR77 platform.
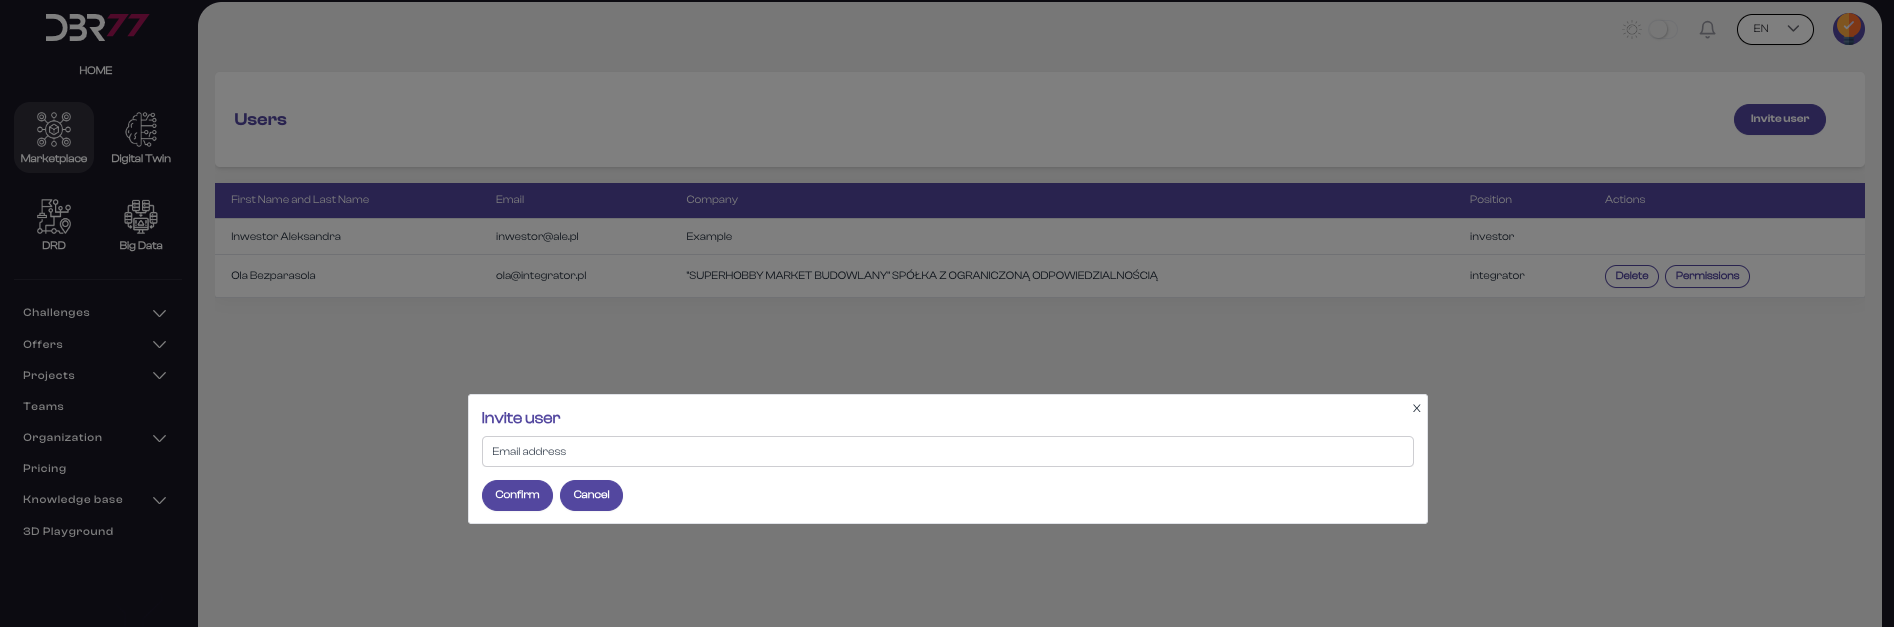
Send Invitation:
- Click the "Confirm" button.
- The new user will receive a notification with an invitation to join the organization. This invitation will also be displayed in the top right corner of the dashboard.
Accept Invitation:
- The new user must accept the invitation to the organization within 7 calendar days.
- Once the invitation is accepted, the user will be added to the organization.
Important Information
- Platform Registration: The new user must already be registered on the DBR77 platform to receive and accept an invitation.
Notification: After accepting the invitation, the new user receives confirmation of joining the organization. If there are issues with acceptance, the user should contact the organization administrator. - This process ensures that adding new users to the organization is secure and effective, maintaining data integrity and authorization for new members on the DBR77 platform.
Assigning Permissions
- The permissions assignment view on the DBR77 platform enables administrators to manage access levels for organization members. Below is the process for assigning permissions:
User Selection:
- Locate the user to whom you wish to assign permissions by browsing the user list.
- Click the "Permissions" button next to the selected user.
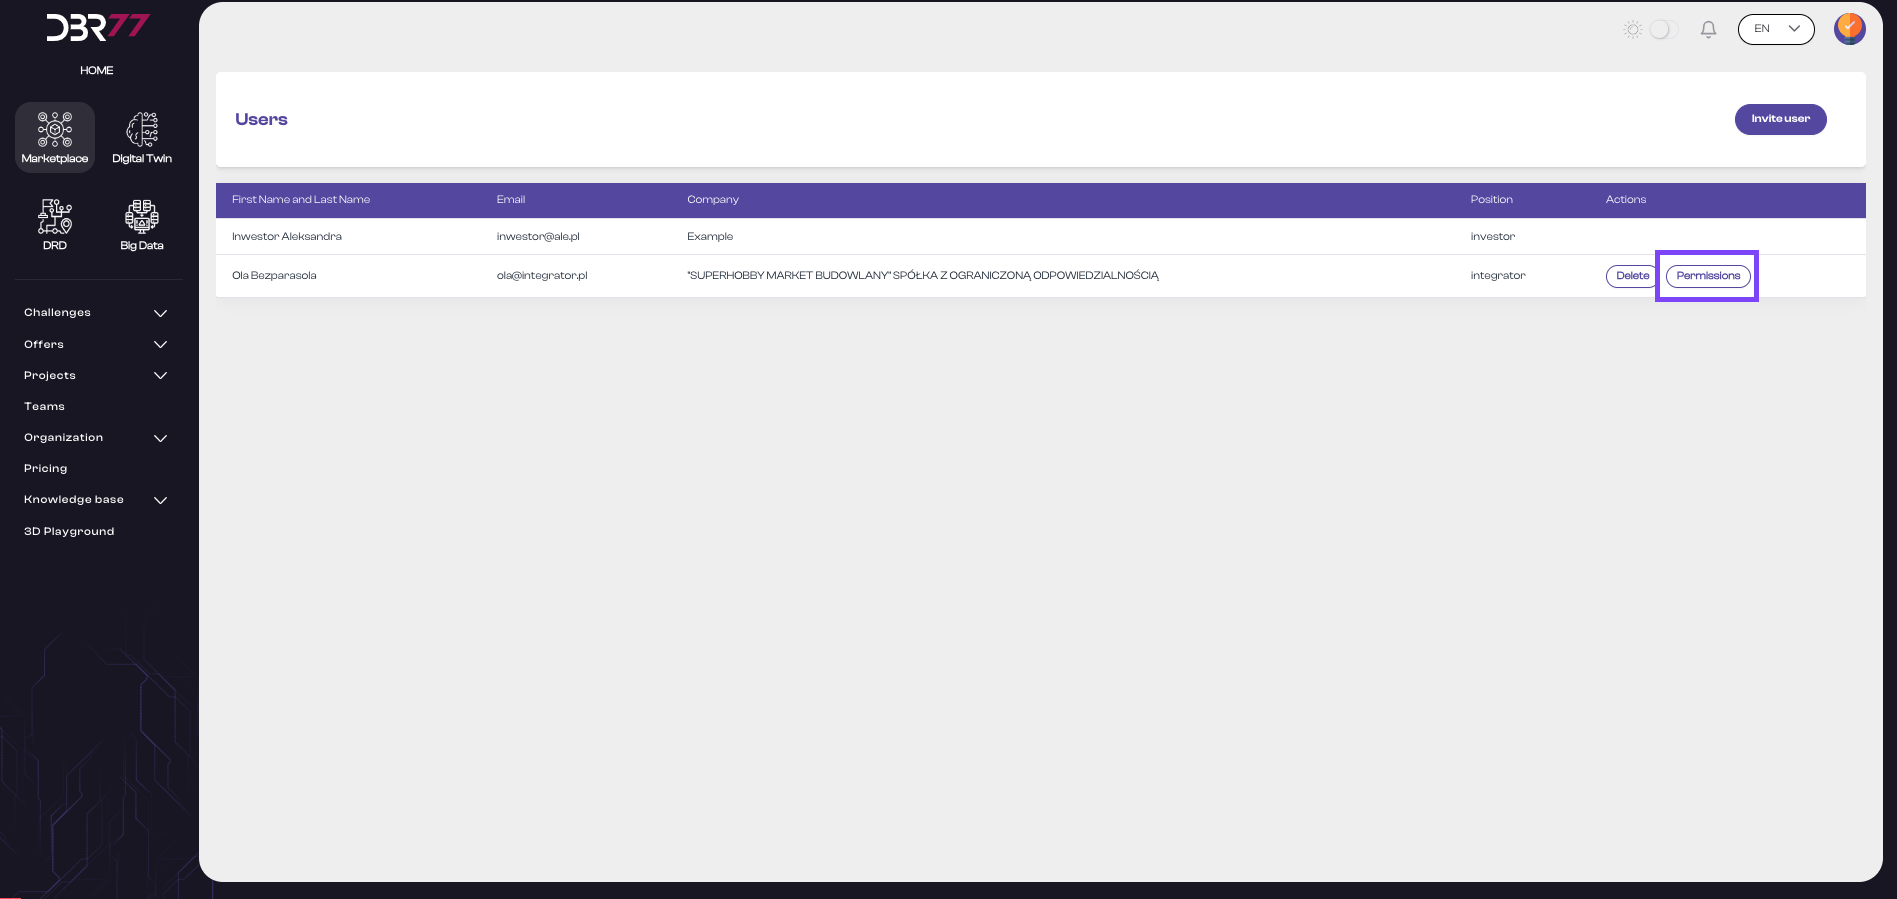
- A new window will display a list of permissions for the selected user.
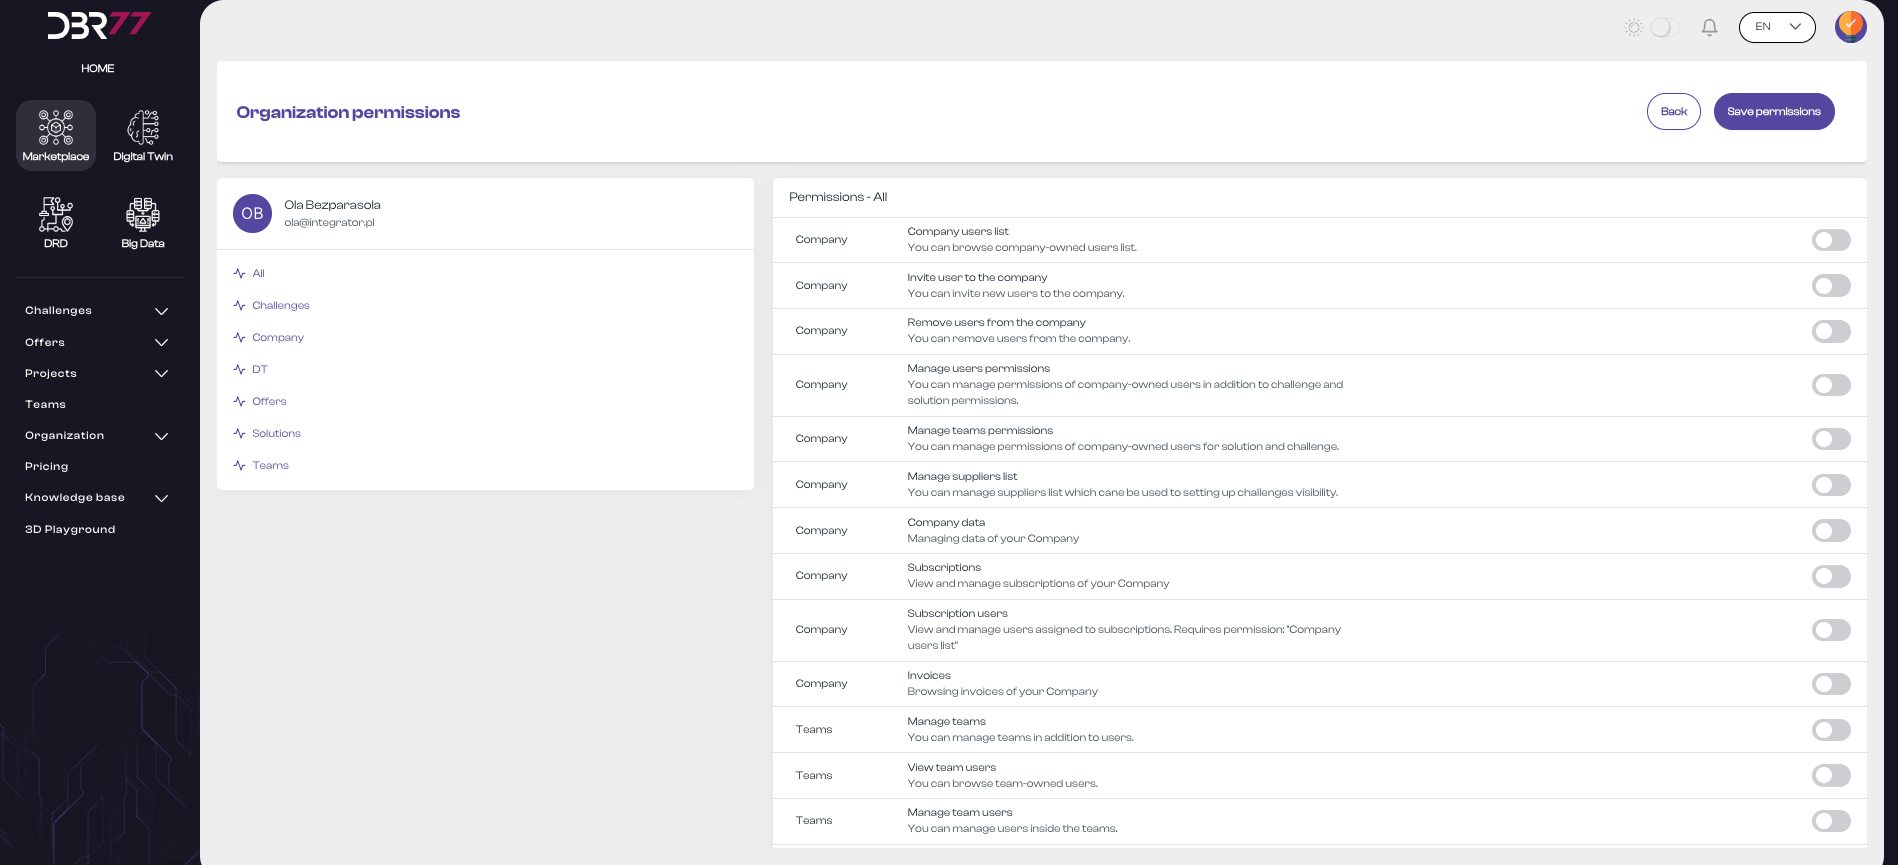
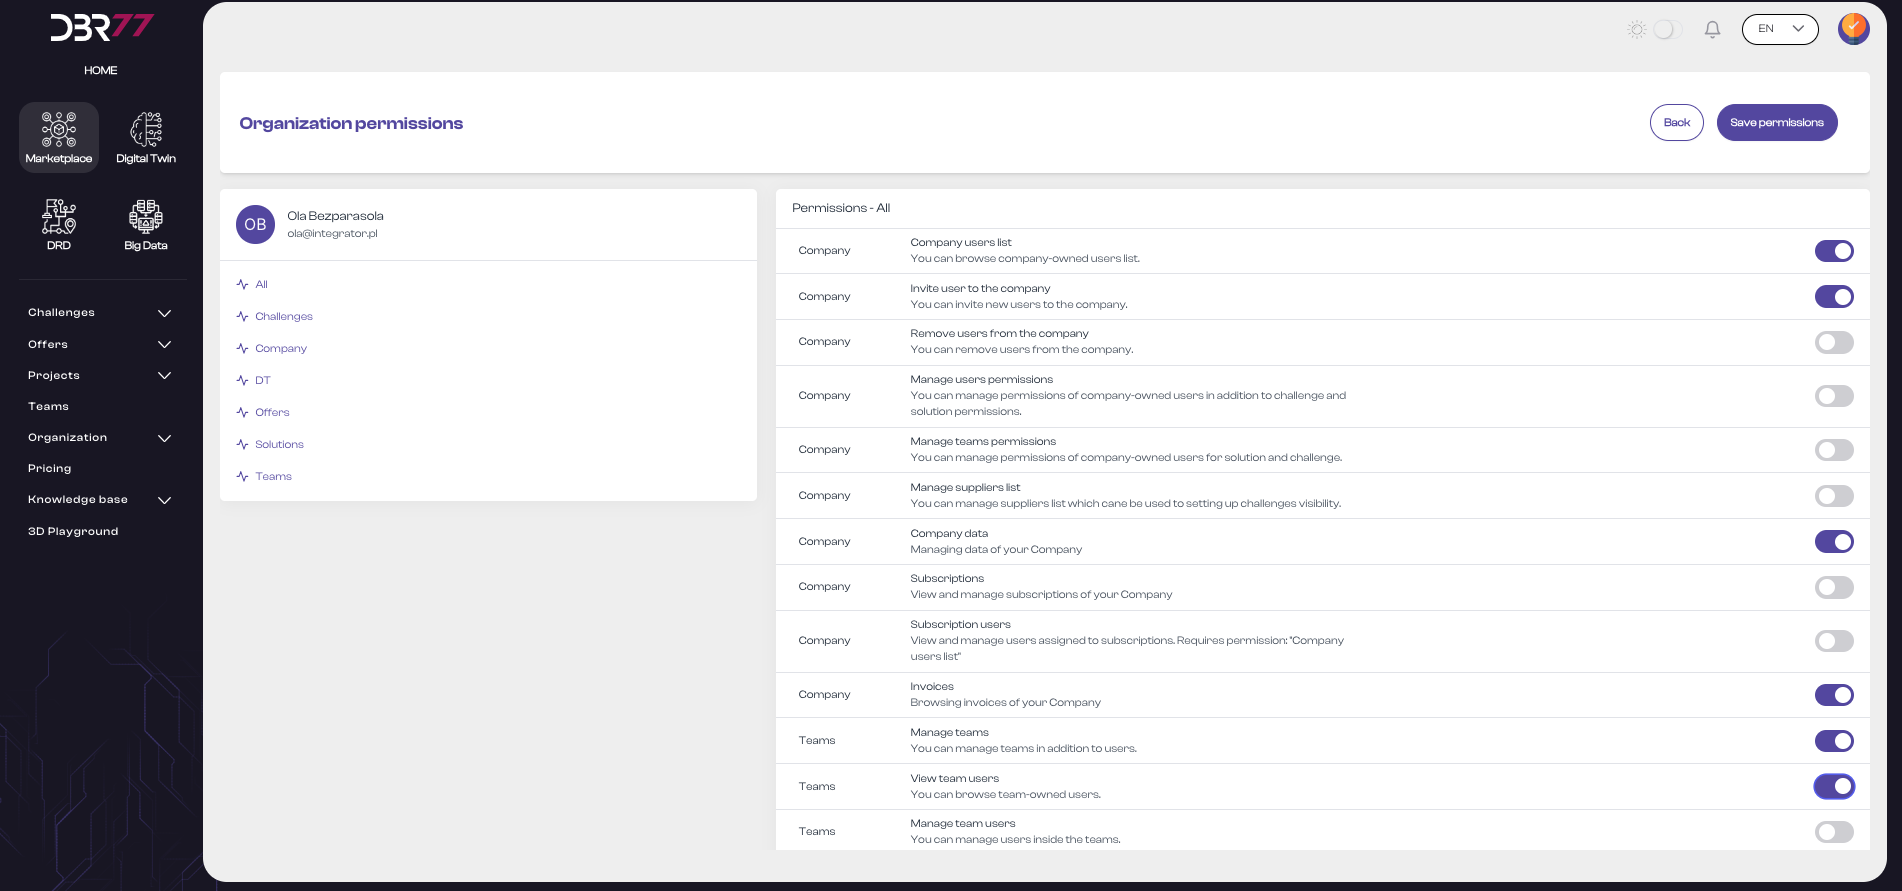
Elements of the Permissions View:
- Header: At the top of the screen is the title "Permissions in the Organization," indicating the current platform section.
User Information:
- User avatar (initials or photo).
- User’s first and last name.
- User’s email address.
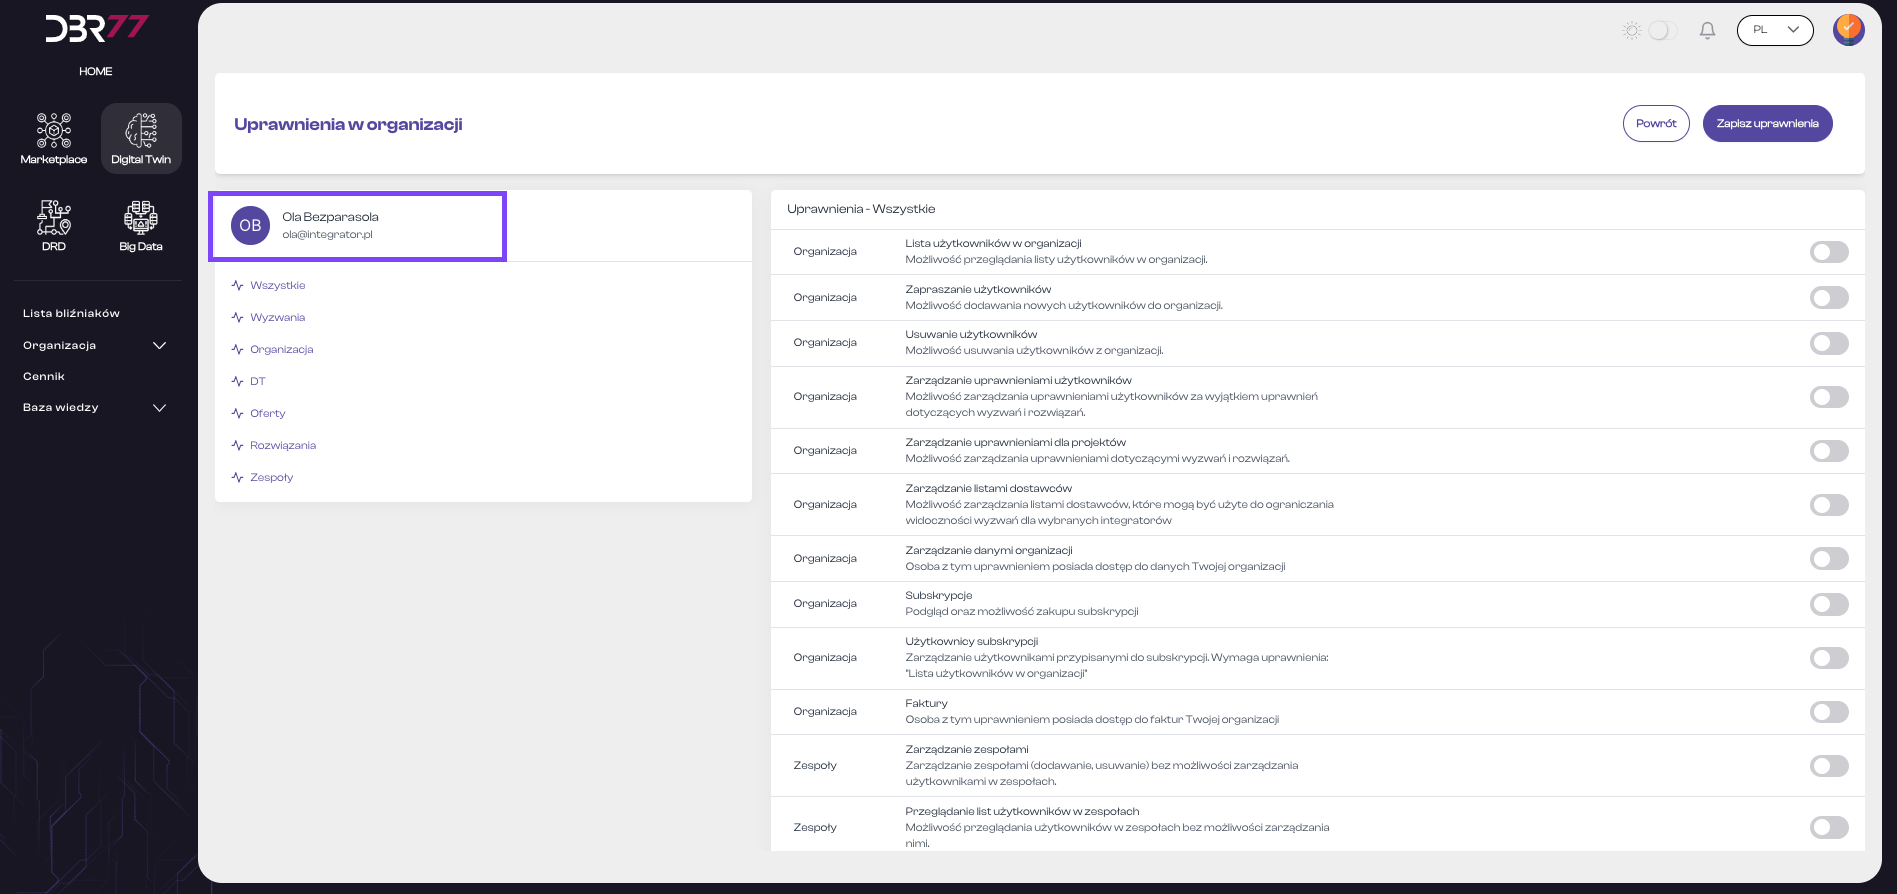
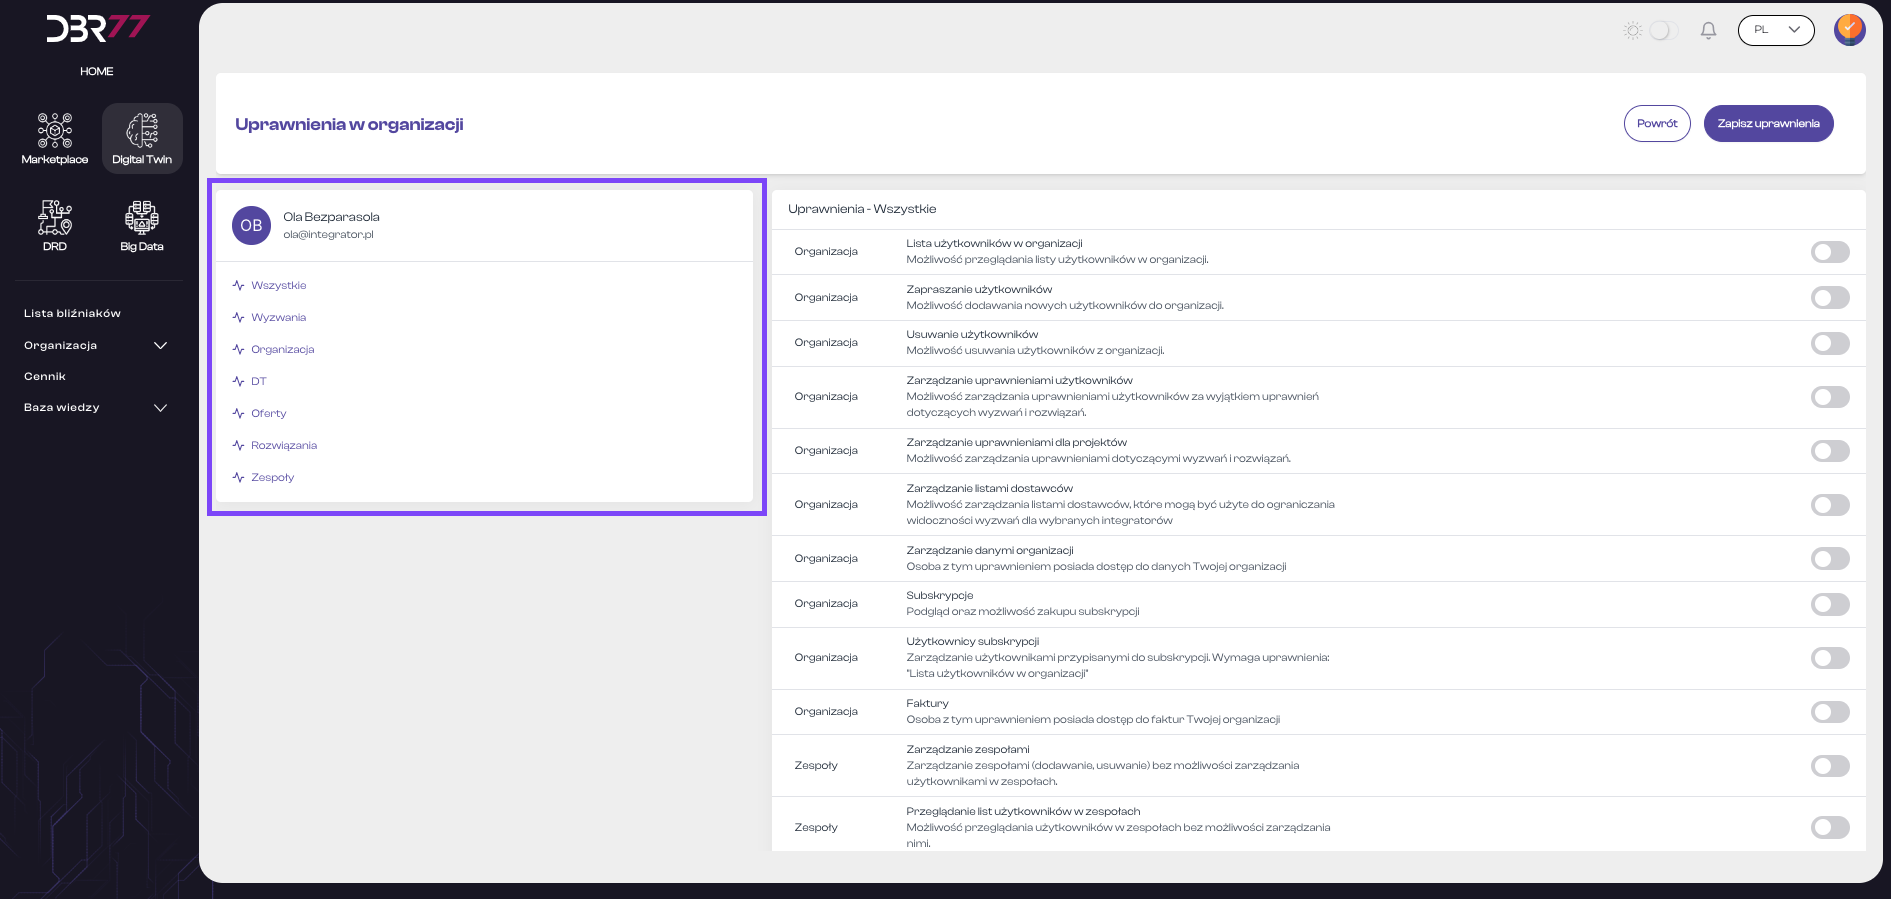
Below this information is a list of permission categories, such as:
- All
- Challenges
- Organization
- DT (Digital Twin)
- Offers
- Solutions
- Teams
Permissions List:
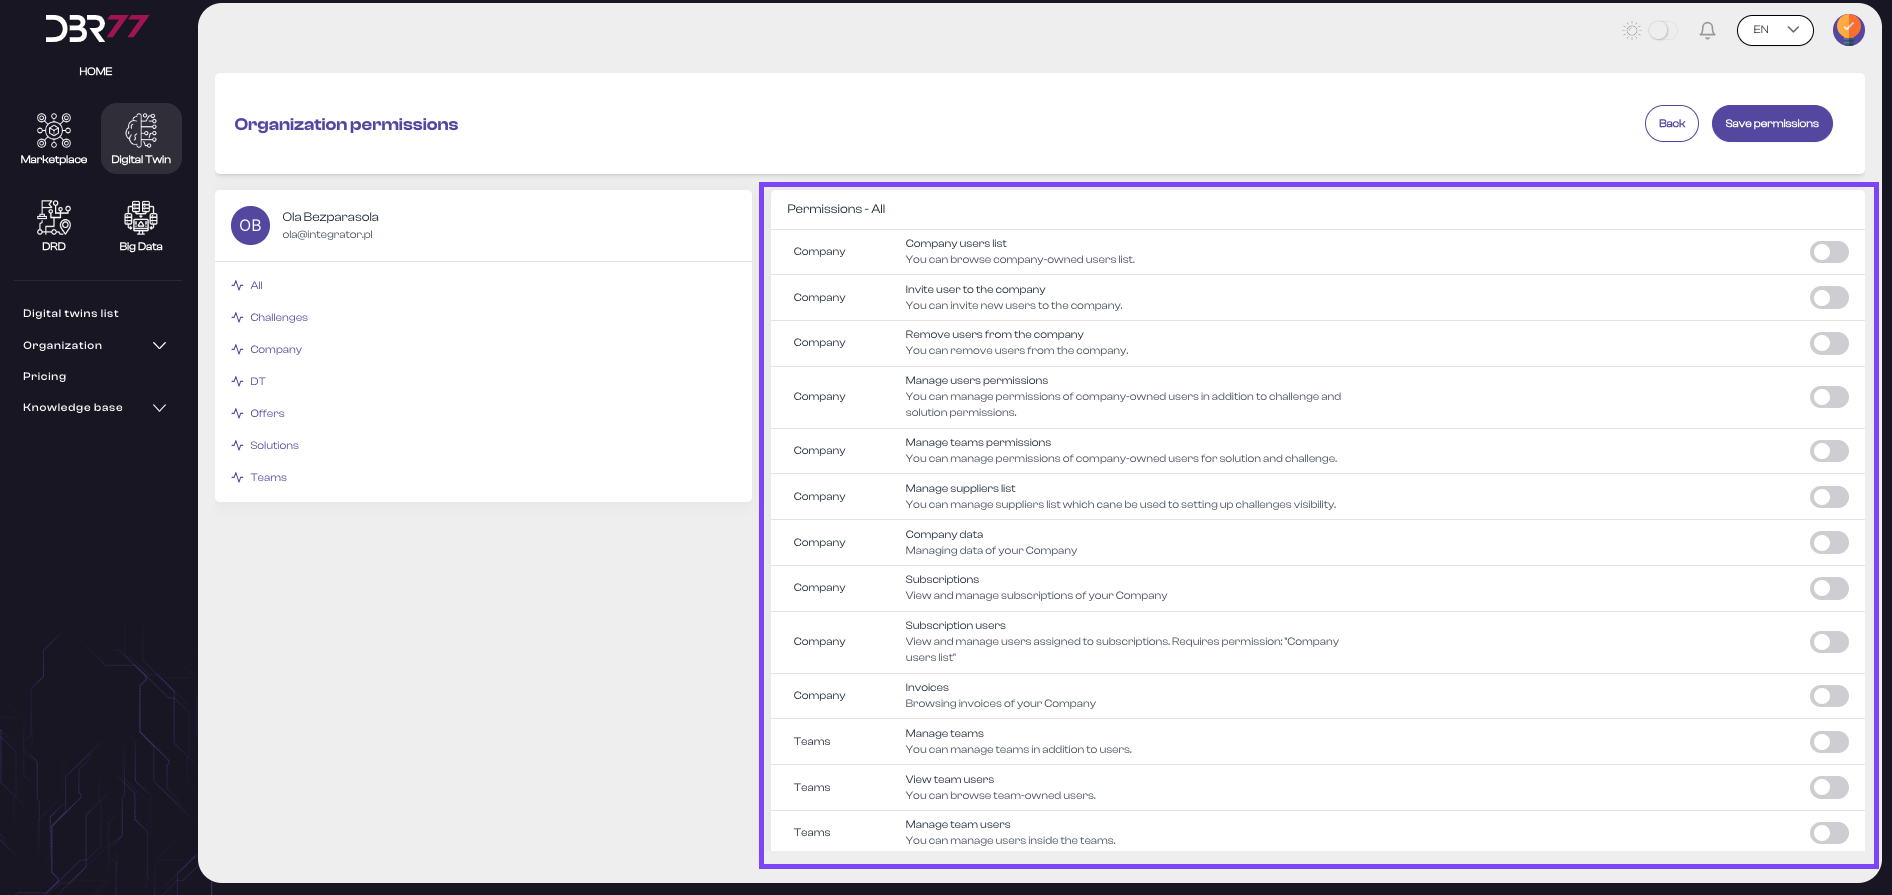
Detailed Permissions List:
On the right side of the screen, there is a detailed list of permissions divided into categories. Each category contains specific rights that can be granted or removed for a user. Example permissions include:
- View Organization User List: Ability to view the user list in the organization.
- Invite Users: Ability to add new users to the organization.
- Remove Users: Ability to remove users from the organization.
- Manage User Permissions: Ability to manage user permissions, excluding permissions for Challenges and Solutions.
- Manage Project Permissions: Ability to manage permissions related to Challenges and Solutions.
- Manage Supplier Lists: Ability to manage supplier lists to limit the visibility of challenges for selected integrators.
- Manage Organization Data: Access to the organization’s data.
- Subscriptions: View and manage subscriptions, including subscription purchases.
- Subscription Users: Manage users assigned to subscriptions.
- Invoices: Access the organization’s invoices.
- Manage Teams: Manage teams (add and remove), without managing users within teams.
- View Team User Lists: Ability to view users in teams without managing them.
- Manage Users in Teams: Ability to add or remove users in teams.
Permission Toggles:
Next to each permission, there is a toggle switch that can be activated or deactivated to grant or revoke the corresponding permission for the user.
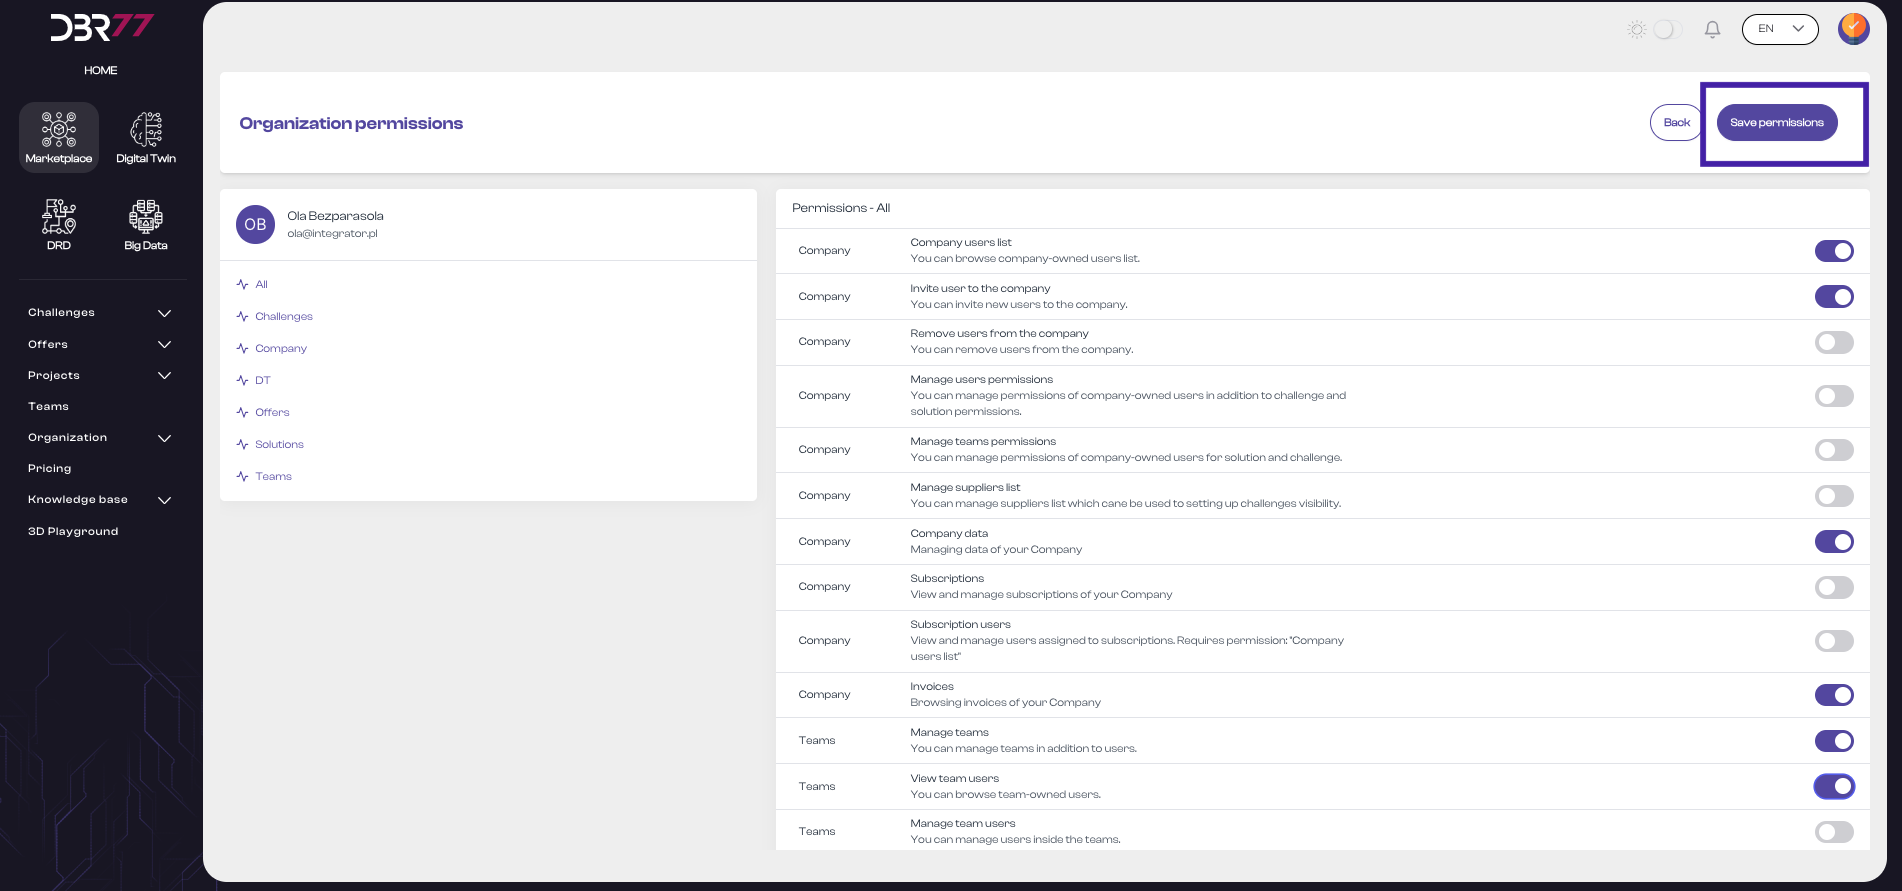
Action Buttons:
In the top right corner of the screen, there are two action buttons:
- Back: Returns to the previous view.
- Save Permissions: Saves the changes made to the user’s permissions.
The permissions view mode on the DBR77 platform is user-friendly, allowing administrators to efficiently manage user access rights within the organization. With detailed options and a clear interface, administrators can easily assign appropriate permissions so each user has access to the relevant platform functions and resources.
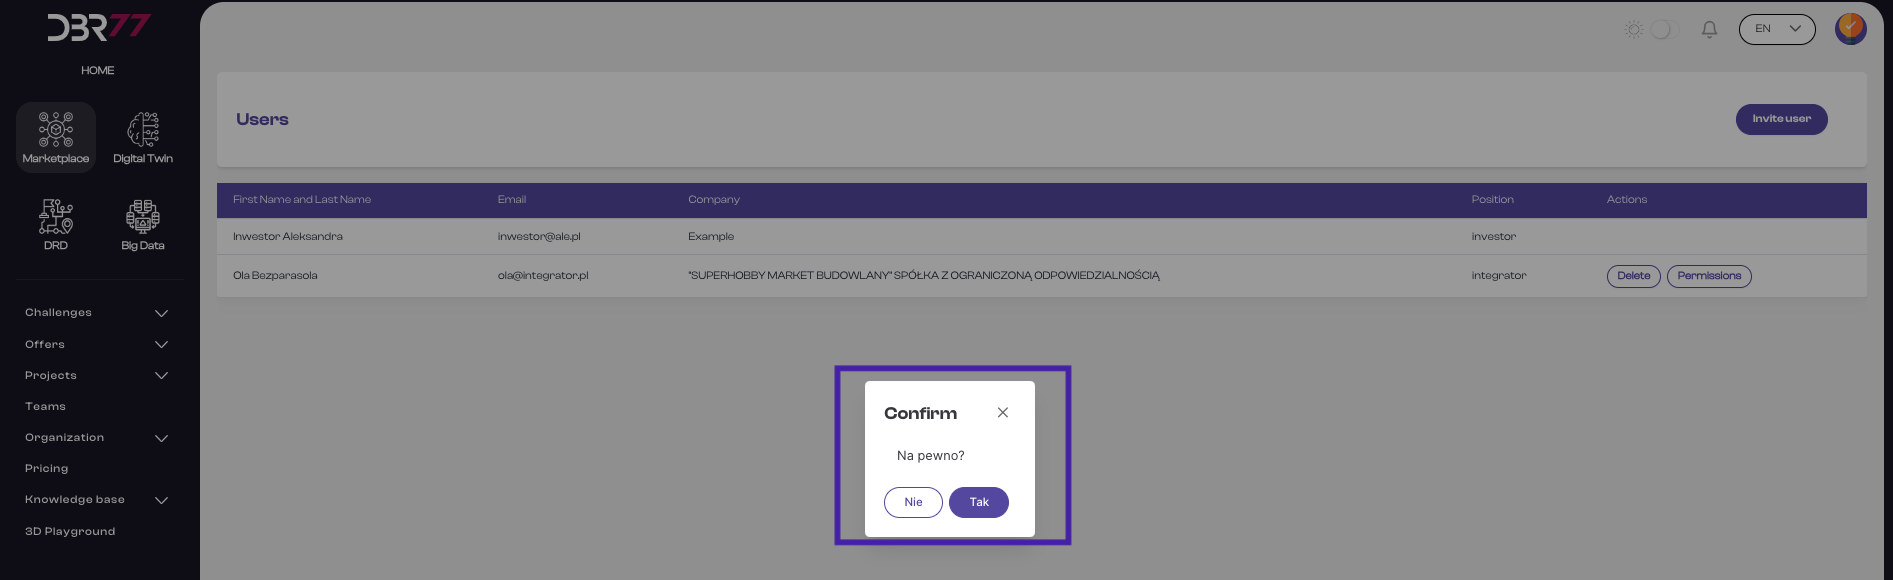
Removing a User
Steps to Remove a User:
- Locate the user you wish to remove in the list, then click the management icon next to their details.
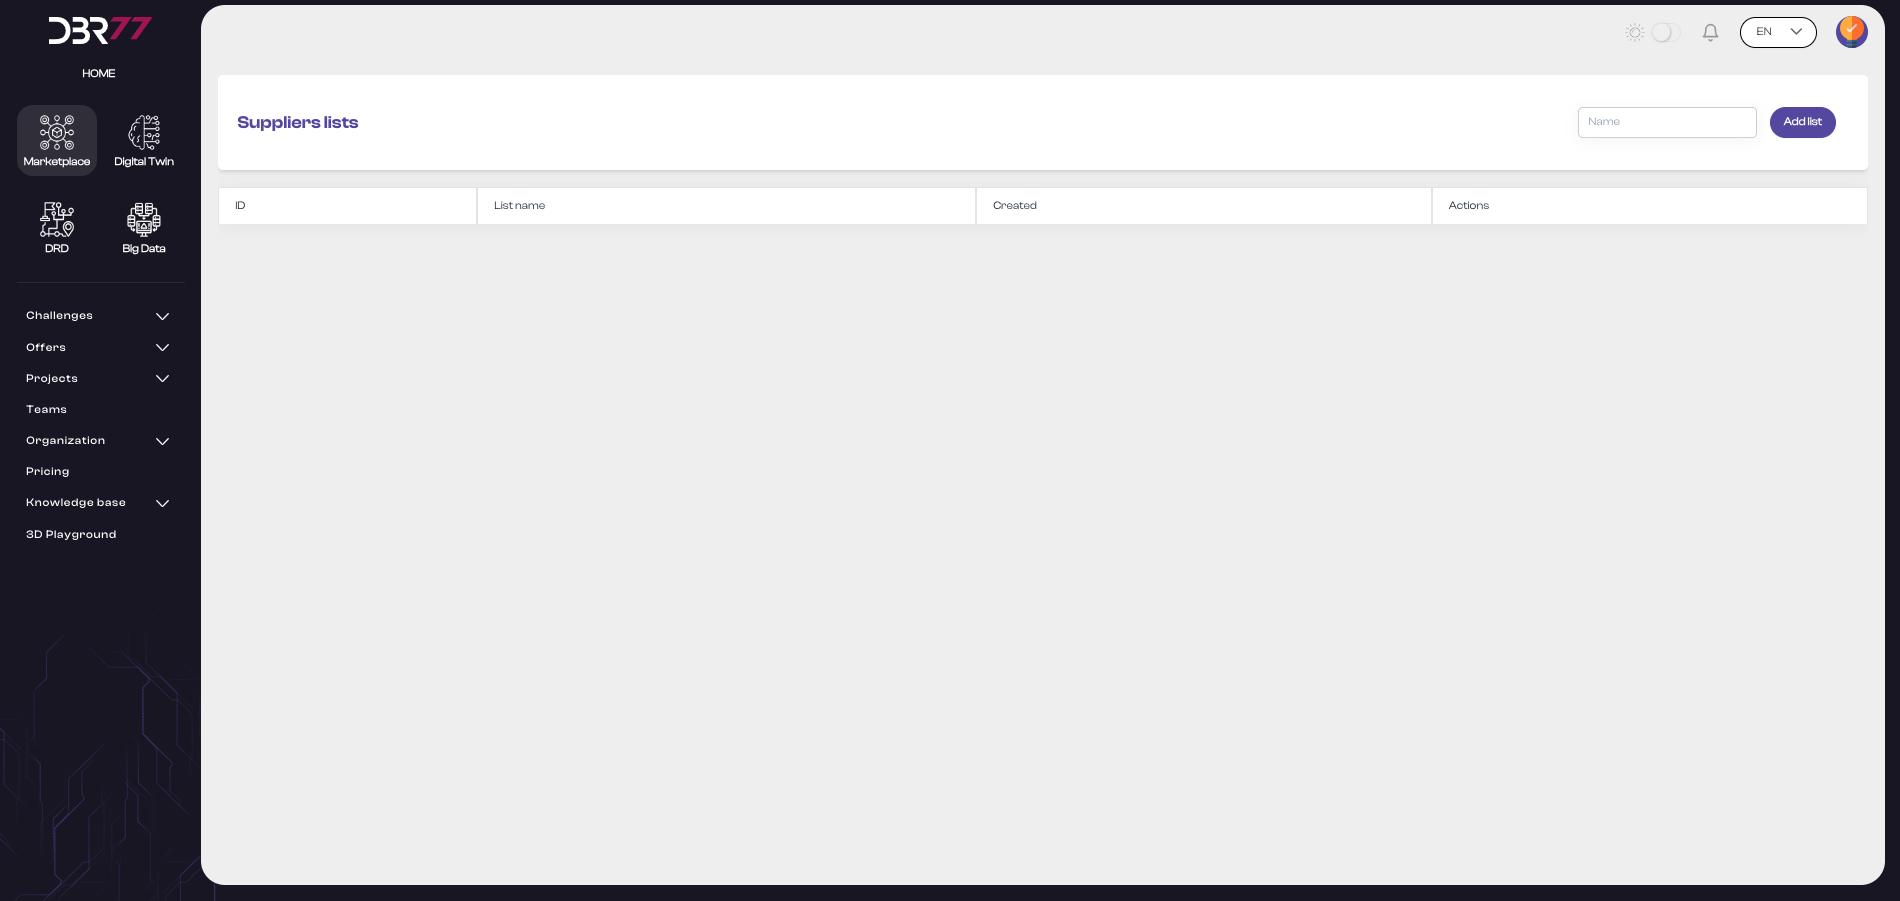
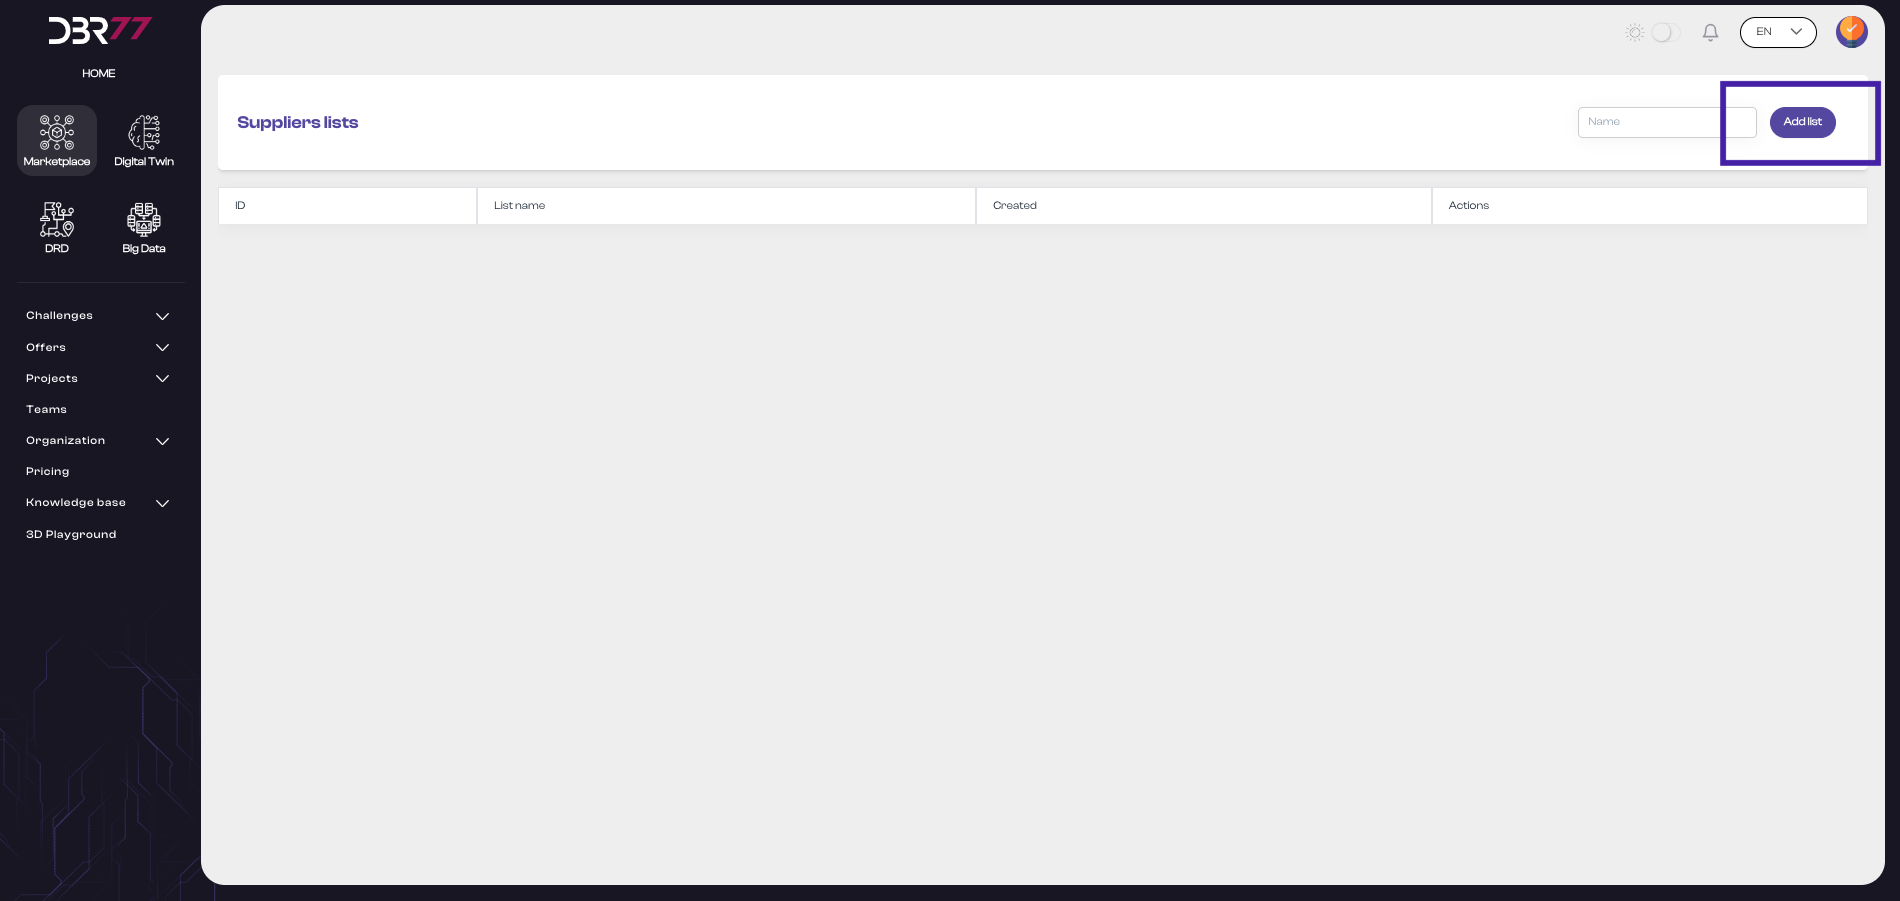
the Supplier List
Go to the Supplier List.
Subscriptions
Go to Subscriptions.
The subscription view on the DBR77 platform allows users to manage their subscriptions, including viewing subscription details, status, and payment information. The structure of the view is described below:
Elements of the Subscription View:
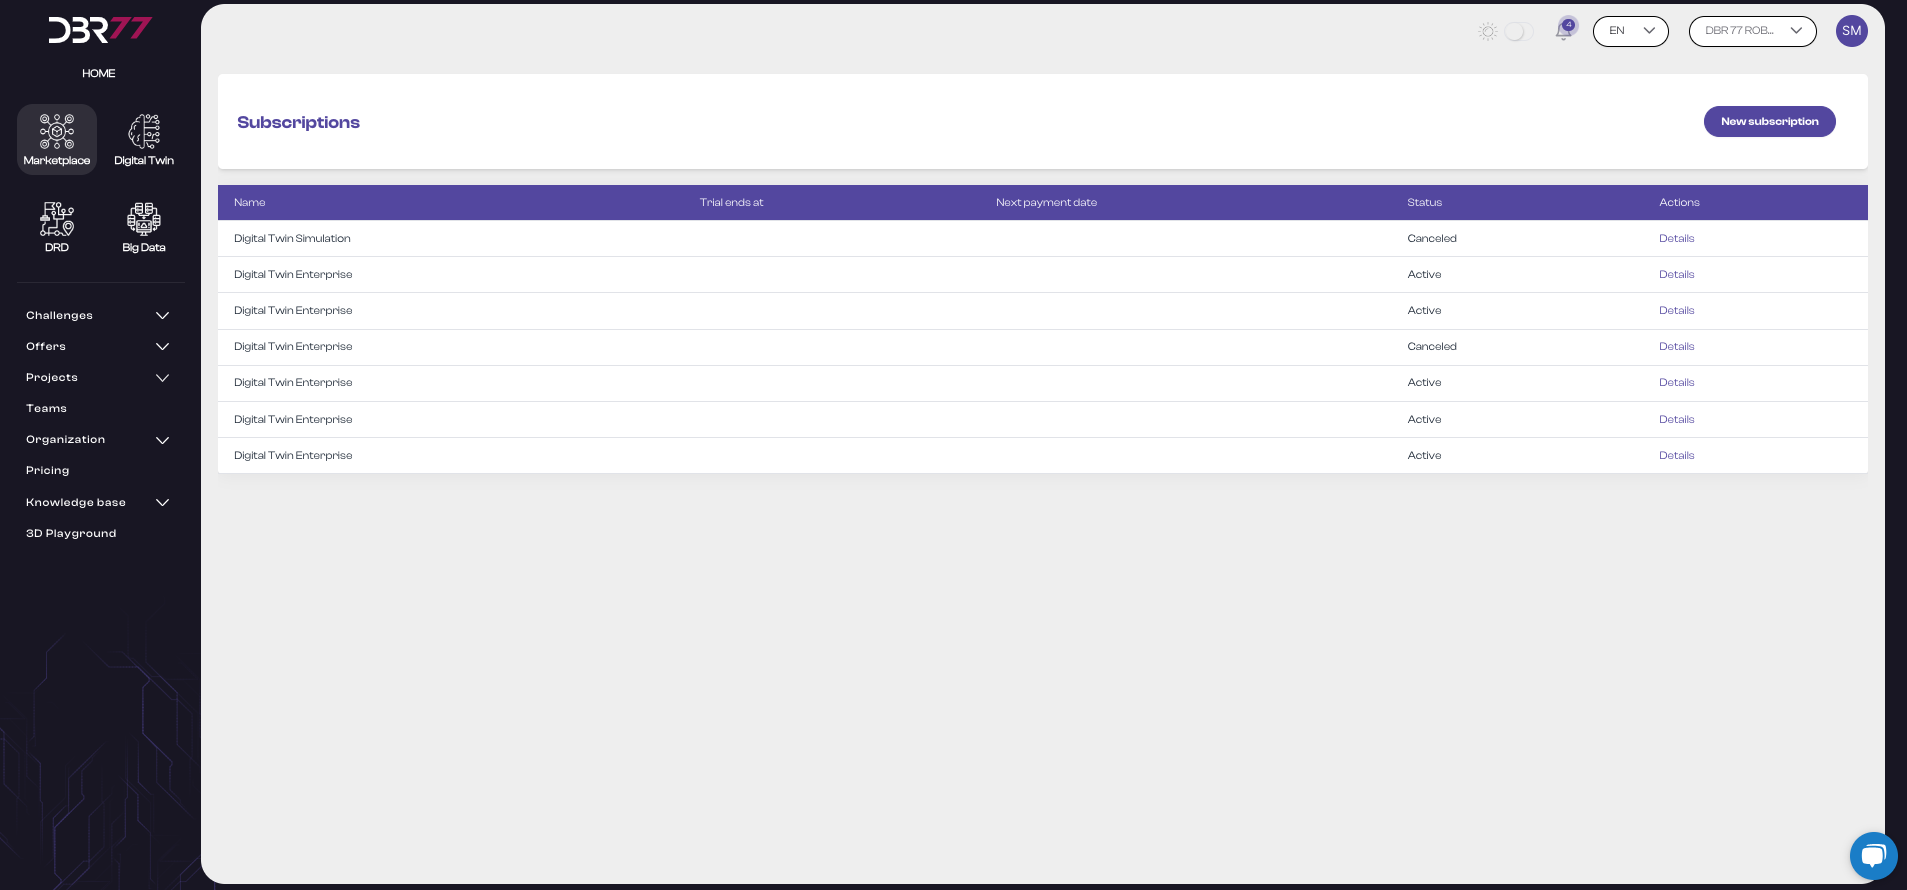
- Header: At the top of the screen is the title "Subscriptions," indicating the current platform section.
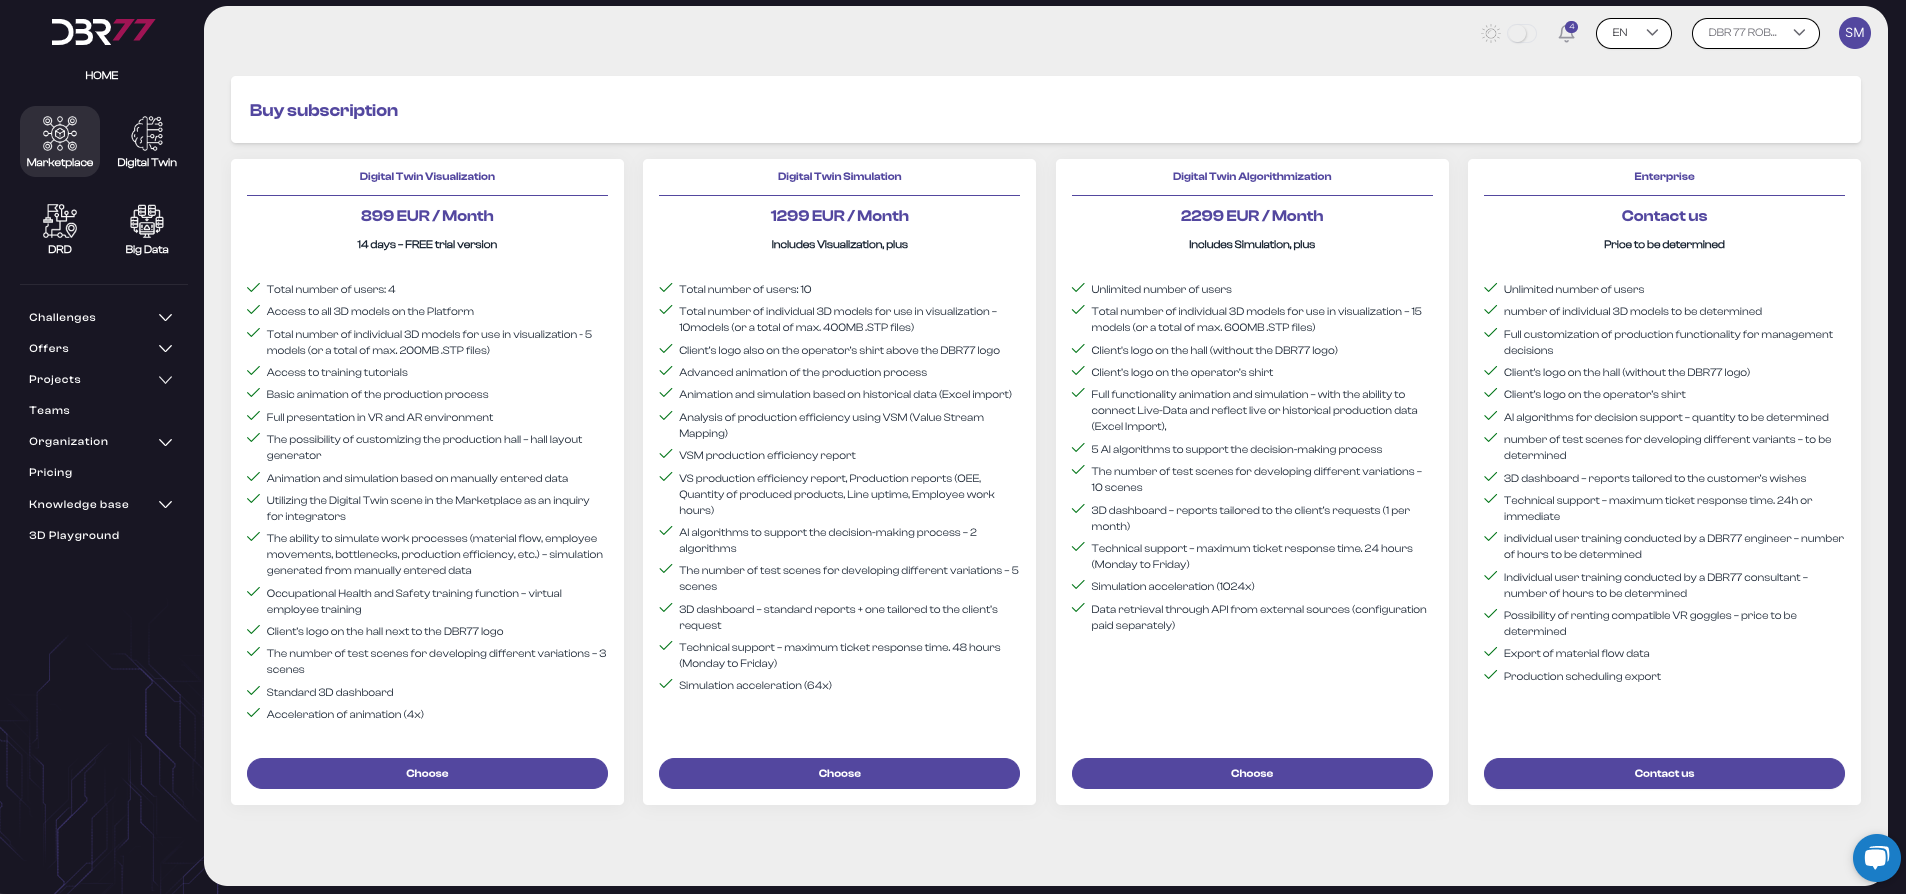
- "New Subscription" Button: To the right of the header is the "New Subscription" button, which allows the user to add a new subscription.
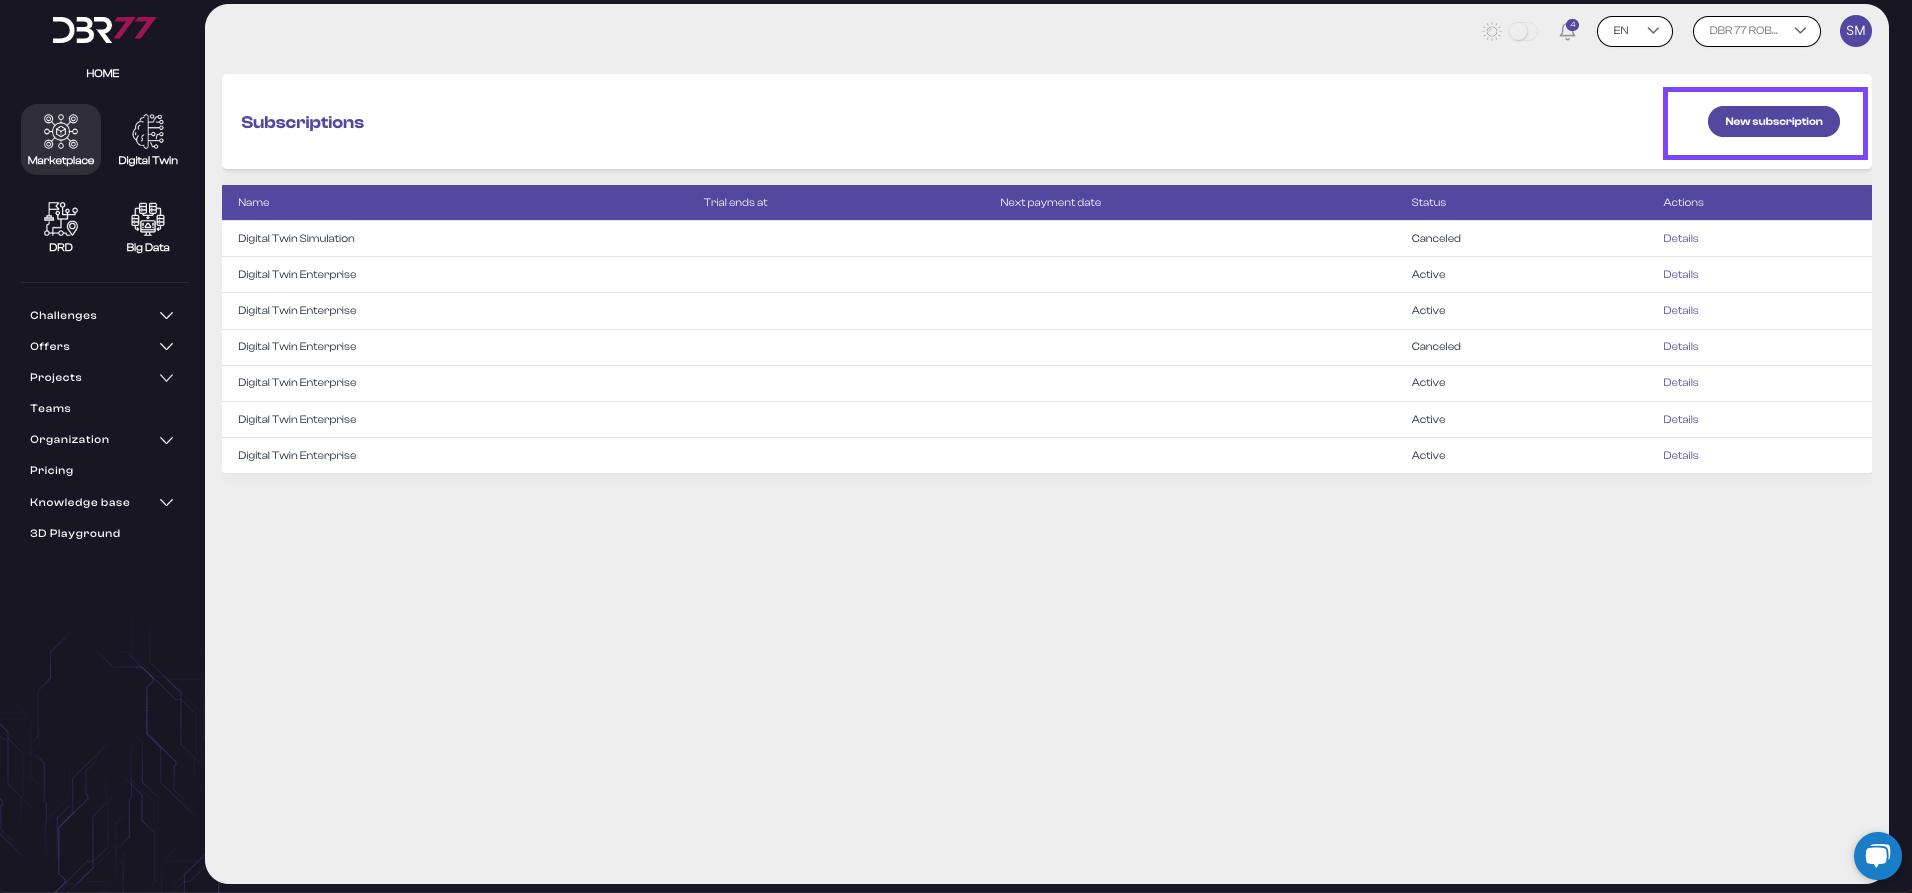
Clicking this button automatically redirects the user to the pricing plan and view of all available subscriptions.
Subscription List:
In the central area of the screen is a table listing all subscriptions. Each row in the table represents a subscription and includes the following columns:
- Name: The name of the subscription, such as "Digital Twin Simulation" or "Digital Twin Enterprise."
- End of Trial Period: Date when the trial period ends, if applicable.
- Next Payment Date: The date of the next payment for the subscription.
- Status: The subscription status, such as "Canceled" or "Active."
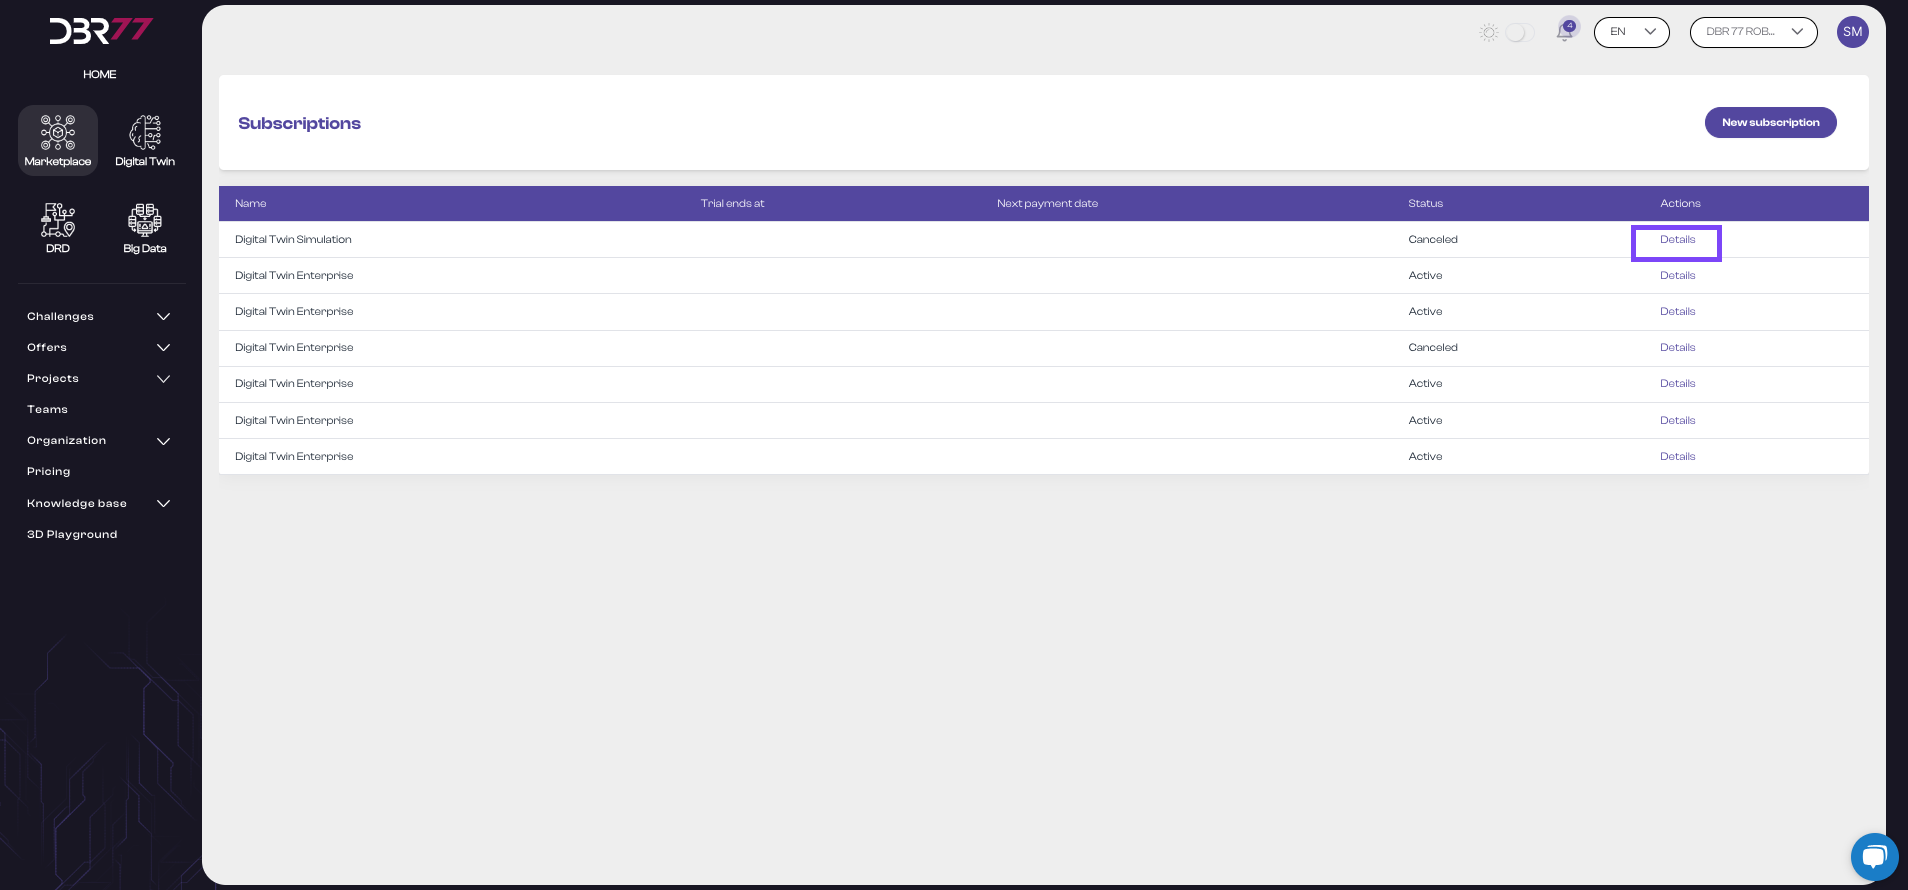
- Actions: A button that allows the user to view subscription details.
"Details" Button:
- Each row in the "Actions" column includes a "Details" button. Clicking this button allows the user to view specific details of the selected subscription.
Active Subscription Details:
- The active subscriptions view on the DBR77 platform allows users to manage subscribers and view details of each subscription. Below is a detailed description of the individual elements in this view:
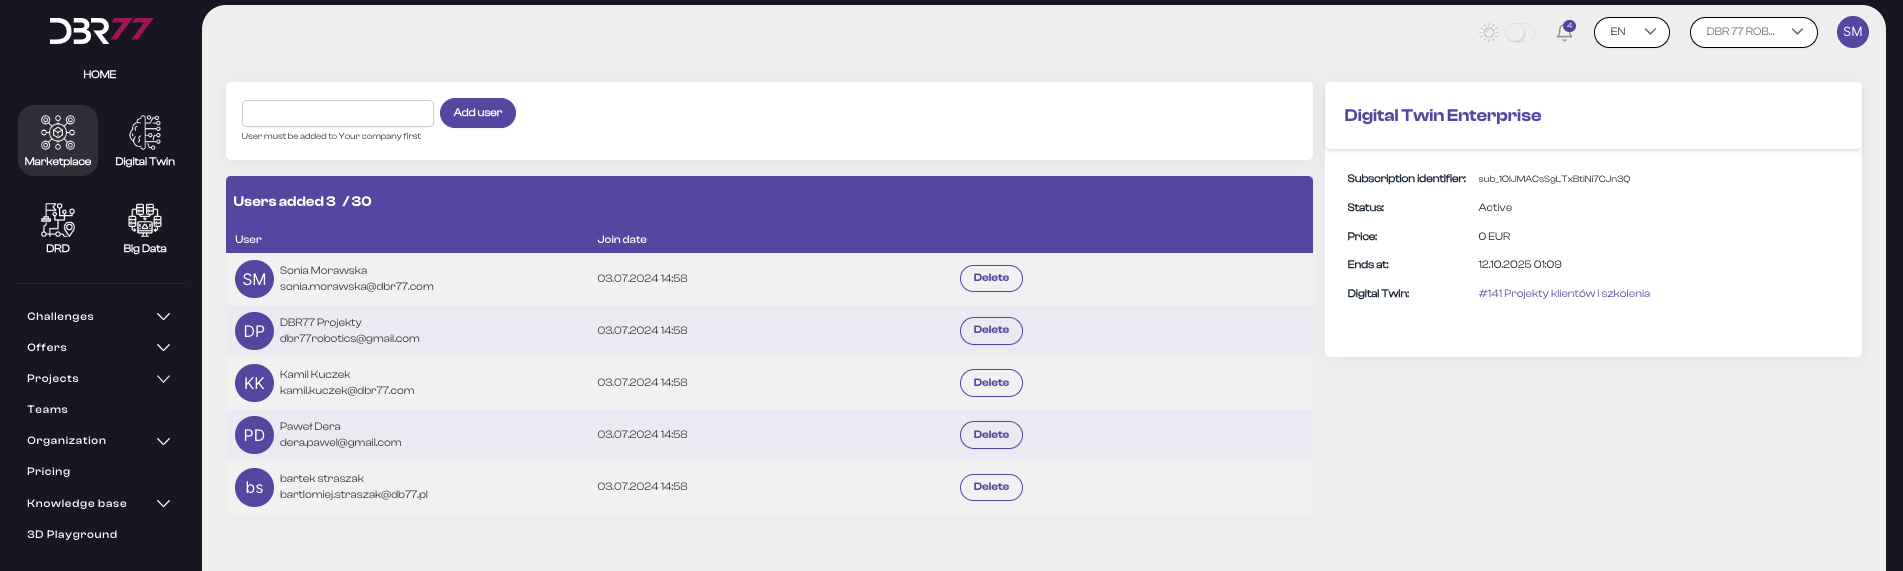
Elements of the Active Subscriptions View:
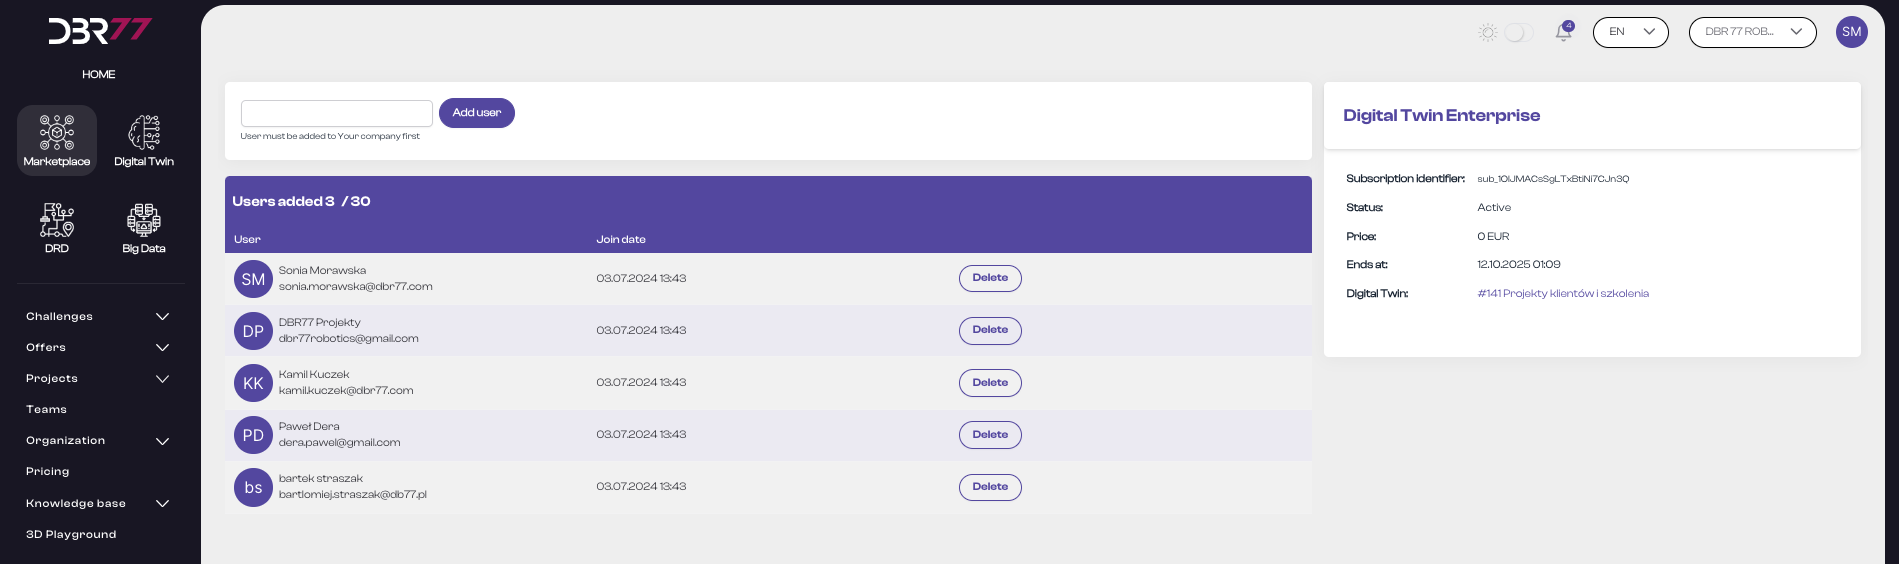
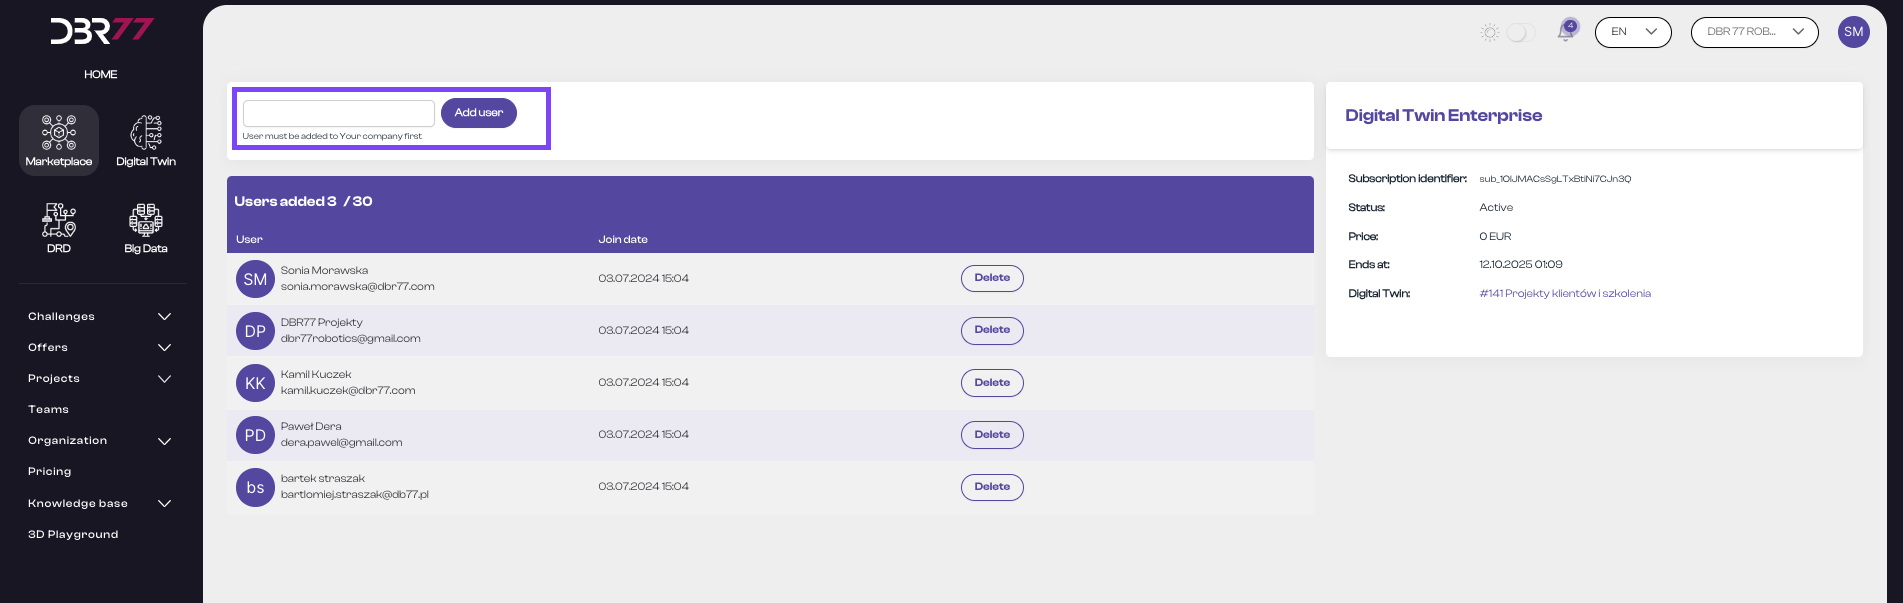
Search Field and "Add User" Button:
- At the top of the screen is a search field where the user can enter the email address of the user they wish to add to the subscription list.
- Next to the search field is the "Add User" button. Clicking this button adds the new user to the subscriber list.
- Important: Only a user who has previously accepted the invitation to the organization can be added.
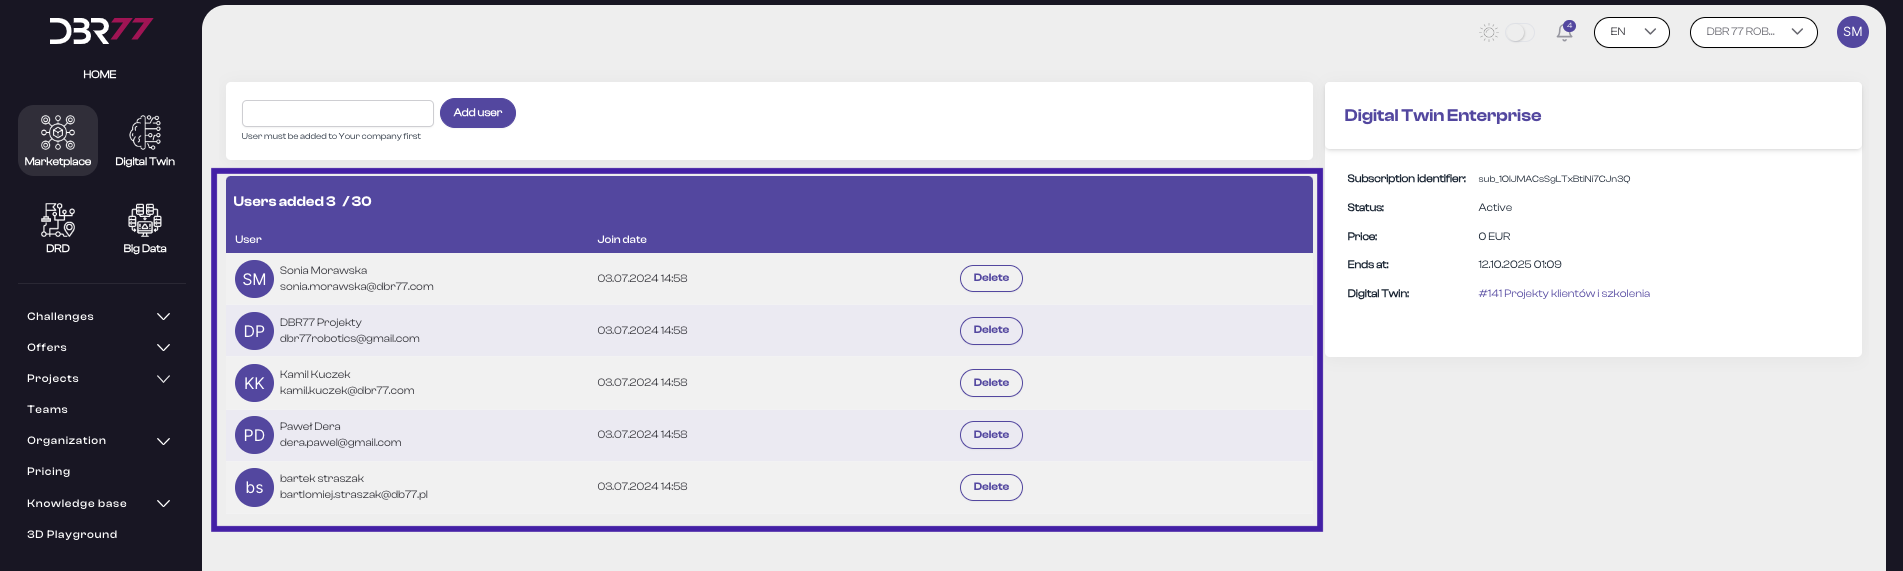
Subscriber List:
In the central area of the screen is a table listing users added to the subscription. Each row represents a user and includes the following columns:
- User: The first and last name, as well as the email address of the user.
- Join Date: The date the user was added to the subscription.
- "Remove" Button: A button that allows the user to be removed from the subscription.
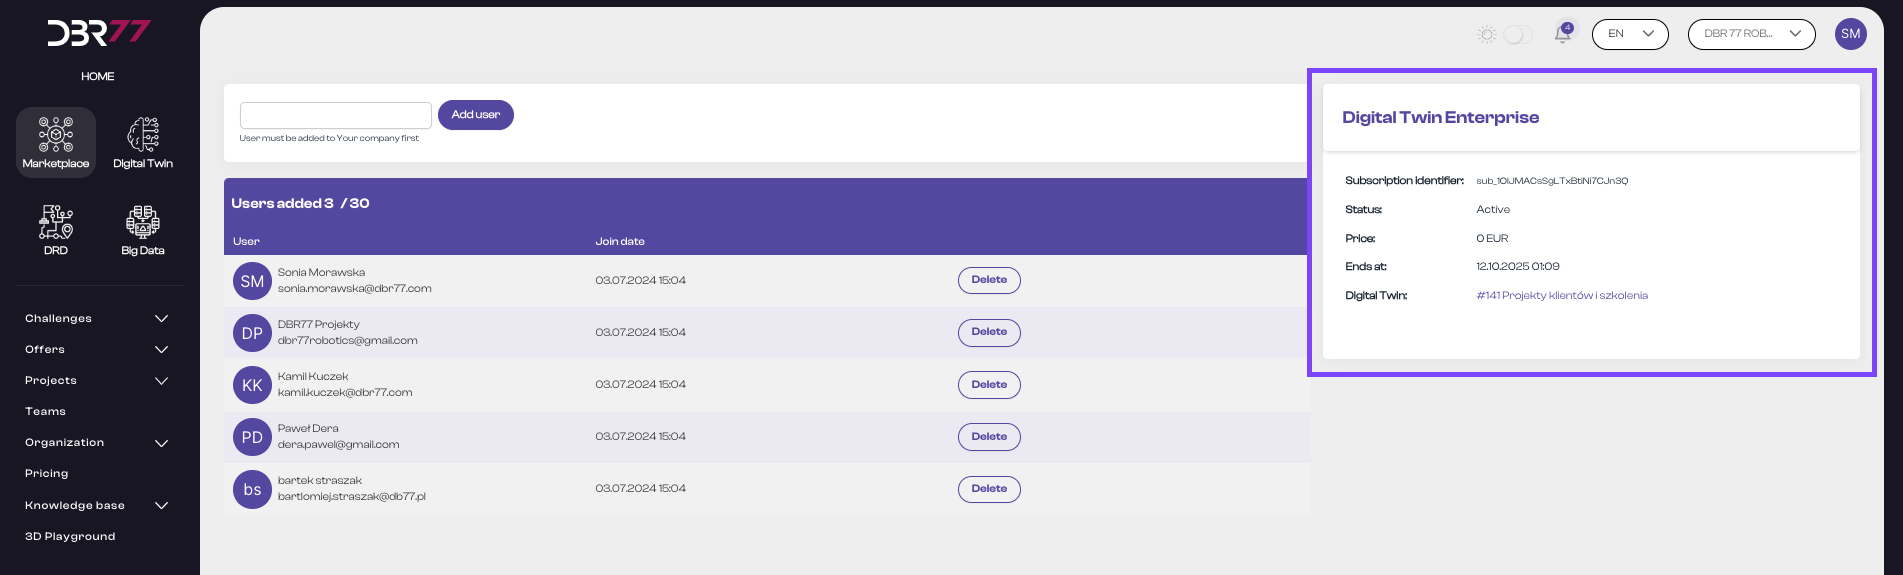
Subscription Details:
On the right side of the screen, the subscription details are displayed, including:
- Subscription ID: Unique identifier of the subscription.
- Status: The current status of the subscription, such as "Active."
- Price: The cost of the subscription.
- End Date: The date when the subscription ends.
- Digital Twin: A link to the associated project.
The active subscriptions view on the DBR77 platform is clear and intuitive, allowing users to manage subscribers and view important subscription details with ease.
By allowing users to add or remove subscribers and view detailed subscription information, users have full control over subscription management on the platform.
Canceled Subscription Details:
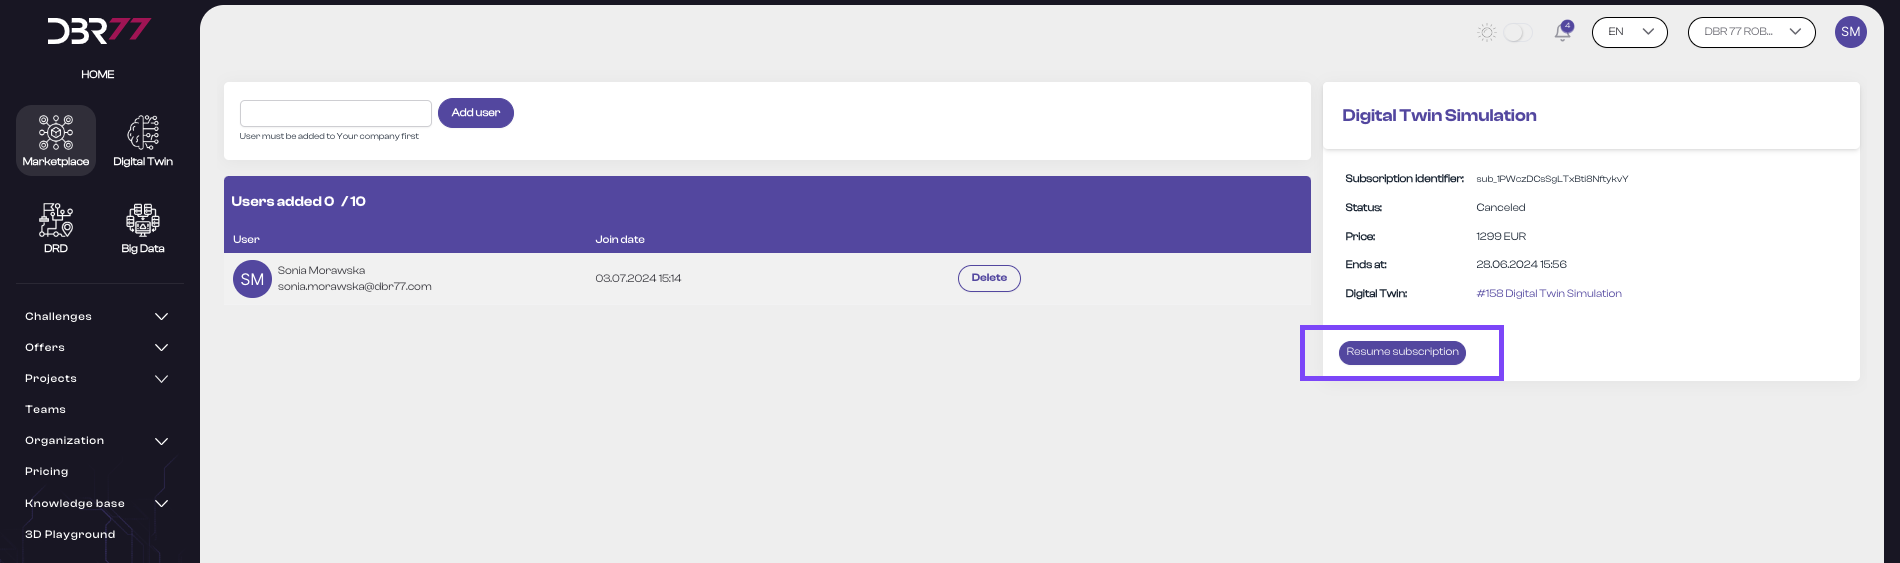
A canceled subscription is currently inactive, meaning related services may be suspended. The only additional element in the view is a button to resume the subscription and reactivate all associated services.
The subscription view on the DBR77 platform is designed to be intuitive and straightforward, making it easy for users to manage their subscriptions. Details like subscription name, trial period, upcoming payments, and status are easily accessible, and the detailed view provides convenience and full control over subscriptions.
Invoices
Switch to Invoices.
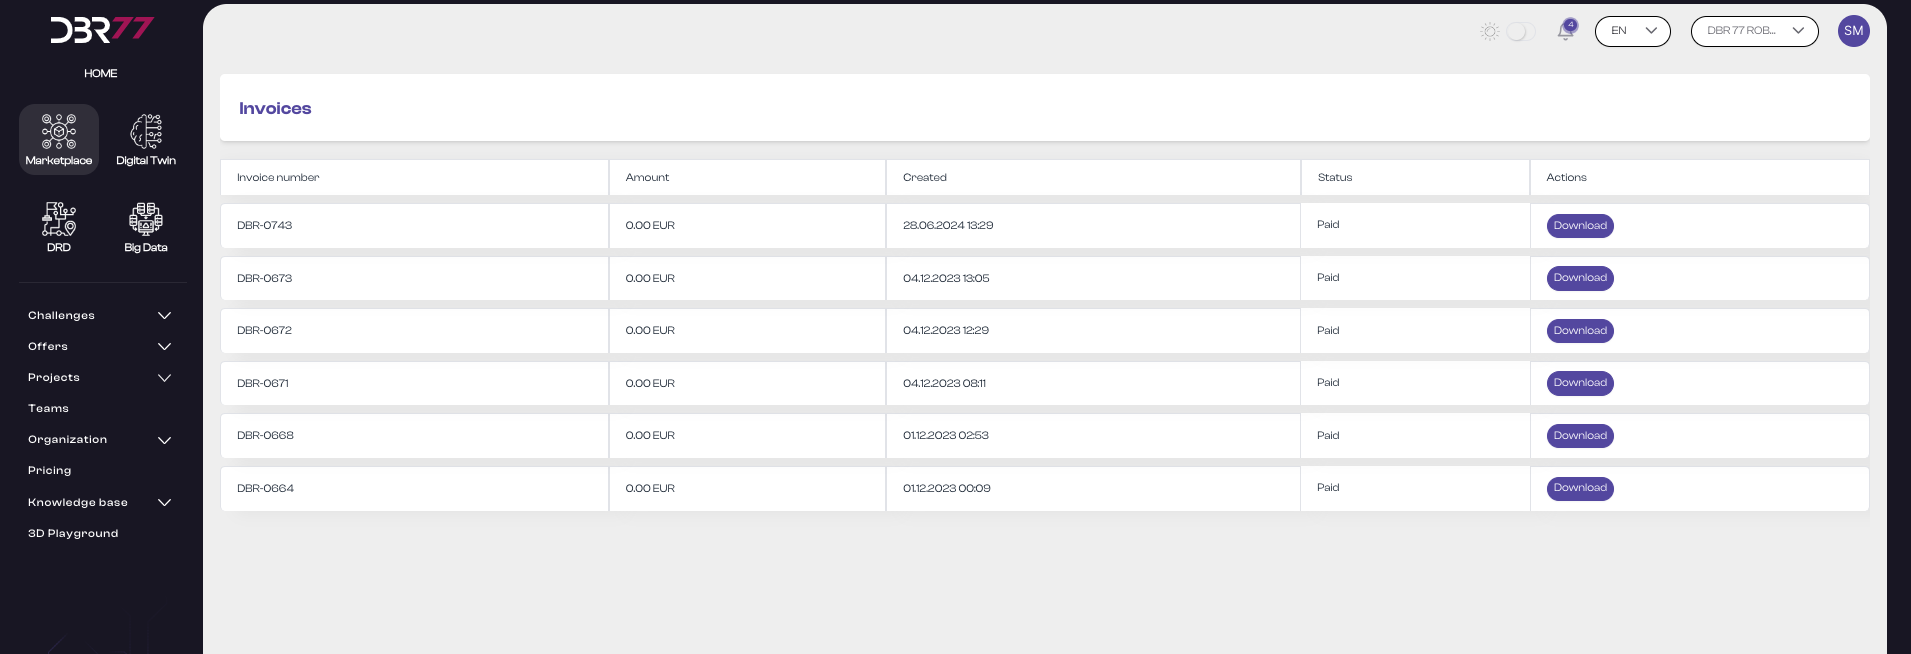
The invoice view on the DBR77 platform allows users to browse, manage, and download invoices linked to their account. Below is a detailed description of the individual elements in this view:
Elements of the Invoice View:
Header: At the top of the screen is the title "Invoices," indicating the current platform section.
Invoice List: The central part of the screen contains a table listing all invoices. Each row in the table represents a single invoice and includes the following columns:
- Invoice Number: A unique identification number for the invoice.
- Amount: The invoice amount, displayed in euros (EUR).
- Created On: The date and time the invoice was issued, e.g., 06/28/2024 13:29.
- Status: The invoice status, e.g., "Paid."
- Actions: An action button to download the invoice in PDF format.
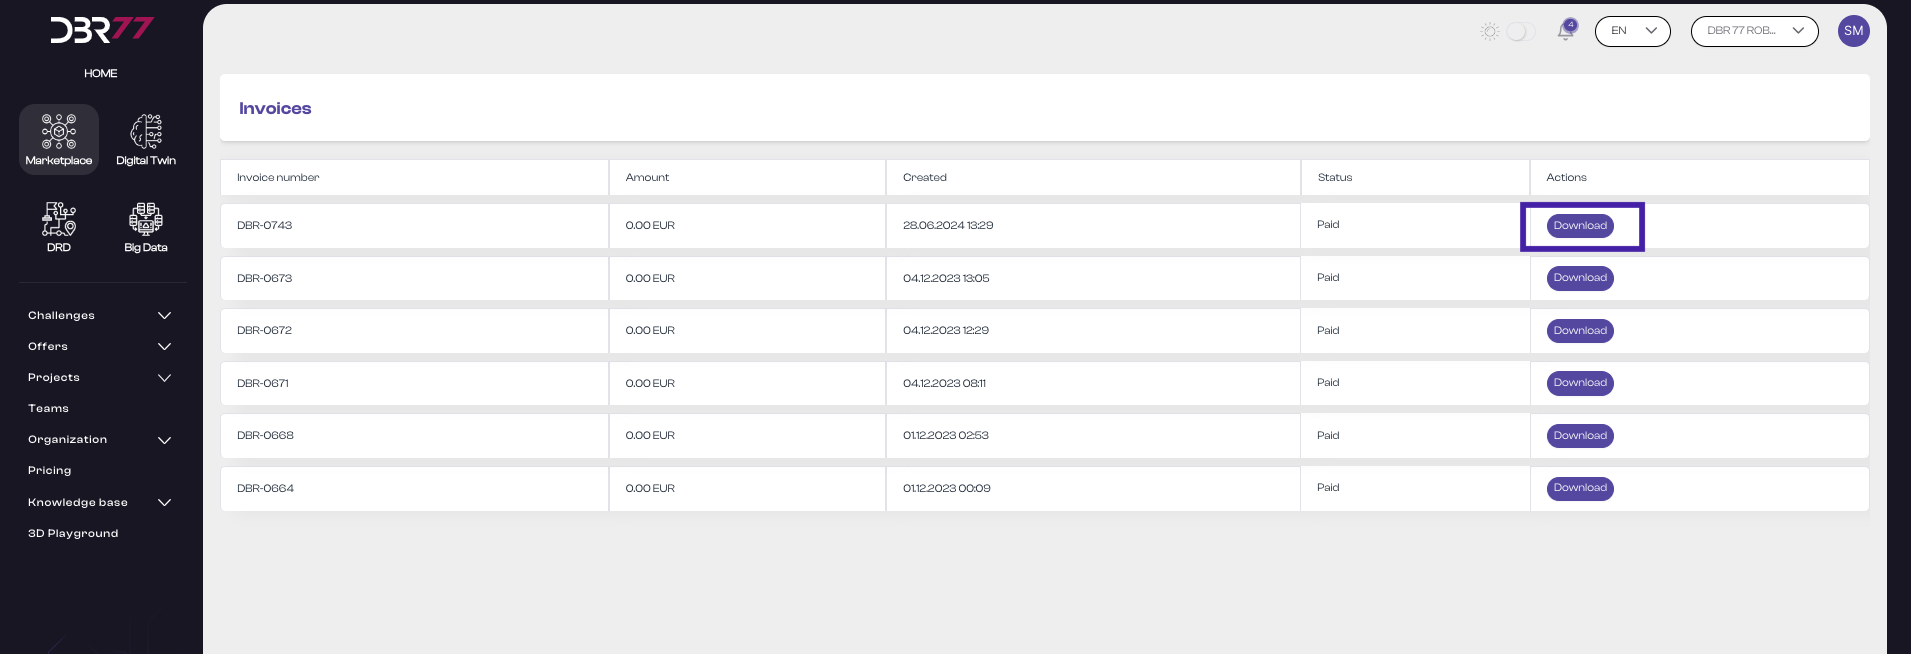
Invoice Download
Each row in the "Actions" column includes a "Download" button. By clicking this button, the user can download the invoice in PDF format to their device.
The invoice view on the DBR77 platform is designed to be intuitive and straightforward, making it easy for users to manage their invoices. Reviewing details like invoice number, amount, creation date, and status is simple, and the PDF download function provides convenience and facilitates document archiving.