# Layout Mode
# Adding a New Area in Layout Mode
Adding an area in **Layout Mode** is a crucial step in designing production, warehouse, or facility spaces. Follow these steps to create a new area and ensure accuracy in your design.
### Steps to Add a New Area
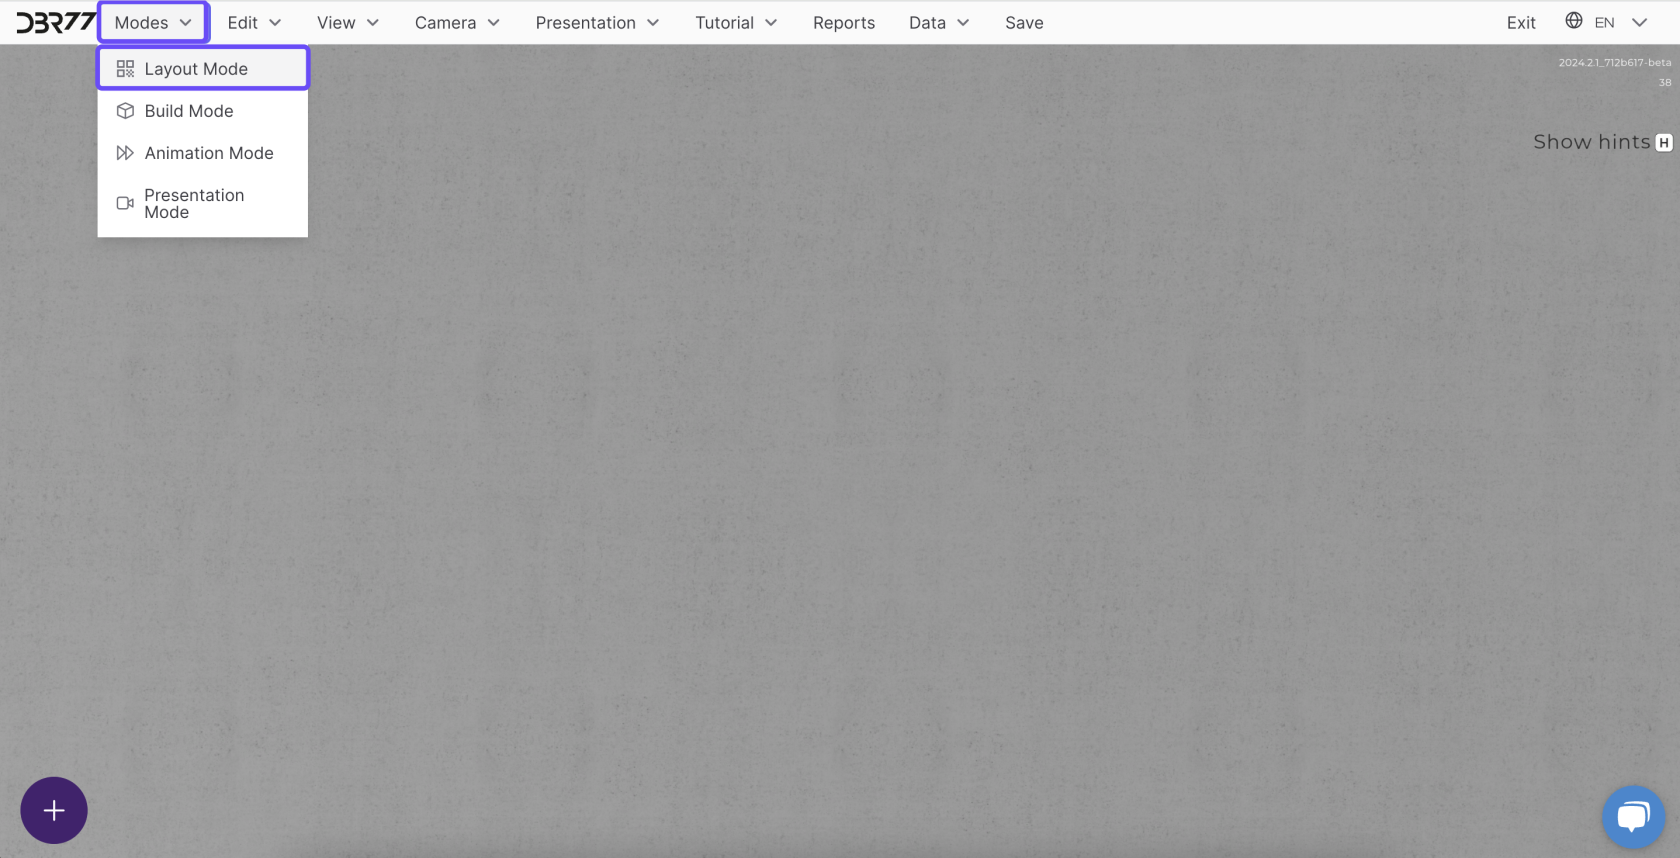
#### **Switch to Layout Mode**
- Ensure you are in Layout Mode by selecting it from the "**Modes**" menu.
[](https://learn.dbr77.com/uploads/images/gallery/2024-07/TQj970CRVhsF3dJU-image.png)
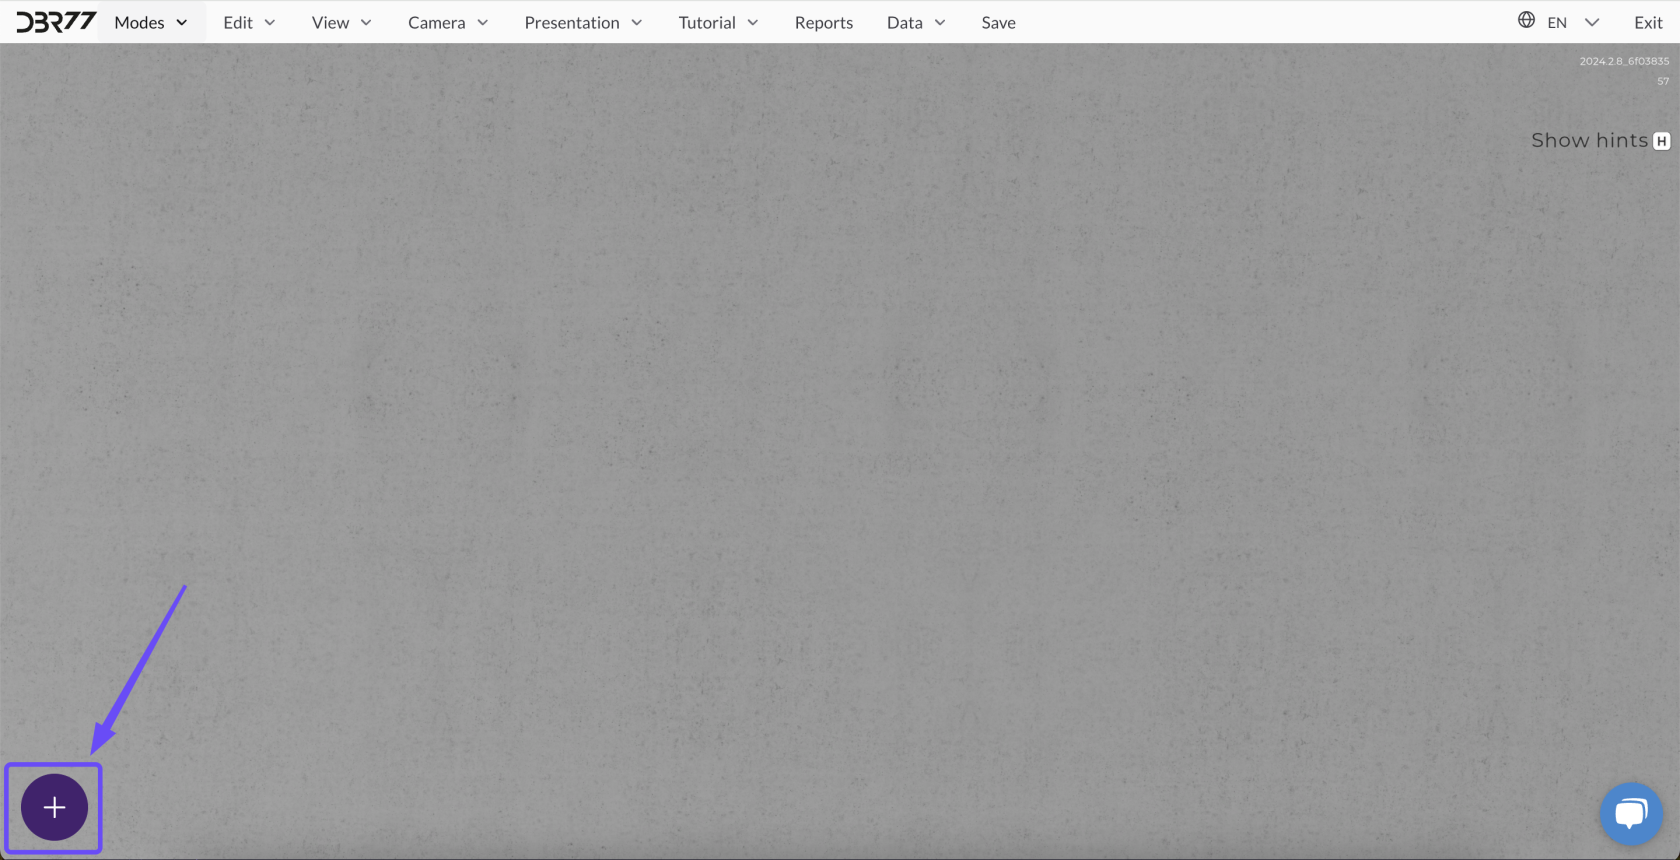
2. #### **Add a New Area**
- Click the **plus symbol (+)** in the bottom-left corner of the screen.
[](https://learn.dbr77.com/uploads/images/gallery/2024-10/1nVfzVfQA4WIeikh-image.png)
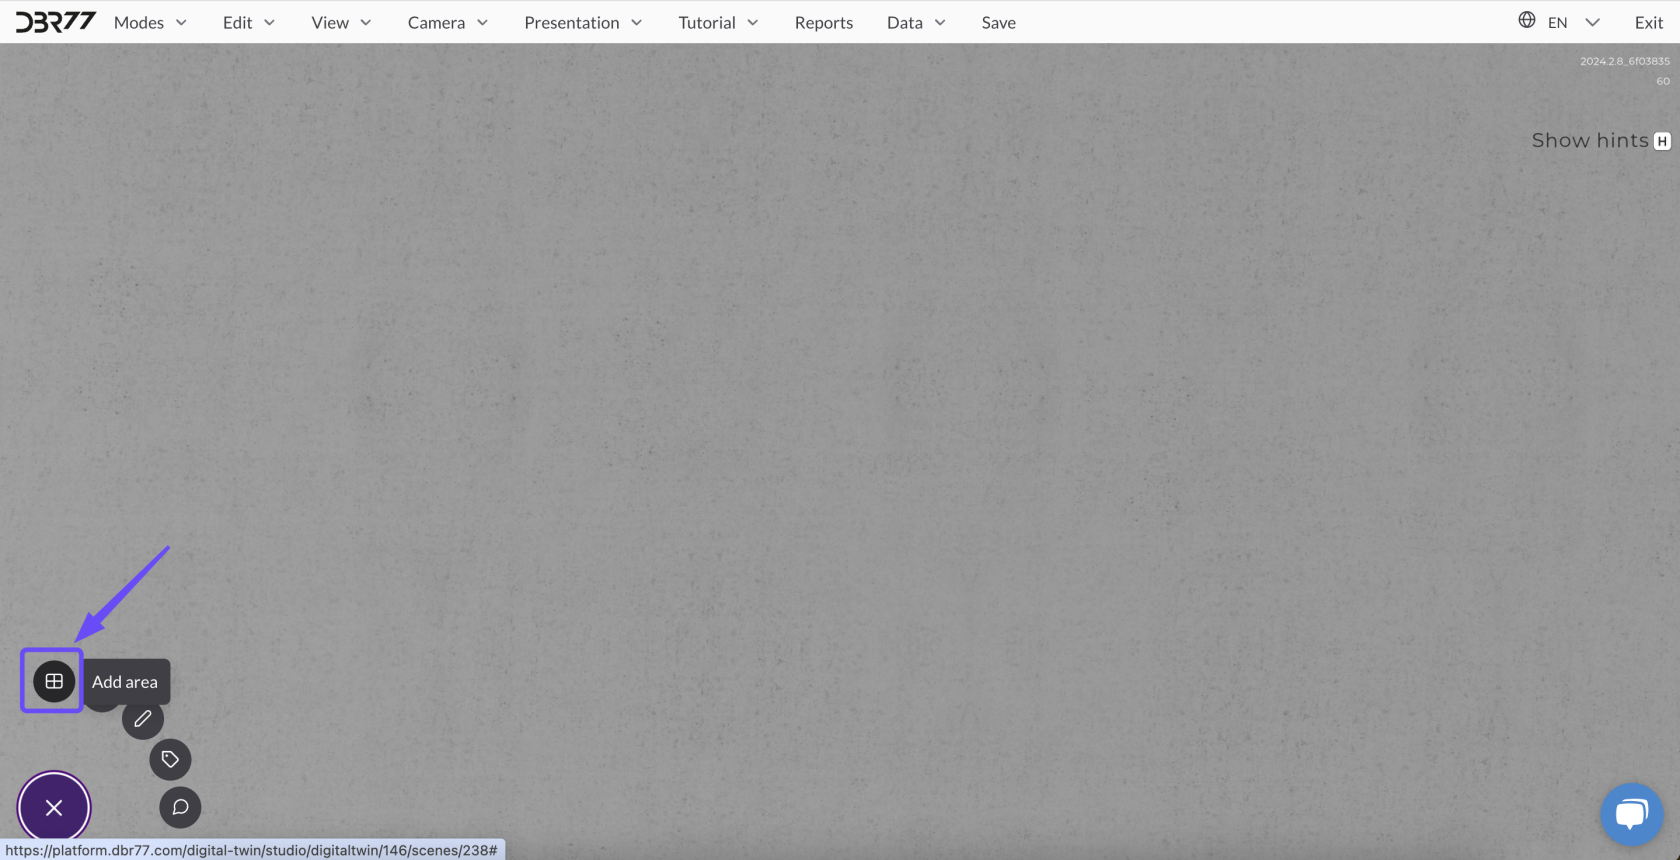
- Select the **"Add Area"** option from the menu that appears.
[](https://learn.dbr77.com/uploads/images/gallery/2024-10/BFW548aBj6C8TIGJ-image.png)
[](https://learn.dbr77.com/uploads/images/gallery/2024-07/1Lt44q2Rs0RUIwdz-projekt-bez-nazwy-18.gif)
3. #### **Draw the Area**
- **Set the First Corner**: Choose any point on the floor of the scene and click with the left mouse button to define the first corner of the layout.
[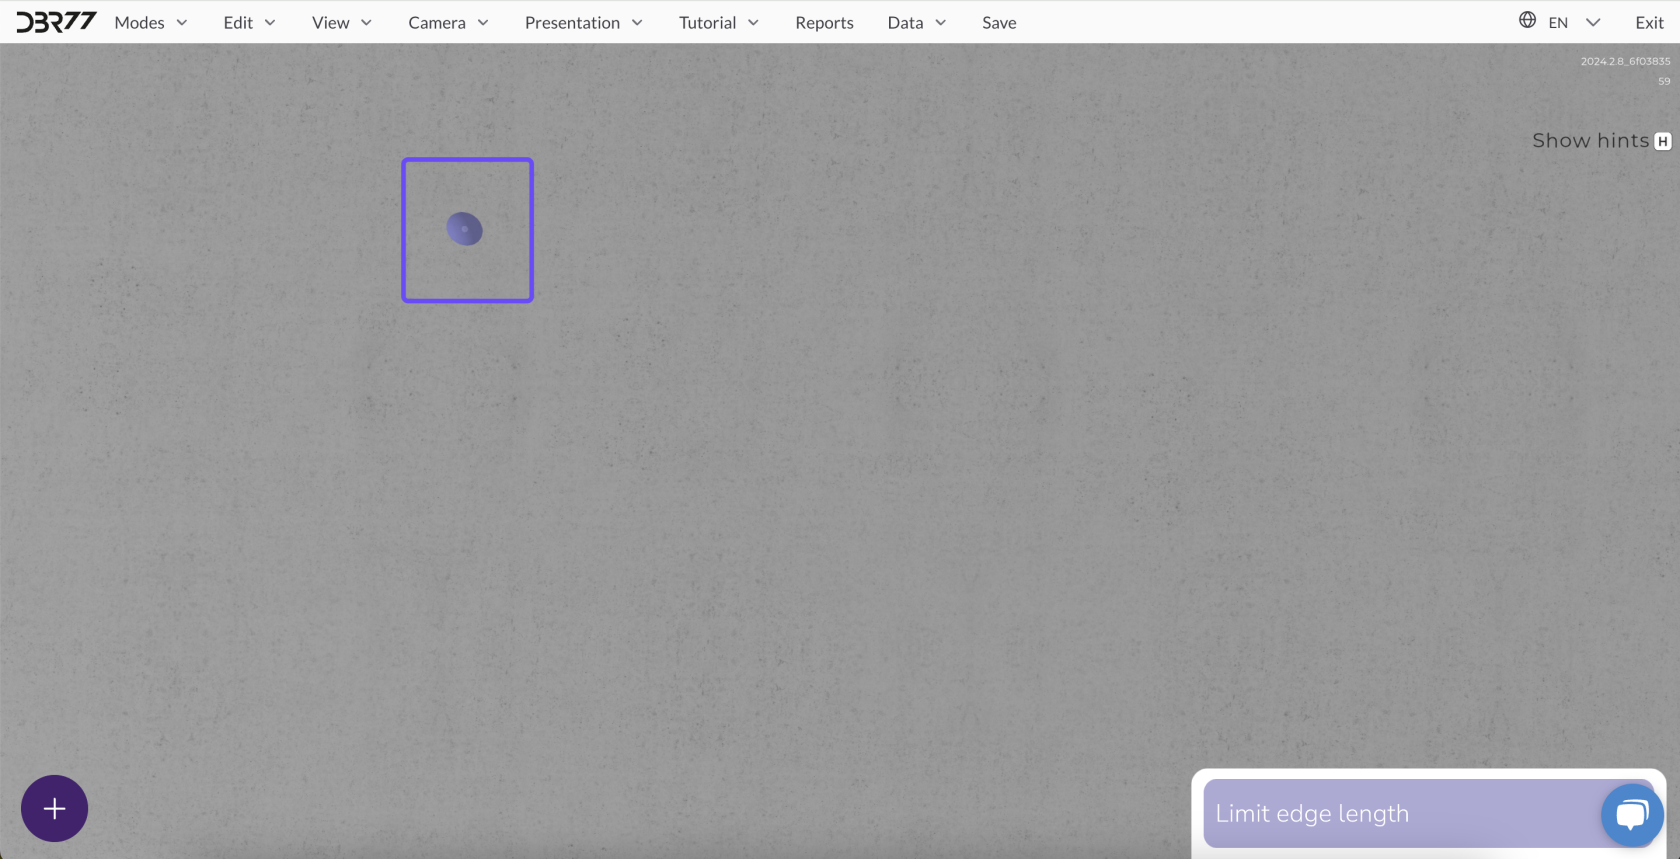](https://learn.dbr77.com/uploads/images/gallery/2024-10/H9eEDdt74uNz43Gx-image.png)
-
**Add More Points**: Continue drawing the area by clicking additional points to define the other corners. Each click adds a new corner, connected to the previous one by a line.
[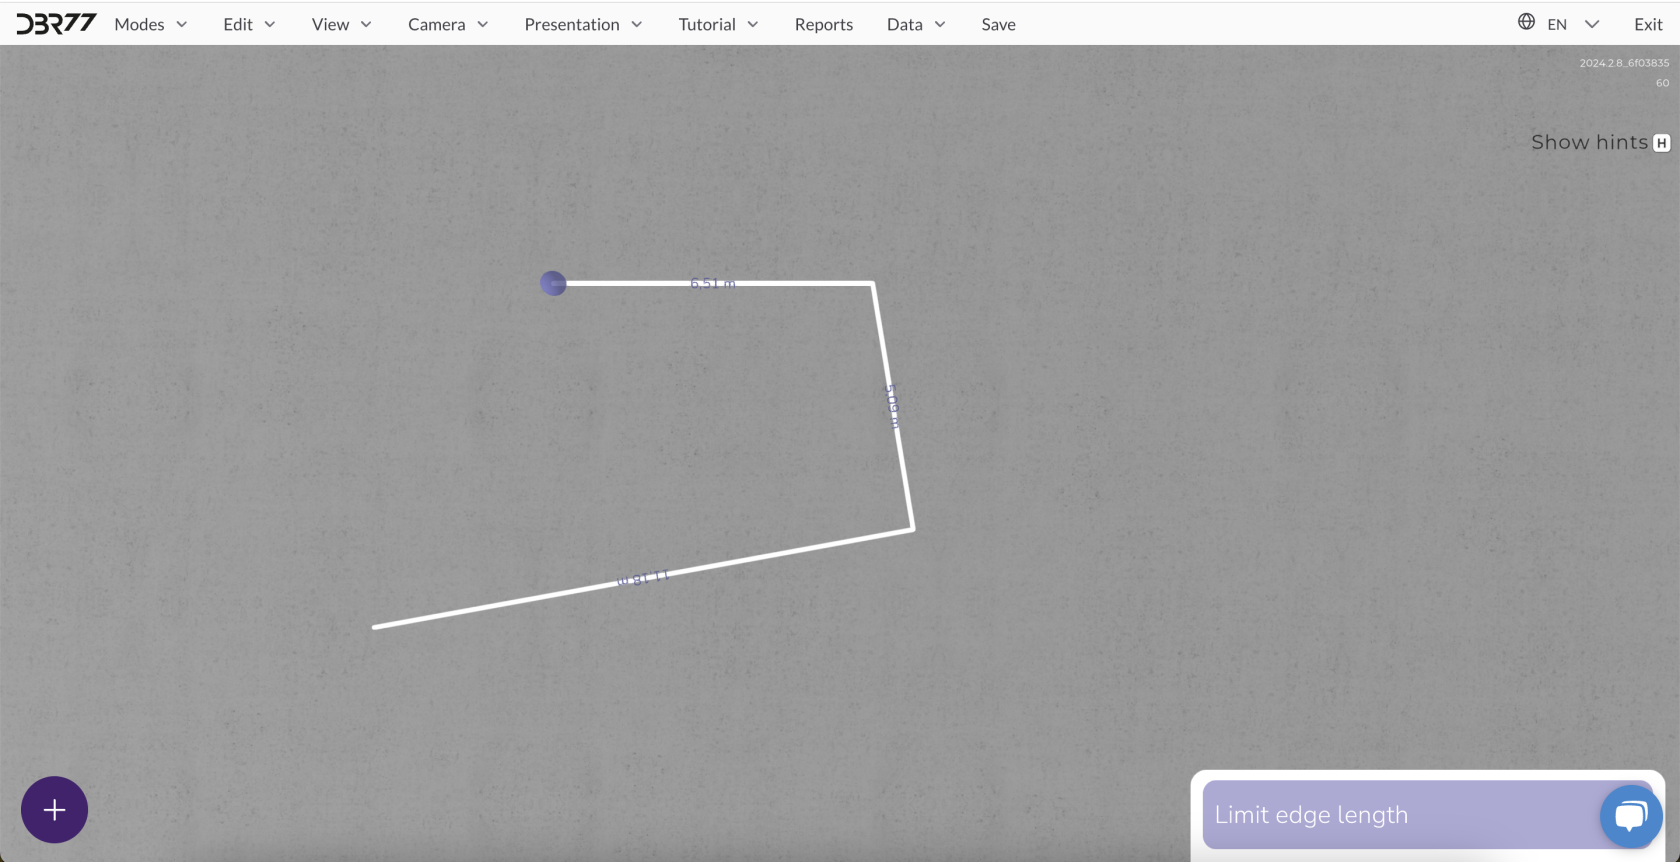](https://learn.dbr77.com/uploads/images/gallery/2024-10/bSq5RyNthMkhWI6E-image.png)
- **Important**: The starting and ending points must meet to close the area. The 3D Studio will not allow the drawing process to finish if the area is not closed.
[](https://learn.dbr77.com/uploads/images/gallery/2024-10/MXL1mXJcYb8maacd-image.png)
[](https://learn.dbr77.com/uploads/images/gallery/2024-07/P79KWvecs6MZ8qME-gify2.gif)
### **Using the Grid for Precision**
- - **Snap to Grid**: Hold the left **Shift** key while clicking to snap points to the nearest grid intersection. This ensures precise placement of corner points.
[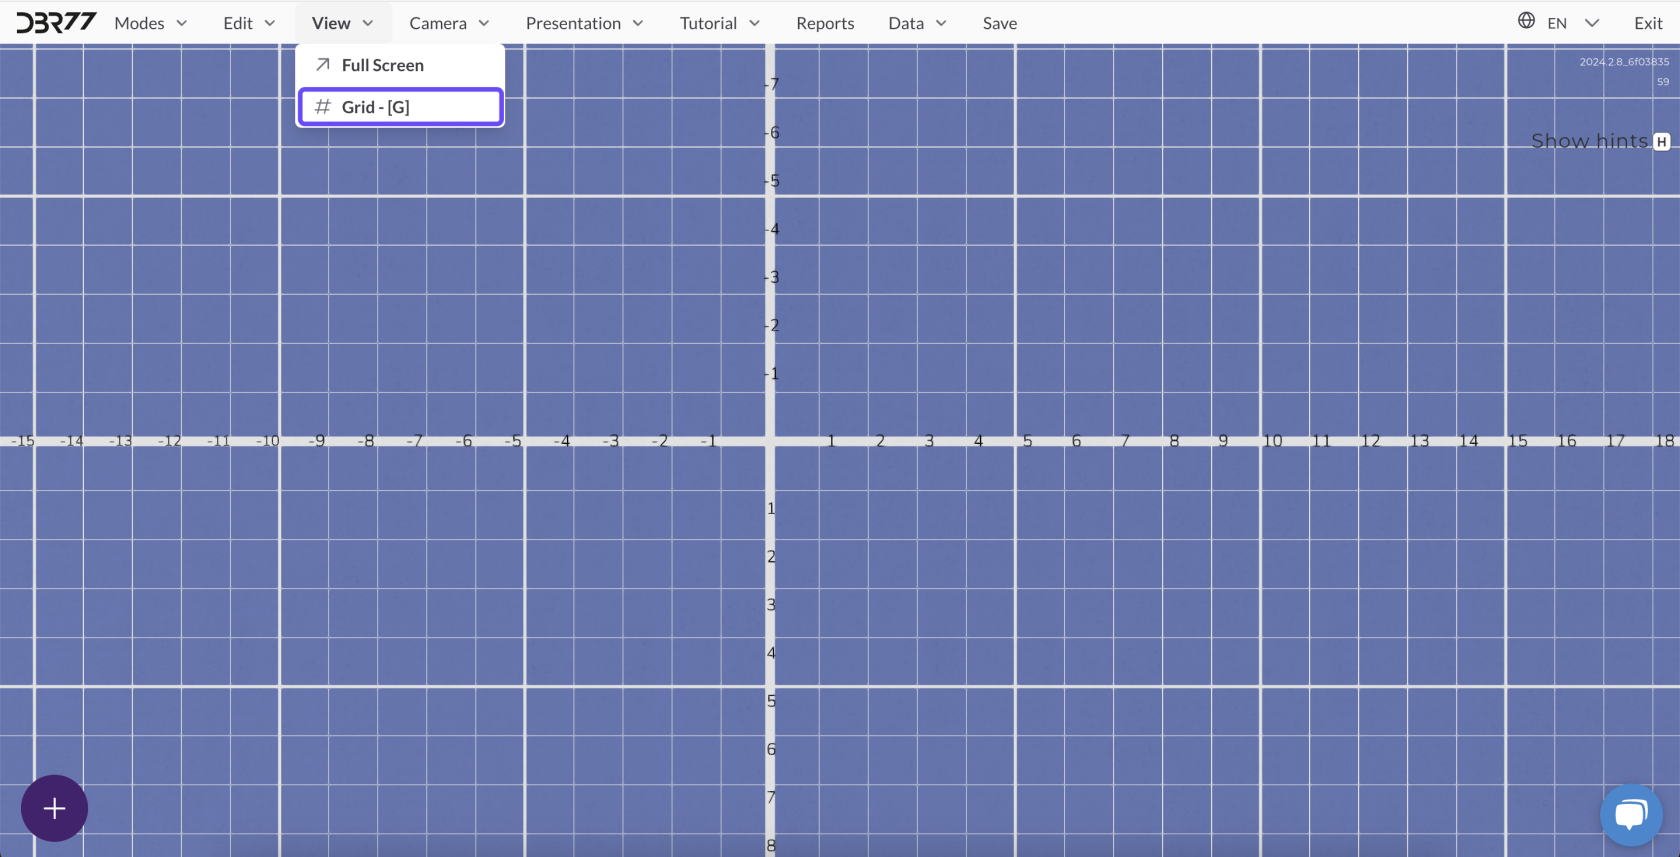](https://learn.dbr77.com/uploads/images/gallery/2024-10/8zoiXYGnq9dDLogT-image.png)
### **Restricting Edge Length**
- A window in the bottom-right corner of the screen allows you to set the edge length.
- **Specify Length**: Choose a unit (meters or millimeters) and enter the desired edge length. The edge will automatically adjust to this value.
- **Modify or Remove Restriction**: To change the length, update the value. To remove the restriction, clear the value or close the window.
By following these steps, you can accurately add and customize areas in Layout Mode for precise project planning.
[](https://learn.dbr77.com/uploads/images/gallery/2024-10/LrWuYFIRsS7wl95T-image.png)
[](https://learn.dbr77.com/uploads/images/gallery/2024-08/ooWvwGCGzVqUhHhX-gify2-5.gif)
# Measuring Tape
The **Measuring Tape** in Layout Mode is a tool that enables precise measurements and distance calculations between layout elements or machinery. It helps you control the spatial arrangement of objects in the scene, ensuring proper placement of all elements.
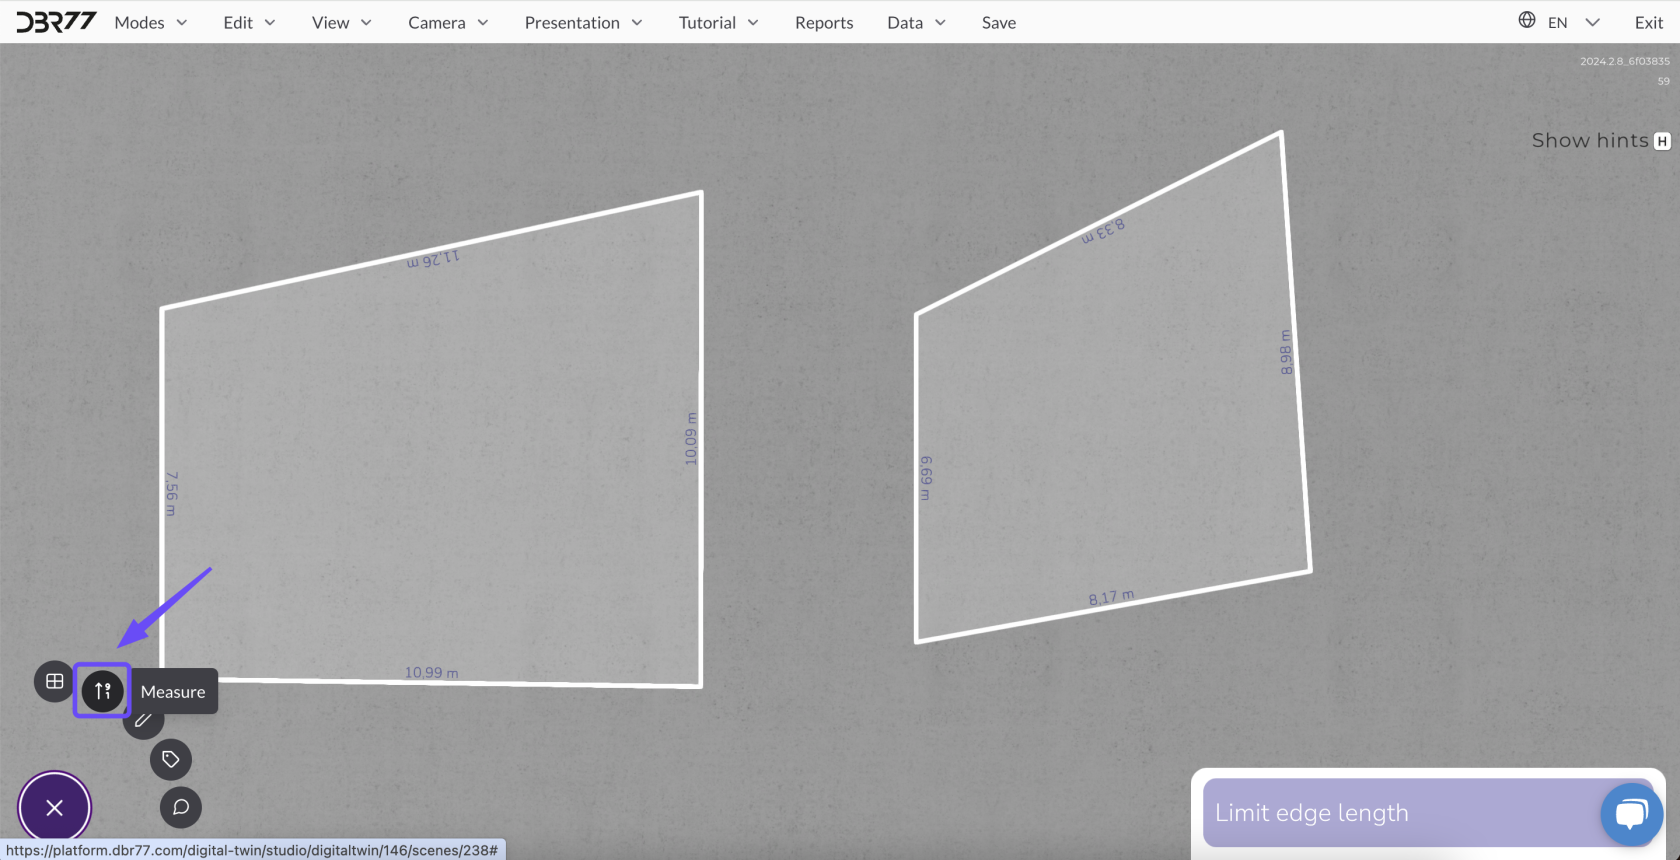
### **Activating the Measuring Tape**
#### **Via Button**
1. Switch to **Layout Mode**.
2. Click the **Measuring Tape** icon in the tool panel on the left side of the screen.
#### **Via Keyboard Shortcut**
- Press the **"M"** key on your keyboard in Layout Mode to instantly activate the tool.
[](https://learn.dbr77.com/uploads/images/gallery/2024-10/TxhTguaLwMxFjKom-image.png)
### **Using the Measuring Tape**
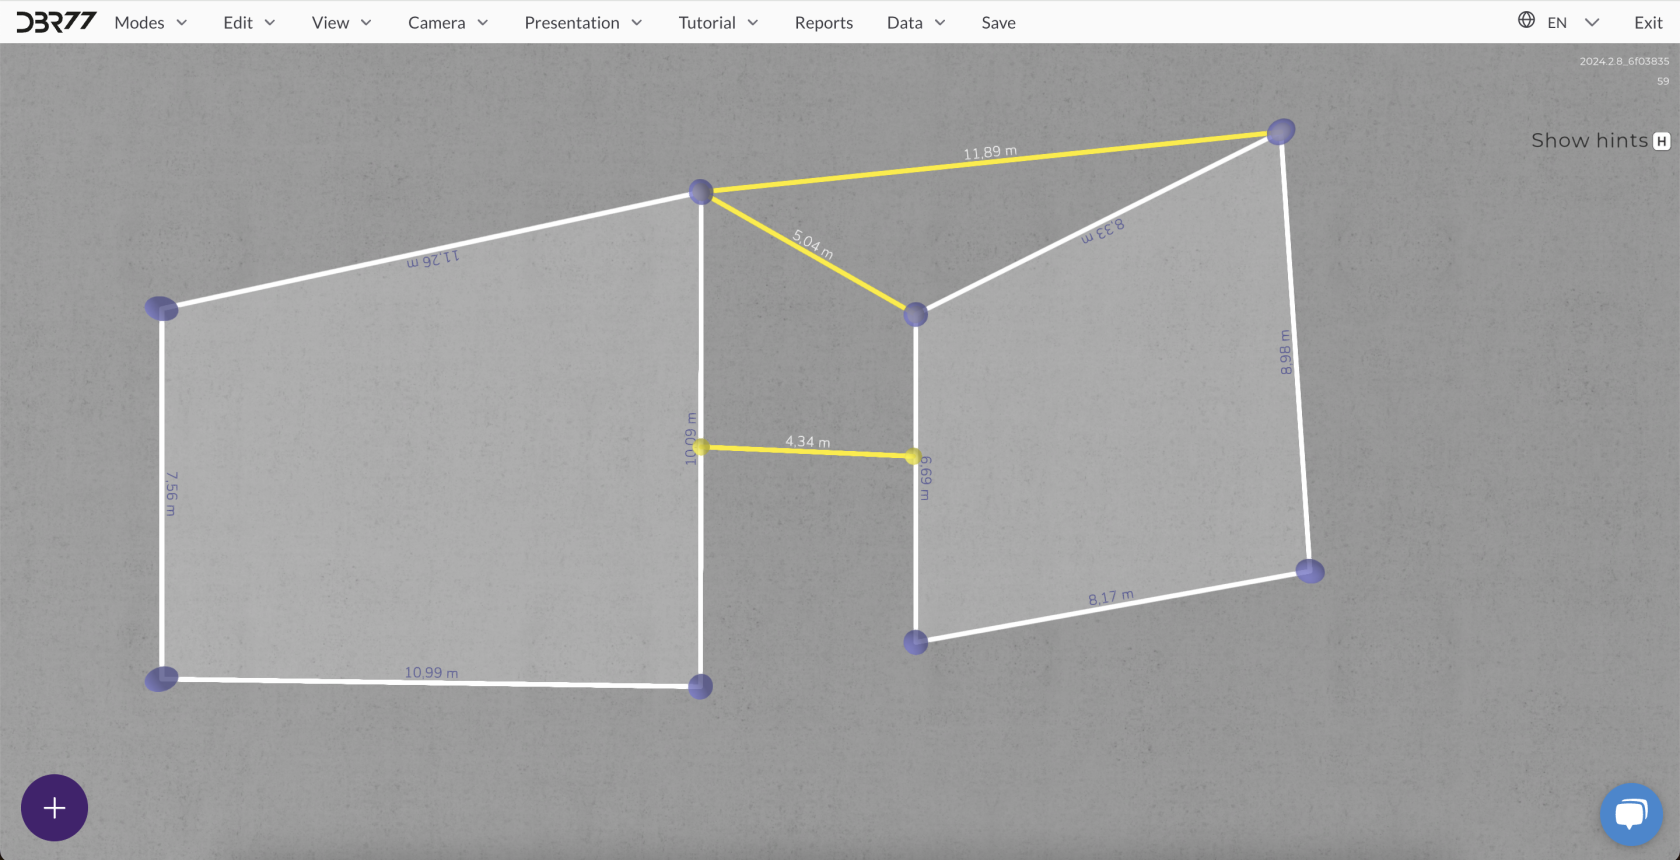
#### **Measuring Distances**
1. **Start a Measurement**: Click the left mouse button on the starting point in the scene.
2. **Set the Endpoint**: Move the cursor to the endpoint and click again to mark the distance.
3. **View Results**: The tool displays the exact distance between the selected points.
#### **Precision Measurement**
- The Measuring Tape allows you to measure distances accurately between various layout elements, such as machines, workstations, or other objects.
- This is particularly useful for spatial planning and ensuring compliance with technical specifications.
[](https://learn.dbr77.com/uploads/images/gallery/2024-10/ETktKo8D10RmPrOZ-image.png)
[](https://learn.dbr77.com/uploads/images/gallery/2024-08/l2ve3dEtWM8jFAwr-image.gif)
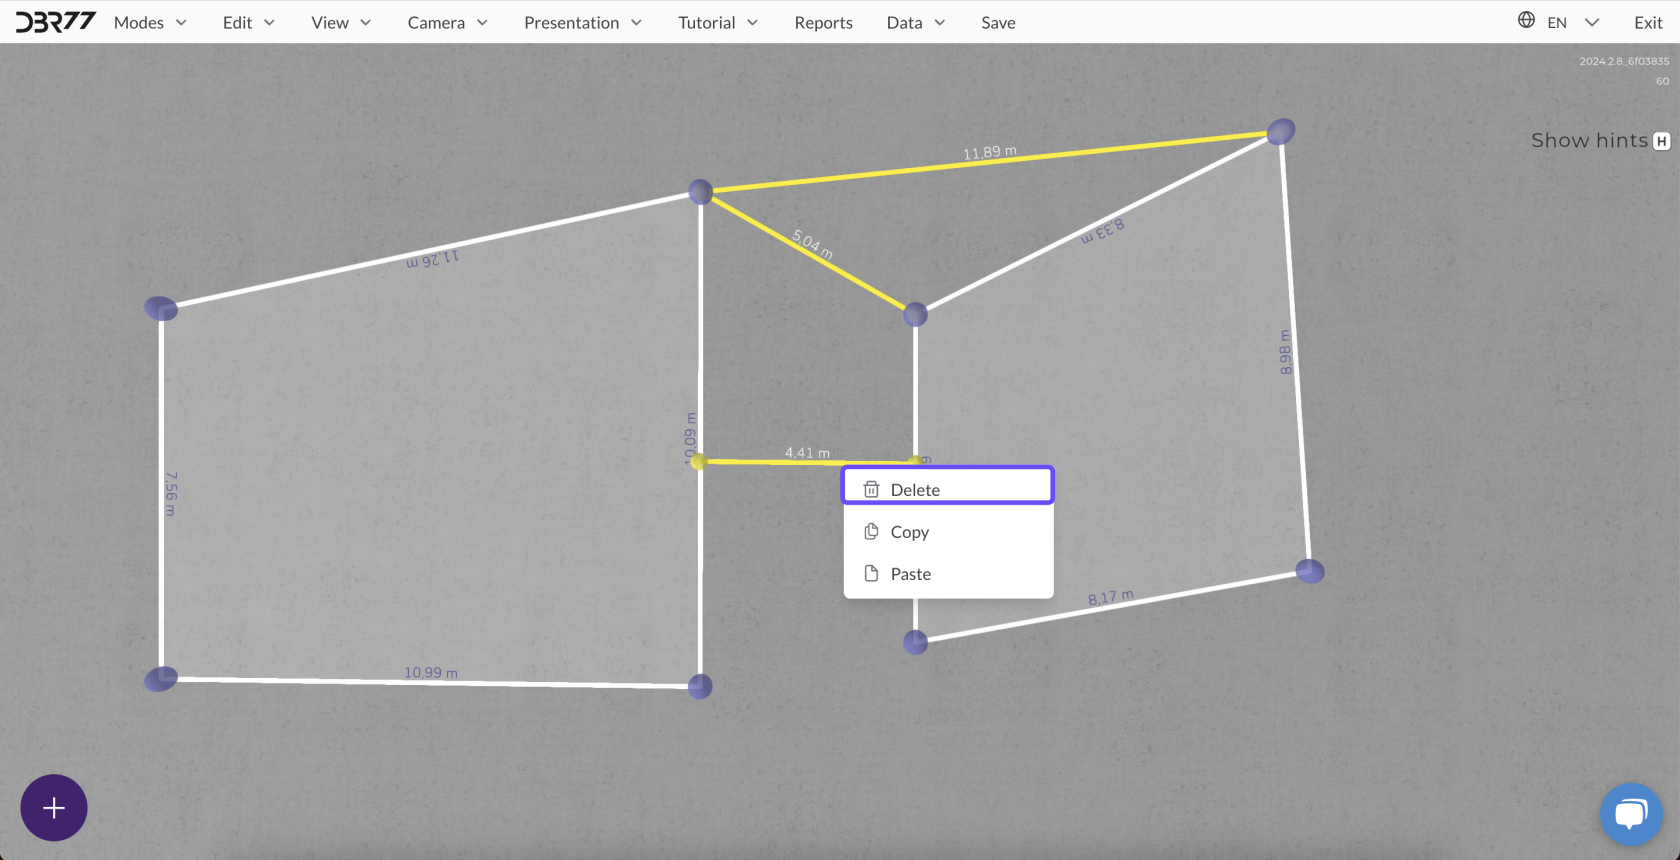
### **Removing the Measuring Tape**
1. **Select the Measuring Tape**: Click on the drawn measuring tape with the left mouse button.
2. **Delete**: Once selected, double-click the right mouse button to open the context menu and choose the **"Delete"** option to remove it from the layout.
[](https://learn.dbr77.com/uploads/images/gallery/2024-10/ue7WQj7UrD6gxfZl-image.png)
[](https://learn.dbr77.com/uploads/images/gallery/2024-08/VO1kwX8NCBTk3Vly-gify2-4.gif)
### **Summary**
The Measuring Tape tool in Layout Mode is an essential aid for precise planning of production spaces. Its simple functionality, combined with the ability to quickly delete measurements, allows for accurate and efficient placement of elements in the scene.
# Editing in Layout Mode
The **Edit Mode** in the Layout section allows for detailed adjustments to existing layouts and the management of individual elements within the scene. This feature ensures precise customization and effective control over your project.
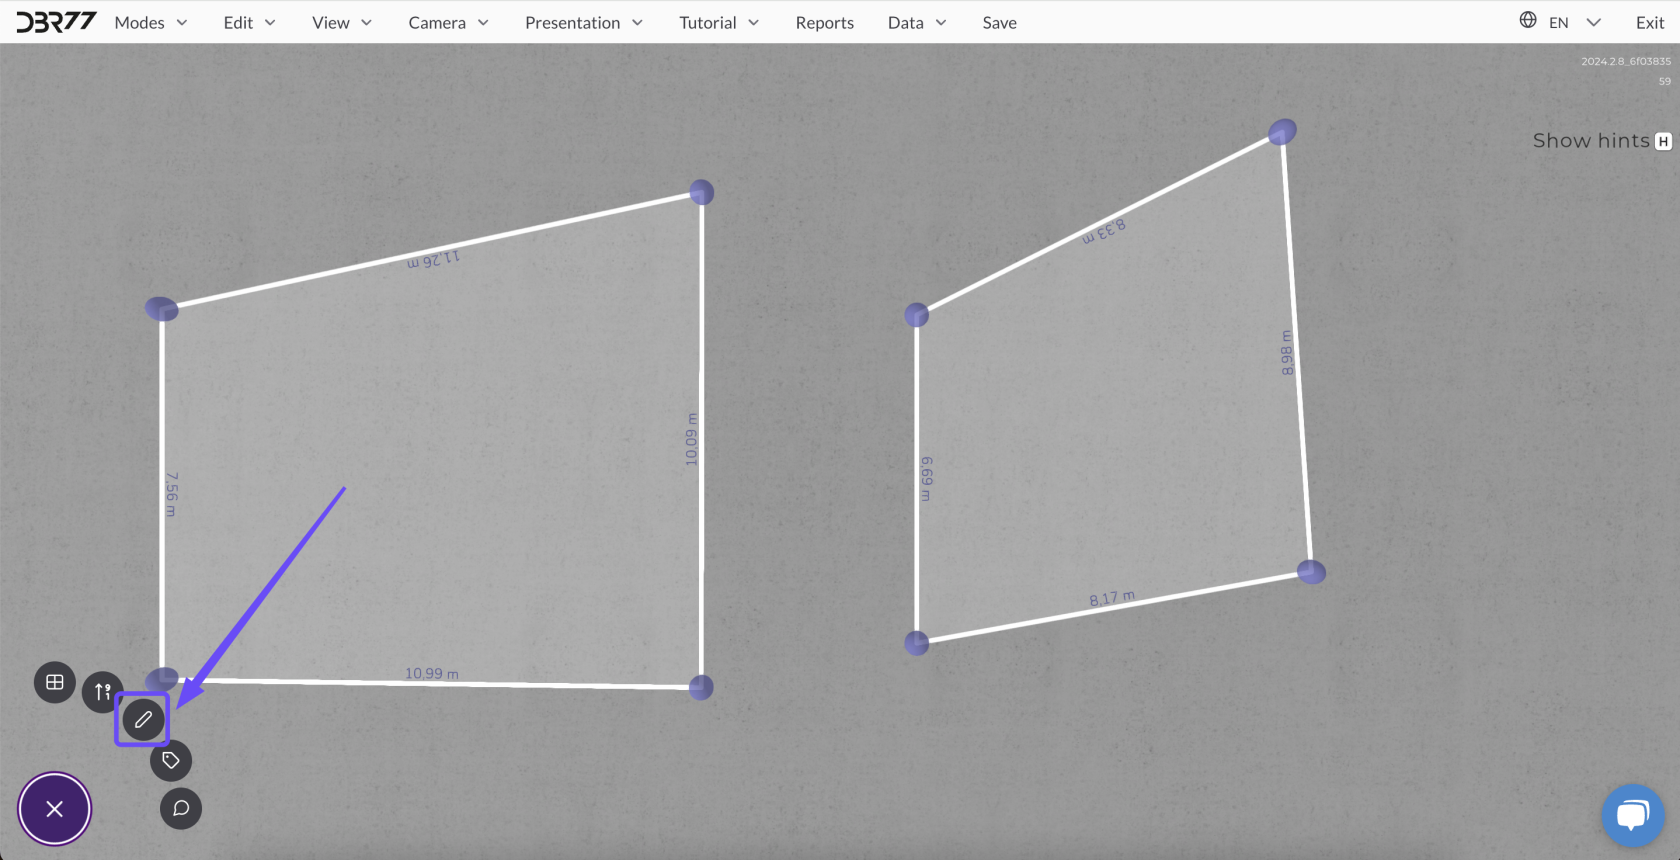
### **Activating Edit Mode**
1. Make sure you are in **Layout Mode** (selected in the main modes menu).
2. Click the **"Pencil" icon** (Edit) to enable editing.
3. You can now modify the position, size, and color of layouts as well as copy, paste, and delete elements.
[](https://learn.dbr77.com/uploads/images/gallery/2024-10/VtRSLBWqSKLMWibr-image.png)
### **Key Functions in Edit Mode**
#### **Editing Drawn Layouts**
- **Moving Corner Points**:
Click on a specific corner point with the left mouse button and drag it to the desired position to adjust the layout’s shape.
- **Shifting Edges**:
Select and drag an edge to reposition it within the scene.
- **Moving Entire Areas**:
Click the center of the layout area and drag it to move the entire section to a new location.
[](https://learn.dbr77.com/uploads/images/gallery/2024-08/iPaoHzbKmDXOoSTi-gify2-6.gif)
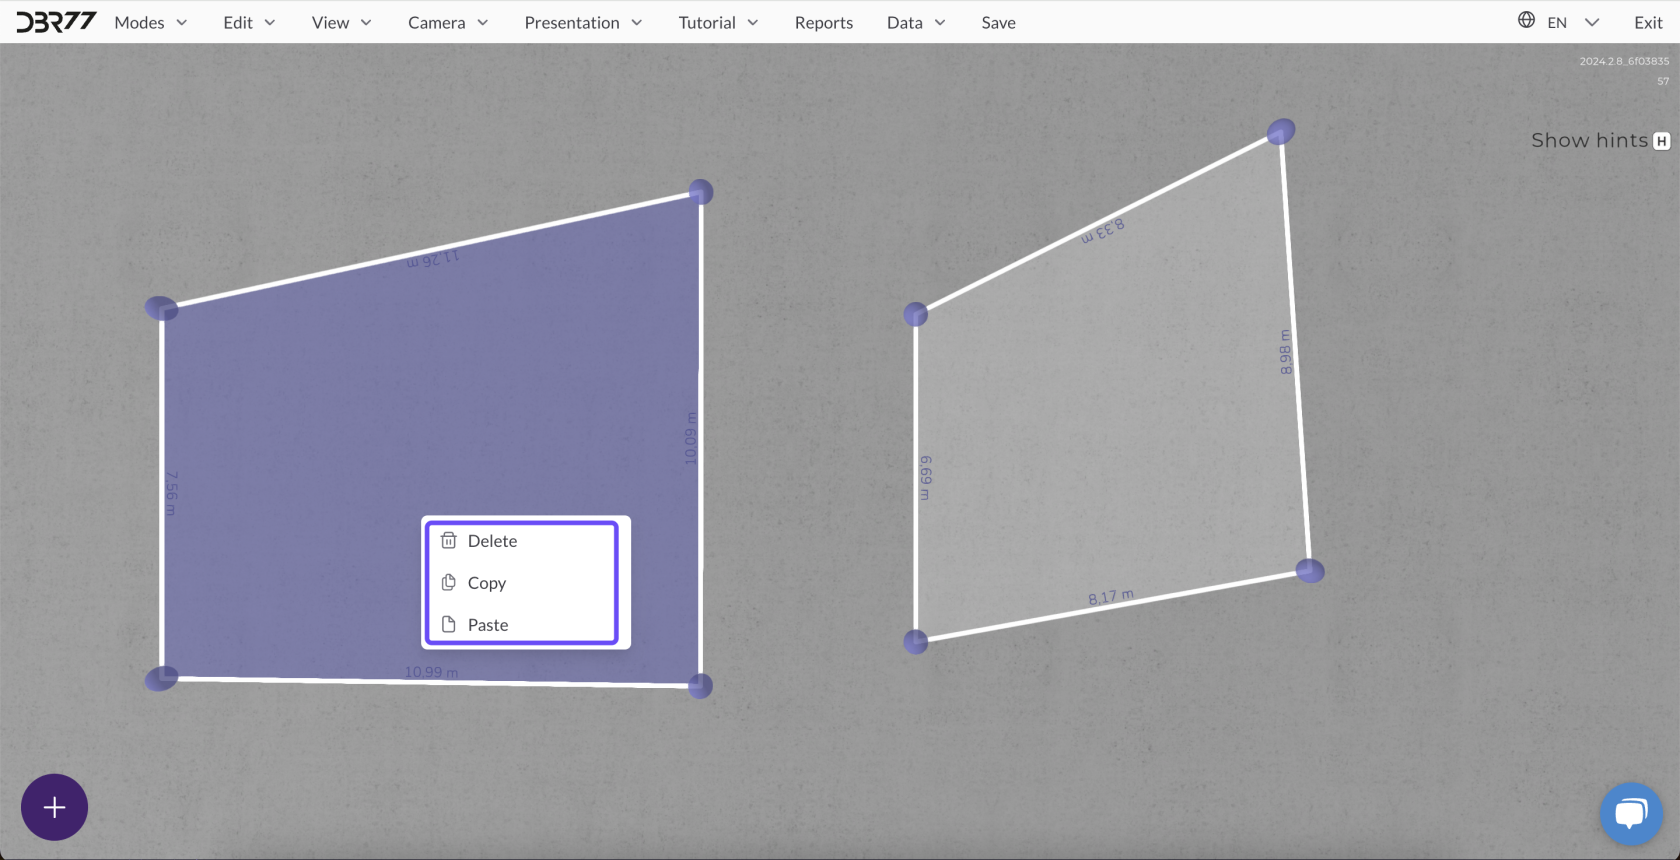
#### **Copying, Pasting, and Deleting Layout Elements**
- **Copying Elements**:
1. Select the desired layout element by clicking it with the left mouse button.
2. Open the context menu with a double right-click and select **"Copy"**, or use the shortcut **Ctrl + C**.
- **Pasting Elements**:
After copying, paste the element at a chosen location by selecting **"Paste"** from the context menu or using **Ctrl + V**.
- **Deleting Elements**:
Select the layout element and delete it using the **"Delete"** option in the context menu or by pressing the **Del** key on your keyboard.
[](https://learn.dbr77.com/uploads/images/gallery/2024-10/wyhwozhSFQHBv4bn-image.png)
[](https://learn.dbr77.com/uploads/images/gallery/2024-08/Nefi7bBrqDrXy6Qc-gify2-7.gif)
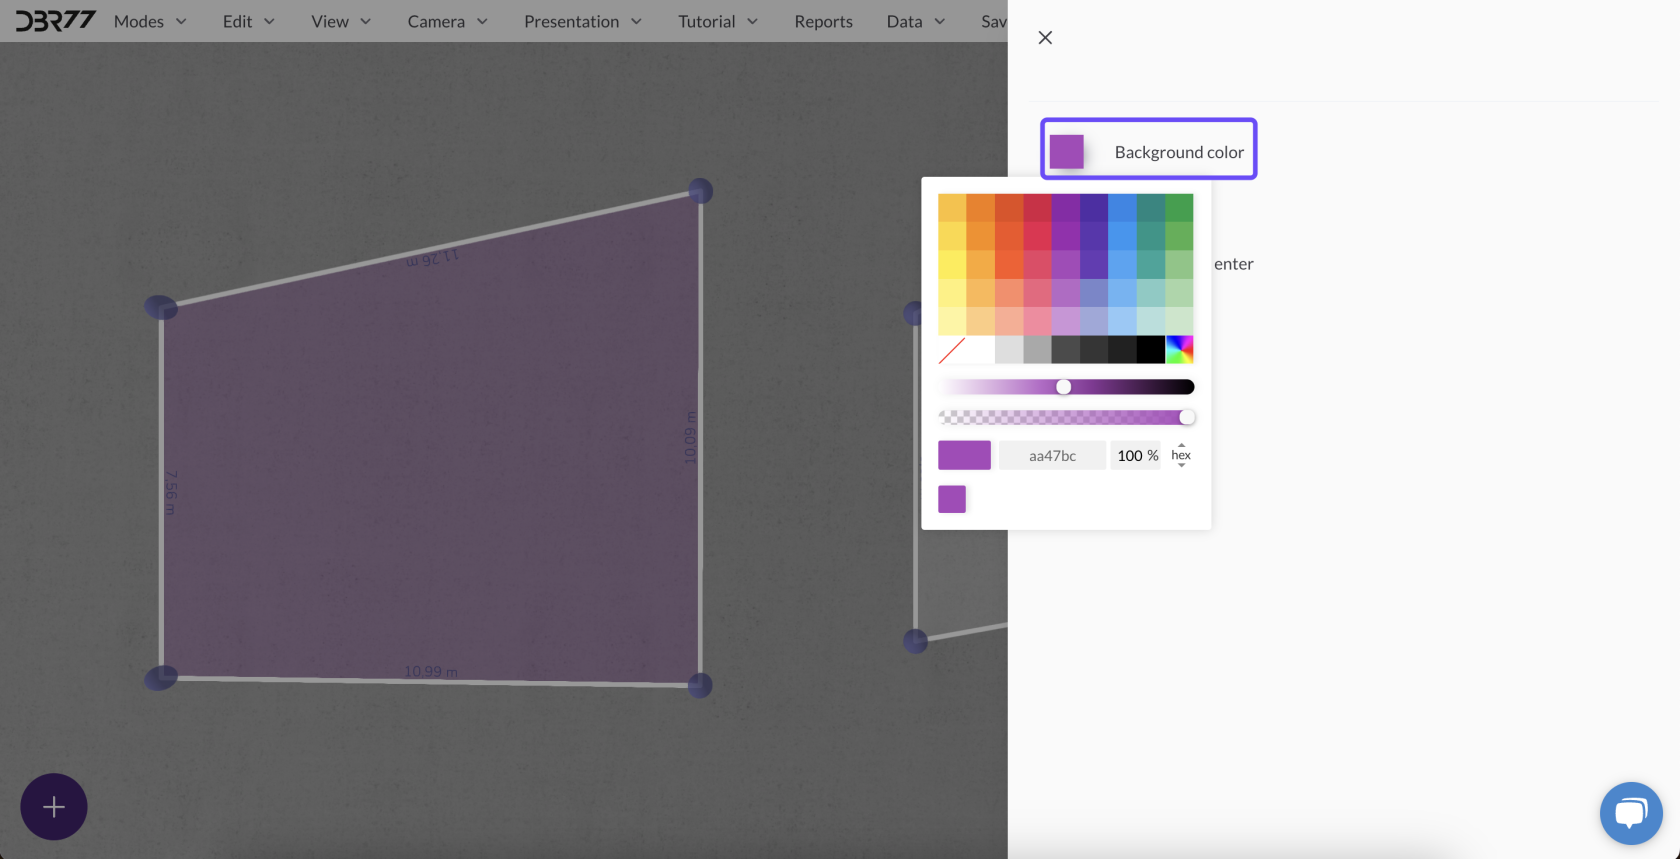
#### **Changing Colors**
- **Edge Color**:
1. Double-click on the layout area you wish to modify.
2. Select the desired edge color from the palette provided.
- **Fill Color**:
Similarly, double-click the area to access the option to change the fill color and choose the appropriate shade for your project.
[](https://learn.dbr77.com/uploads/images/gallery/2024-10/Wz73GsxlI6pvNLKt-image.png)
[](https://learn.dbr77.com/uploads/images/gallery/2024-08/jHusZuUBOfzQJjeX-gify2-8.gif)
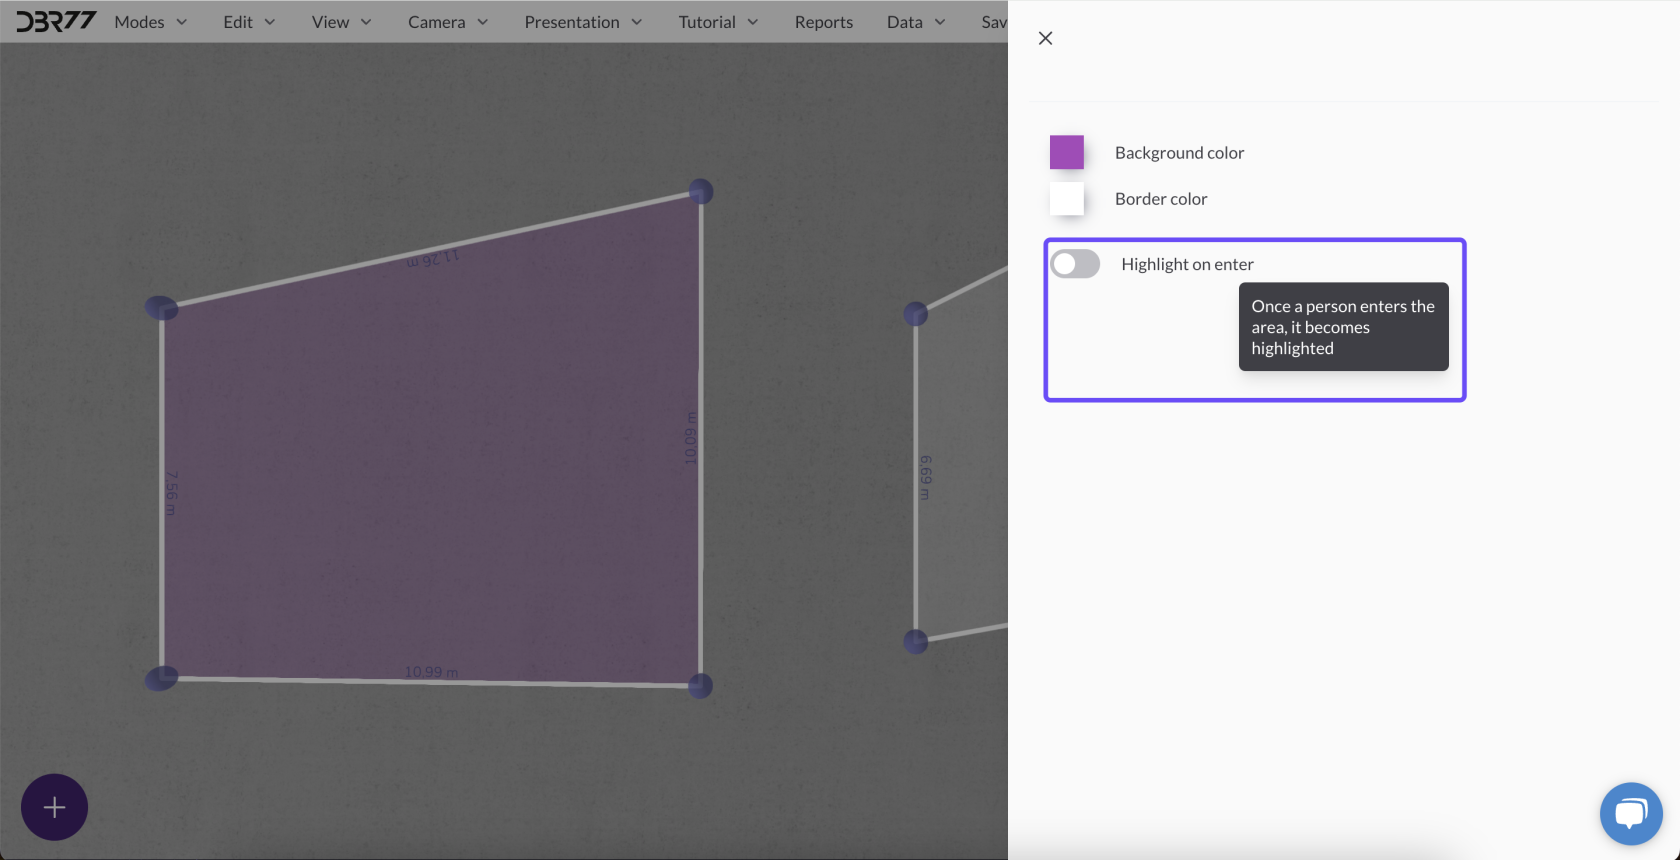
### **Highlight on Entry Option**
- **Highlight During Animation**:
This feature automatically highlights a layout area in **red** when activity occurs within it during an animation.
- To activate: Select the area and enable the **"Highlight on Entry"** option in the edit panel.
[](https://learn.dbr77.com/uploads/images/gallery/2024-10/M1IglBeZCehPZcK4-image.png)
[](https://learn.dbr77.com/uploads/images/gallery/2024-08/dUmcXvLdbz8ZAAJl-gify2-9.gif)
### **Summary**
The Edit Mode in Layout Studio offers full control over the appearance and functionality of your project. With options to modify shapes, colors, and manage elements, you can tailor the layout to your exact requirements, enhancing efficiency and simplifying further work and analysis.
# Adding Labels in Layout Mode
Labels in Layout Mode allow you to annotate individual elements of the layout, making it easier to navigate and manage your project. Below is a guide on how to add and customize labels effectively.
---
### **Adding a Label**
1. **Activate Layout Mode**: Ensure that Layout Mode is selected in the main menu.
2. **Select the Label Tool**:
- Click the **plus symbol (+)** and choose the **Label icon**.
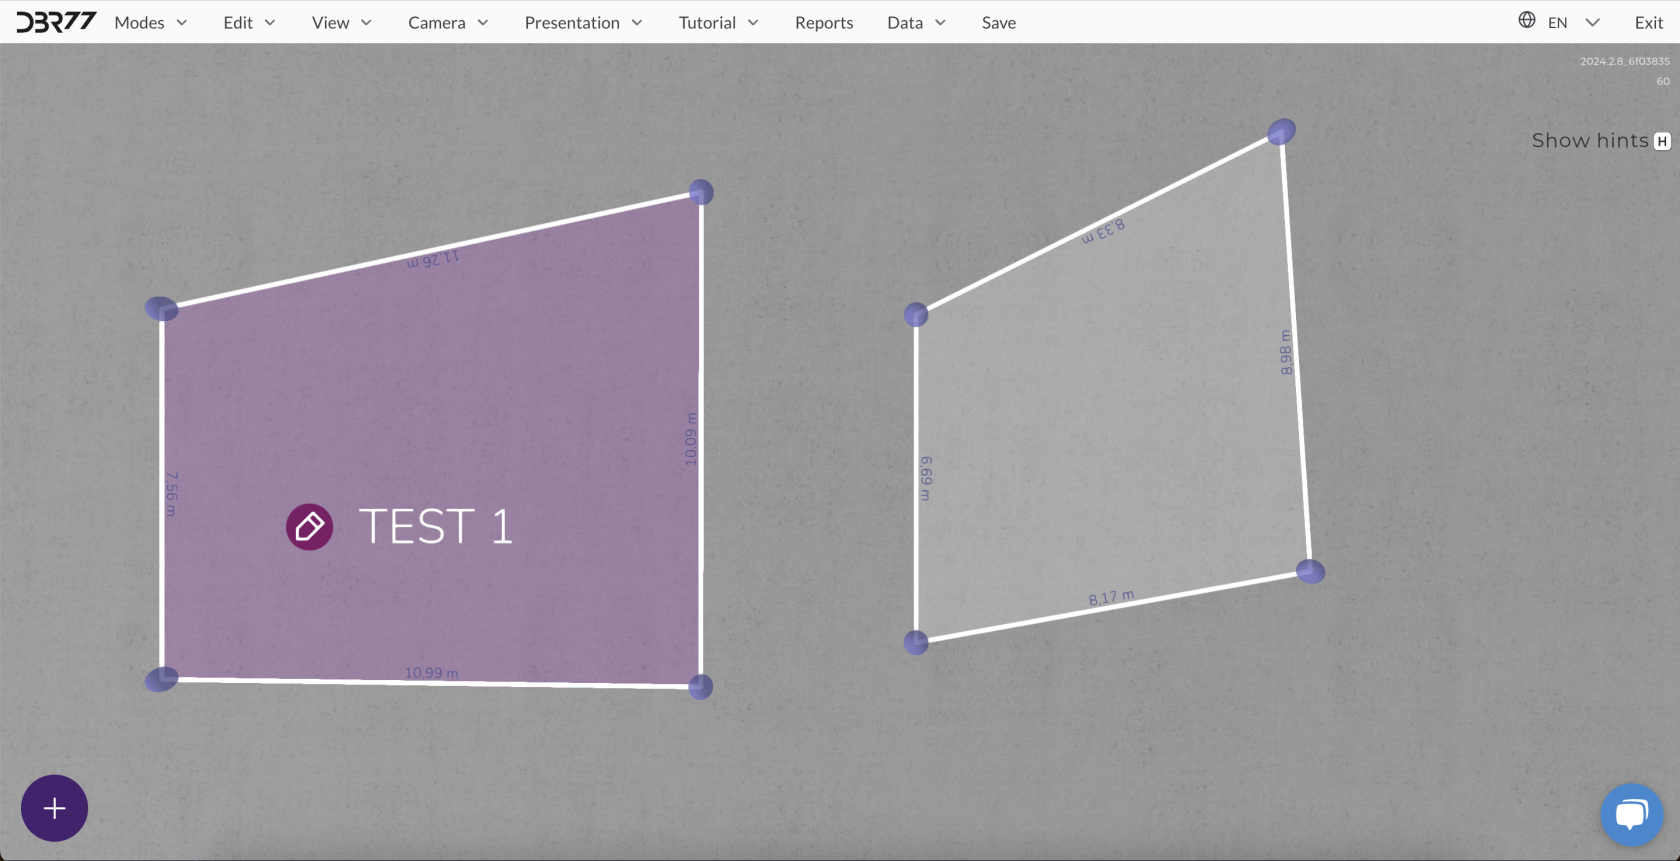
3. **Place the Label**:
- - Click on the desired location in the layout where the label should appear.
- Enter the text to describe the element.
[](https://learn.dbr77.com/uploads/images/gallery/2024-10/1IevR4bl6qekpIJL-image.png)
[](https://learn.dbr77.com/uploads/images/gallery/2024-10/Lyw0rtCdioMuemu0-image.png)
[](https://learn.dbr77.com/uploads/images/gallery/2024-10/UJ3Jg0l2Fkb4gRaF-image.png)
[](https://learn.dbr77.com/uploads/images/gallery/2024-08/yrYsjD7eiy4Elq0l-gify2-10.gif)
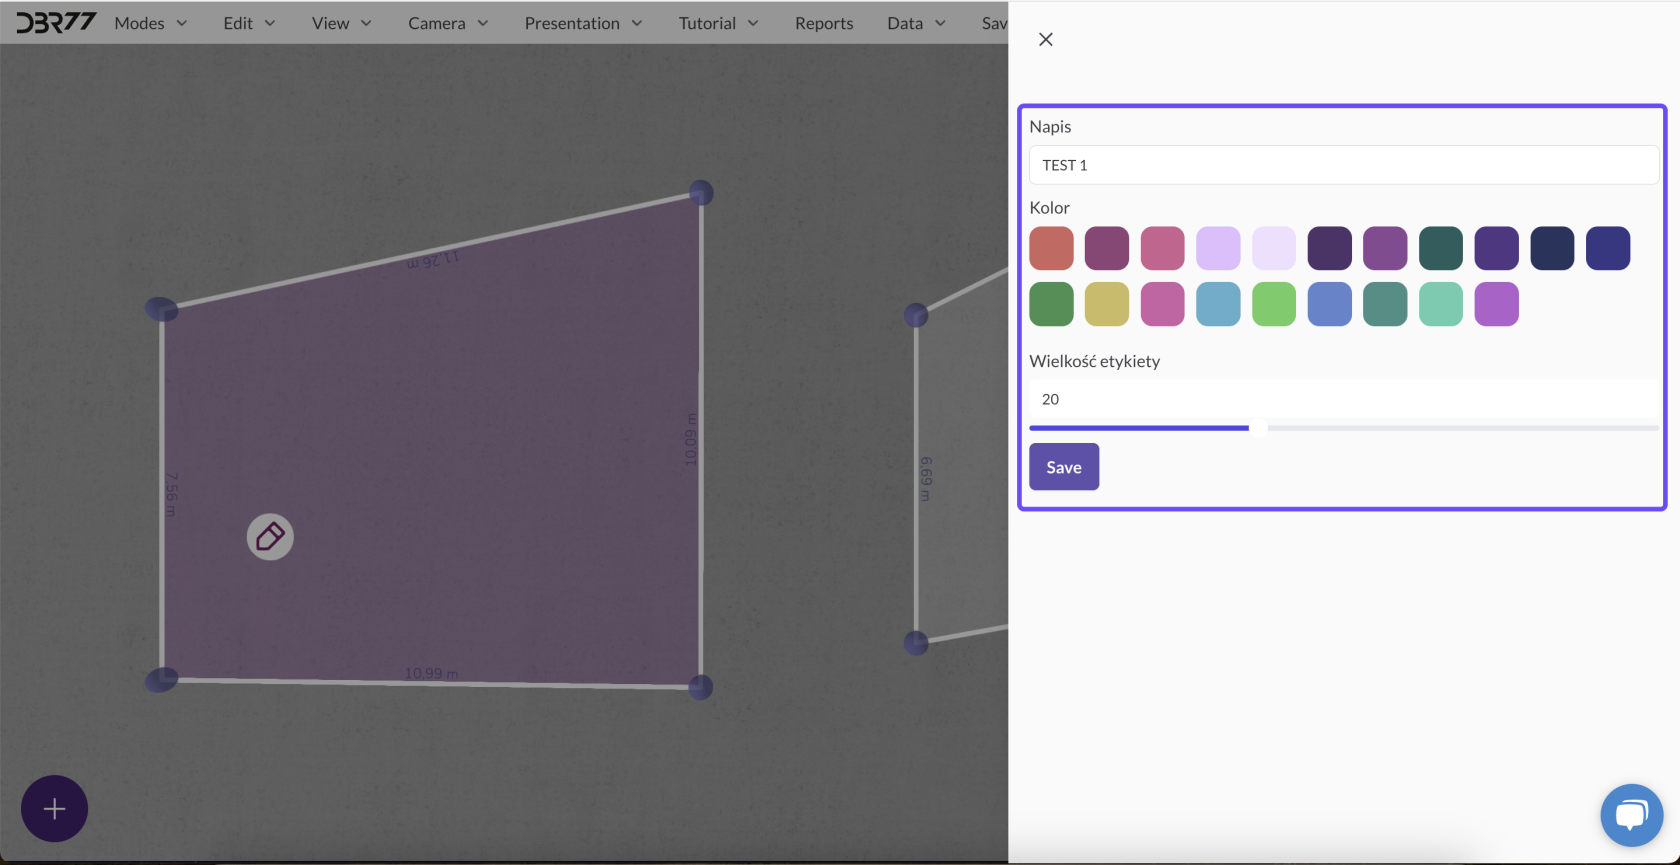
### **Customizing Labels**
#### **Adjusting Size**
- Select the label and resize it to enhance visibility or match the scale of your project.
#### **Changing Color**
- Choose a label and adjust its color using the available palette to better fit the layout design.
#### **Rotating Labels**
- Rotate the label to align it with other layout elements:
- Click and hold the left mouse button on the label.
- Use the **Q** and **E** keys to rotate it.
[](https://learn.dbr77.com/uploads/images/gallery/2024-08/jh2l9JiZdBTKldyW-gify2-11.gif)
### **Summary**
Adding labels to your layout is a simple and effective way to mark and describe project elements. With options to customize size, color, and alignment, labels can be tailored to your specific needs, streamlining your workflow and improving clarity.
# Comments in Layout Mode
Comments in Layout Mode allow you to add notes and annotations directly to your layout, improving communication and project documentation. Here's how to add and edit comments:
---
### **Adding a Comment**
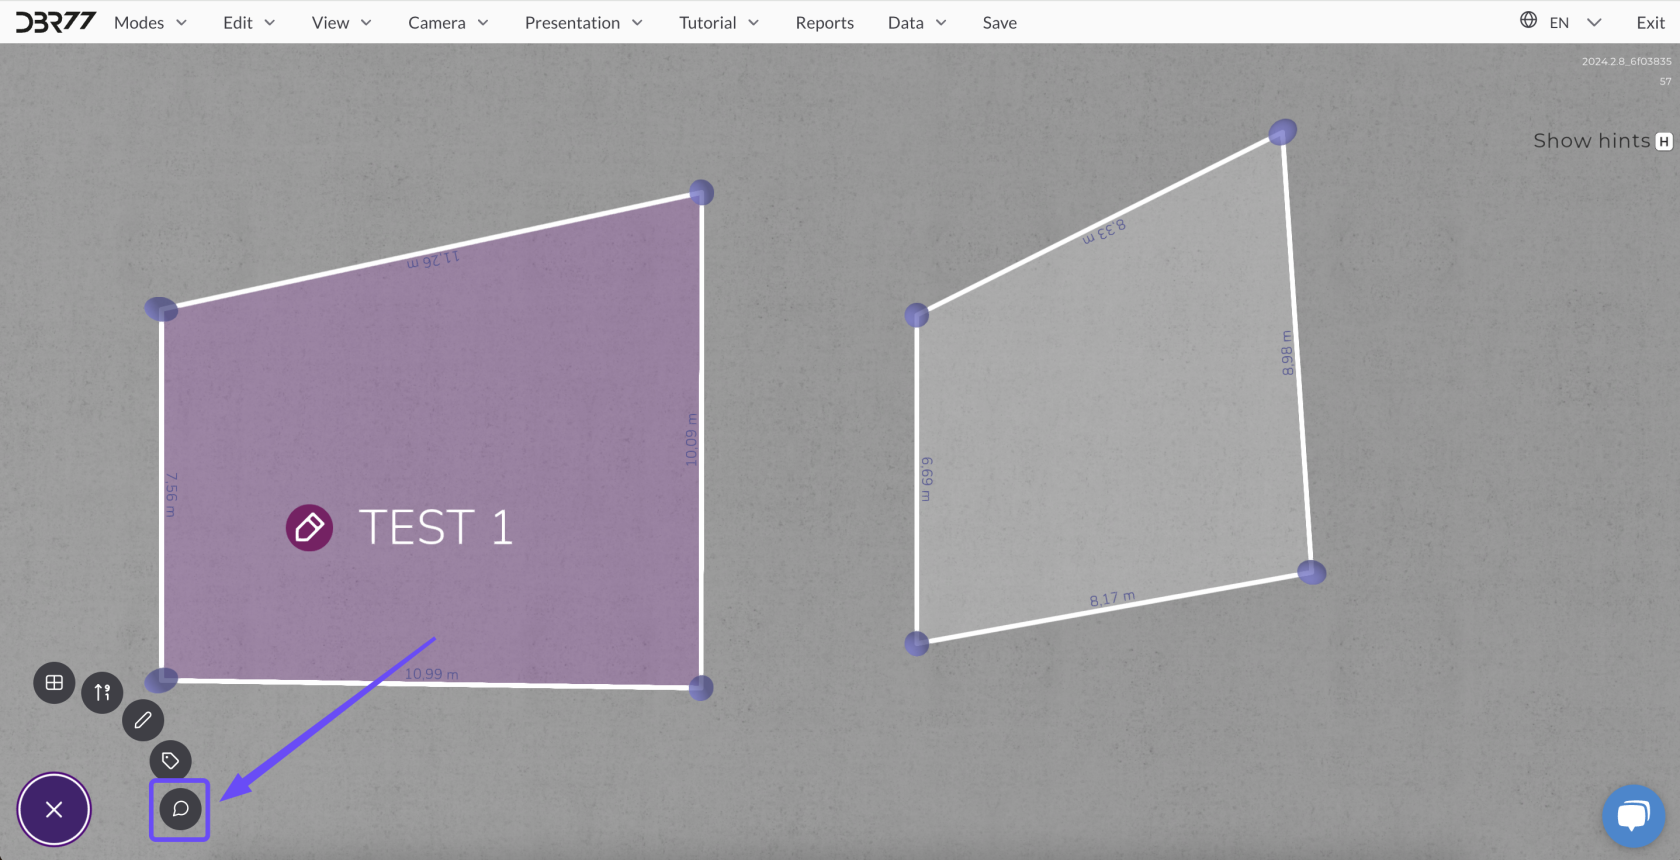
#### **Select the Add Comment Option**
1. Switch to **Layout Mode** and select the **"Add Comment"** option from the tool menu.
#### **Place the Comment**
2. Click with the left mouse button at the desired location in the layout. A window for adding the comment will open automatically.
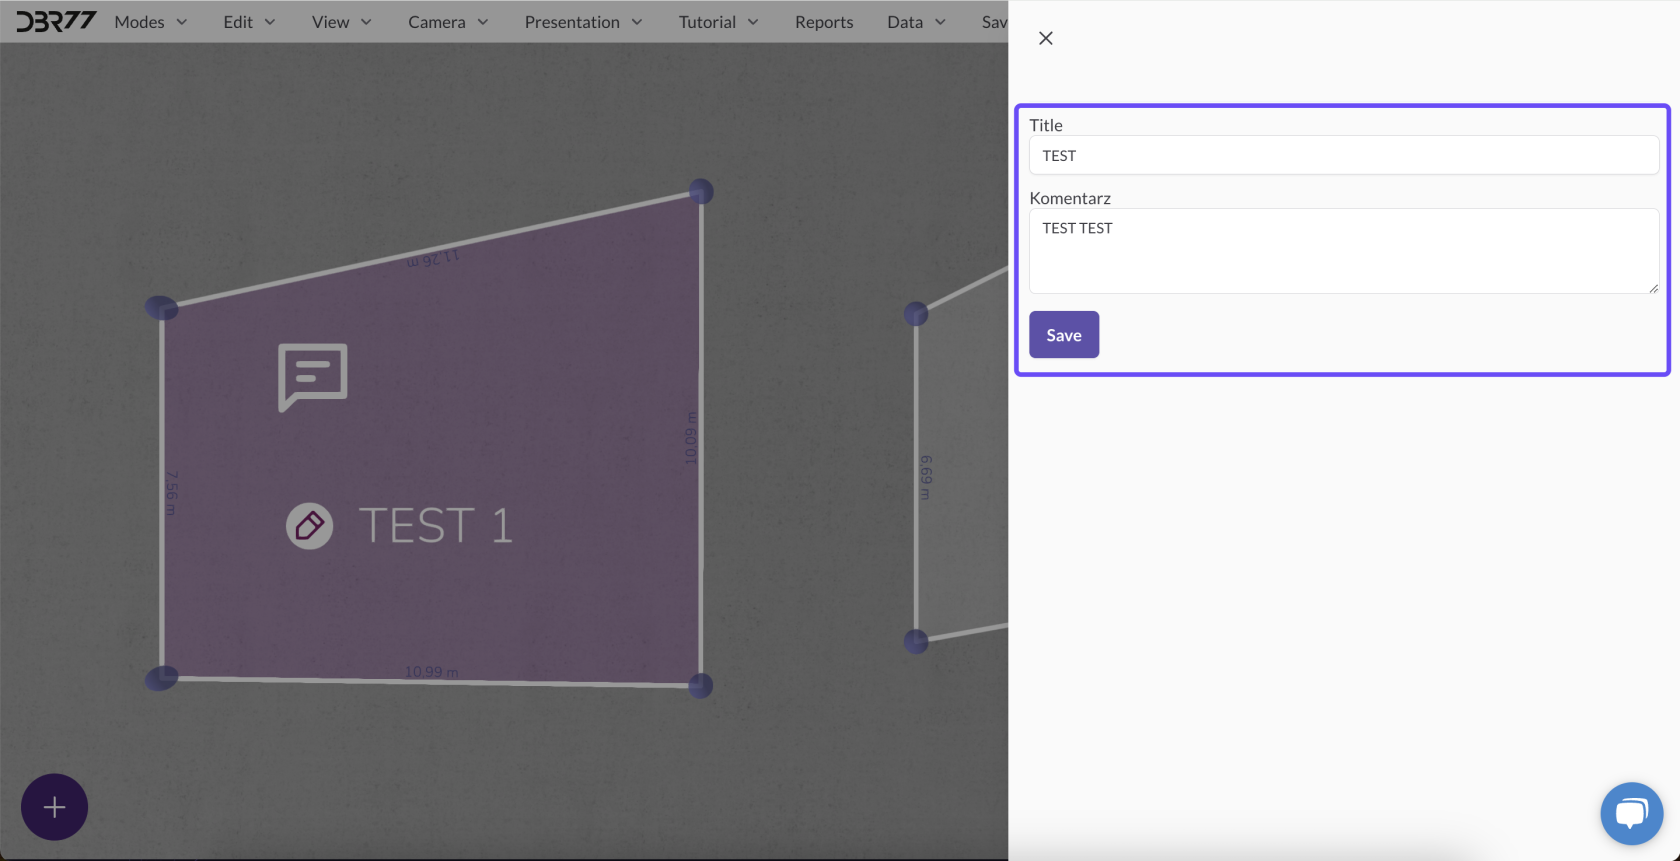
#### **Enter Title and Content**
3. In the opened window:
- Enter a **title** for the comment.
- Provide the **content** or description.
4. Click **"Save"** to confirm and add the comment.
[](https://learn.dbr77.com/uploads/images/gallery/2024-10/UVg0INZDLjTLvnYD-image.png)
[](https://learn.dbr77.com/uploads/images/gallery/2024-10/iqpRXZDozhRbNx7L-image.png)
[](https://learn.dbr77.com/uploads/images/gallery/2024-08/XpNfPqD0wERRgnSV-gify2-12.gif)
### **Editing a Comment**
#### **Edit an Existing Comment**
1. Double-click the comment icon in the layout to open the editing window.
#### **Make Changes**
2. Update the **title** or **content** as needed.
3. Click **"Save"** to confirm your changes.
[](https://learn.dbr77.com/uploads/images/gallery/2024-08/m5PXWmNWna0zXEbg-gify2-13.gif)
### **Summary**
Adding comments to the layout is an effective way to communicate important information directly within the project. The ability to quickly edit and precisely place comments makes working with the layout more organized and efficient.